Before the advent of HTML5, eLearning courses were published to Flash. Learners had to install the latest version of the Flash player to access online courses. Two decades ago, learners didn’t have a choice of browsers as there were just a few and Flash updated versions frequently.
The Shift from Flash to HTML5: 9 Steps for Conversion
HTML + CSS3 + JavaScript = HTML5
Steps to Convert Flash to HTML5
- Gather source files
- Extract and organize content and media
- Choose an appropriate authoring tool
- Finalize the GUI and interactivities
- Pick the right templates for interactivities and assessments
- Develop a prototype
- Get stakeholder approval
- Develop and publish the course
- Perform a quality check and deliver the final courses
When HTML came into the picture, Flash’s incompatibility with mobile devices and browsers was taken care of. As more and more organizations opted for eLearning to extend online training via mobile devices, HTML5, the latest version of HTML, became a success. Also, HTML5’s compatibility with various Learning Management System (LMS) standards such as AICC, SCORM, Tin Can/Experience API, made it the most sought-after alternative to Flash.
In this post, I’ll highlight what HTML5 is all about and what it means for eLearning. I will also share a few steps to convert existing Flash courses to HTML5.
Migrating from Flash to HTML5? What is HTML5 all about?
HTML + CSS3 + JavaScript = HTML5
With HTML5, you can deliver anything that has to be online, without the headache of additional plugins. You can develop anything, ranging from apps to music to movies. HTML5 can also be used to build complicated applications that run on browsers. As HTML5 is cross-platform compatible, courses can be deployed and accessed on any device.
What Does Switching from Flash to HTML5 Mean for eLearning?
There are multiple reasons HTML5 is beneficial for eLearning. Listed below are a few:
- Content is in a single source that can be delivered through multiple devices
- No external plugins required
- Rich interactivities
- Anytime and anywhere access
- Content can be easily read by multiple browsers
Let’s take a quick look at the steps to convert Flash to HTML5.
9 Steps to Migrate Flash Courses to HTML5
1. Gather Source Files
The important part of the Flash to HTML5 conversion is gathering source files of all Flash-based courses (.FLA and .XML). This also includes the source files of media and support files. You can identify them with the extensions, .html, .xml, .css, .psd, mp4, mp3, and so on. Having these source files in place reduces efforts on creating from scratch and eases the process of Flash to HTML5 conversion.
In case you don’t have the source files, you can opt for the Record conversion strategy. Existing courses are played and recorded using screencast software such as Camtasia or CamStudio. The final output is obtained in the MP4 format which is HTML5 compatible.
2. Extract and Organize Content and Media
Once all the files are in place, it’s time to extract content and media from exiting courses. Copy all the onscreen text including the labels on navigational buttons of the GUI in a document or a PowerPoint presentation.
Moving on, you should create a folder structure to organize various media elements such as audio, video, and graphics in respective folders. You should also create a separate folder for learning resources to be saved as PDFs and Word documents.
3. Choose an Appropriate Authoring Tool
Opting for the right eLearning authoring tool is the next important step for effective Flash to HTML5 conversion. Here are some of the popular authoring tools you can pick from.
- Articulate Storyline 360: Ideal tool to opt if your Flash-based courses contain a lot of interactivities
- Adobe Captivate: This tool makes sense when you are looking to convert Flash courses which include simulations to HTML5
- Lectora Inspire: Go for it to convert Flash-based eLearning courses that are text-heavy.
- iSpring Suite: This tool allows for quick the conversion of PPT (storyboards of Flash-based courses) to HTML5-based eLearning courses
- dominKnow: Opt for it if you are looking for a collaborative platform to convert Flash-based courses into HTML5 responsive eLearning courses
4. Finalize the GUI and Interactivities
Most popular authoring tools offer pre-built templates for GUI. These can be picked and customized according to the branding guidelines of your organization. Needless to say, this saves ample development time on creation from scratch.
Moreover, it’s important to ensure the interactivities in Flash-based courses can be replicated in HTML5. However, there might be interactivities which will be difficult to duplicate. In such a situation, the best alternative will have to be chosen. For instance, complex animations can be converted into videos.
5. Pick the Right Templates for Interactivities and Assessments
Authoring tools also provide templates for interactivities and assessments that can be customized. These templates help in lending consistency to your converted eLearning courses. In case of outsourcing, ensure you pass on the branded GUI as well as any new templates you would want in your HTML5-based courses.
6. Develop a Prototype
A prototype is a fully functional sample of the final converted eLearning course. Simply put, it gives an idea of how the final course is going to look upon completion. It is advisable to not skip this step since it helps in identifying ambiguities and changes at an early stage. This reduces rework and thereby saves time and cost of development.
7. Get Stakeholder Approval
The next step is to get stakeholders’ approval on the developed prototype. This gives them an idea of how the final course is going to look by the end of the conversion. Moreover, it assures them that courses are developed as per the requirements.
8. Convert and Publish Courses
This is where the actual action takes place. Courses are developed using the authoring tool you pick and published in the HTML5 format. Ensure courses are published to the latest versions of technology standards such as API, or the popular SCORM 1.2.
Also, changes have to be incorporated in the HTML5-based courses if required. For instance, in case of content updates, audio files have to be re-recorded to reflect the content update.
9. Perform a Quality Check
After publishing the course, it’s important to ensure it meets the quality standards. You can refer this checklist for final quality assurance in the Flash to HTML5 conversion process. To ensure flawless Flash to HTML5 eLearning courses, you can develop the following:
- Development checklist based on the requirements, style guide, templates, devices, and compliance compatibility.
- Quality assurance checklist for the quality team that includes titles (consistency in style), content (spell check, audio synchronization,), interface functionality (slide progress, page numbers).
- SCORM cloud testing checklist for LMS specialists.
Ensure HTML5-based courses are checked on different browsers and mobile-devices before the final handover to the stakeholder. For instance, test courses to ensure the following technical requirements:
- PC browsers: Latest version of Edge and Internet Explorer such as 11.0
- Tablets: Android, Windows, IOS and Safari browser
- SCORM Cloud: For tracking reporting functionalities
Summing it Up
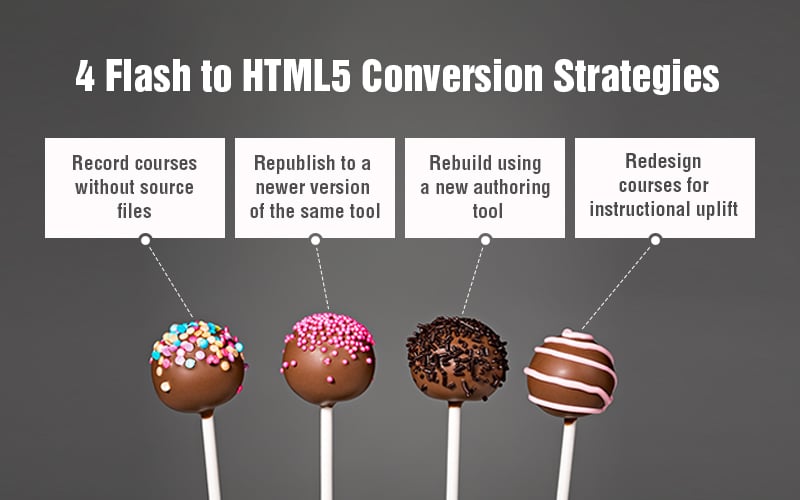
While the Flash to HTML5 conversion process may look like a cakewalk, it isn’t. It requires thorough planning and skilled professionals to handle the ambiguities of the process. If your organization doesn’t hold the expertise in-house, it’s wise to outsource Flash to HTML5 conversion projects. When experts handle the project, it becomes faster and easier. While I’ve mentioned the Record conversion strategy, you can go ahead and read about more strategies in this eBook, “Flash to HTML5 eLearning Conversion: The 4 ‘R’s That Matter”