Creating A Customized Menu Slide with Highlighted Buttons in Articulate Storyline

Designing a user-friendly Menu for an e-learning course is very important as it helps learners navigate easily through the course and find the information they want quickly.
Though Articulate Storyline offers a default menu, you may wish to have custom-made menu for your e-learning course. In this post, we will see how to customize a menu in Articulate Storyline. Let’s check a sample scenario.
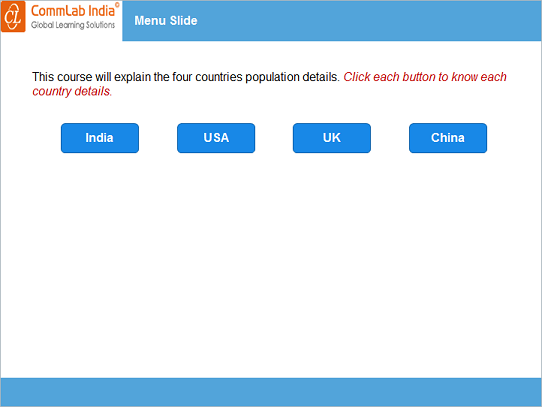
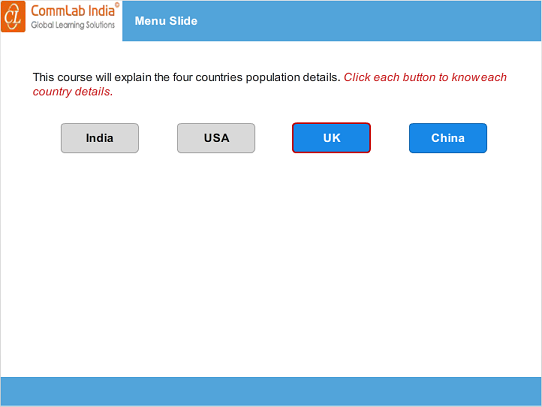
The menu slide contains 4 buttons. When the learner clicks a button, the course will navigate to the respective scene. In the last slide of each scene, the learner will be directed back to the menu slide and the respective button will change to the visited state and get highlighted.
Here are the steps involved to customize the menu according to this functionality.
Step 1: Create a menu slide with clickable buttons as shown in the screenshot.
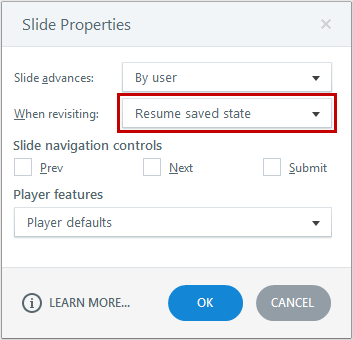
Step 2: Go to slide properties and change the When revisiting property to “Resume saved state”.
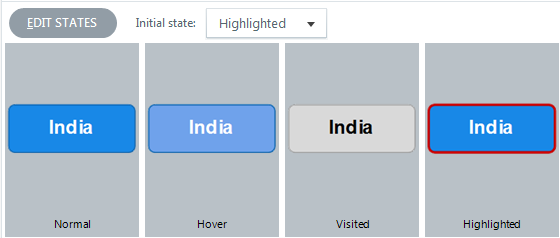
Step 3: Add the Highlighted state for each button. The first button in the initial state will be highlighted when the timeline starts.
Step 4: Create branching scenes for each button.
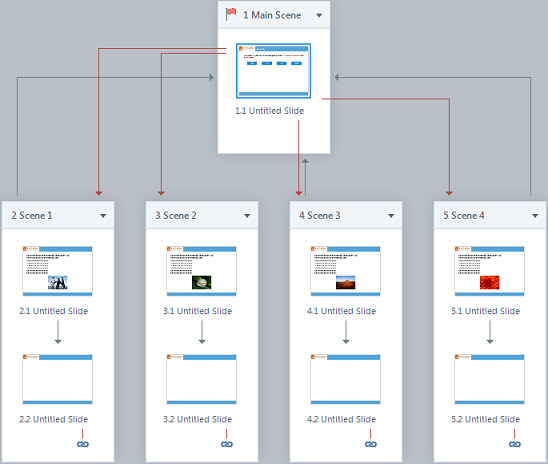
Step 5: Add a trigger to Button 1 to go to the respective scene when the learner clicks it.
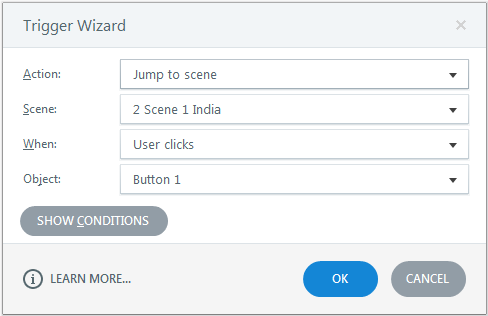
Add similar triggers to Button 2, Button 3, and Button 4.
Step 6: Create boolean variables for each scene with the initial value False.
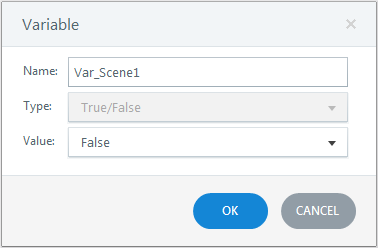
Here four variables are created for the four scenes – Var_Scene1, Var_Scene2, Var_Scene3, and Var_Scene4.
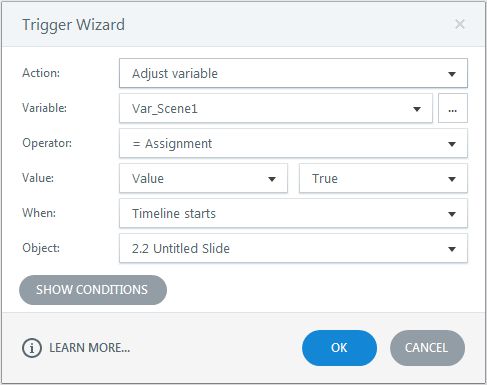
Step 7: Go to the last slide in Scene1 and add the following triggers.
Adjust Var_Scene1 to True when the timeline starts.
Jump to the menu slide when the learner clicks the Next button.
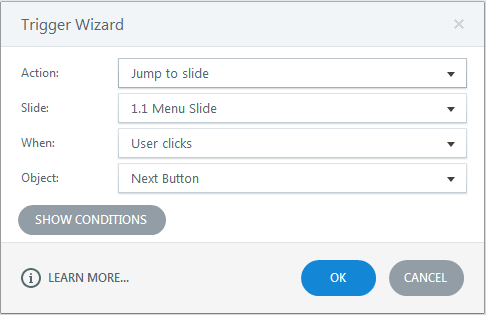
Repeat this step for all the scenes.
Step 8: Go to the menu slide and add the following triggers.
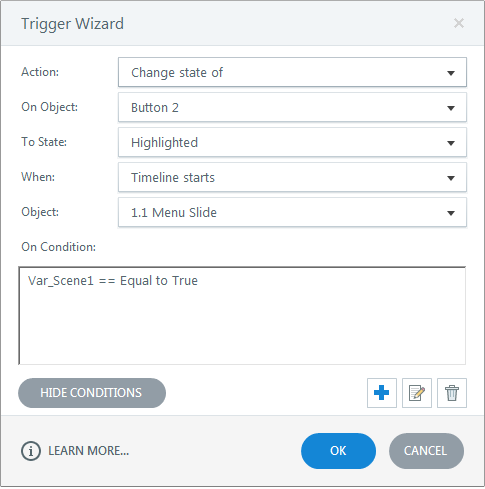
Trigger 1: Change the state of Button 2 to Highlighted when the timeline starts, if Var_Scene1 is True.
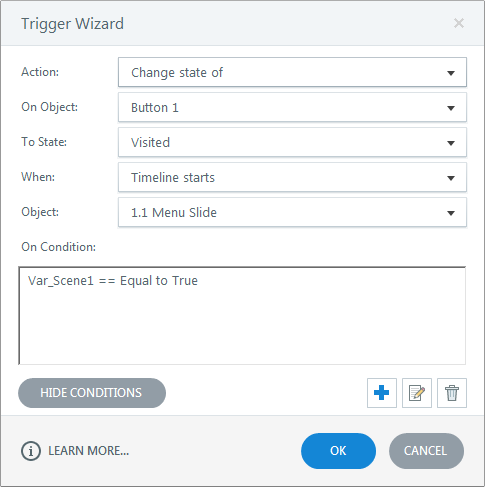
Trigger 2: Change the state of Button 1 to Visited when the timeline starts, if Var_Scene1 is True.
Add similar triggers to Button 2, Button 3, and Button 4 if the respective variables are True when the timeline of the menu slide starts.The order of triggers will be the same.
Publish or preview the course and see the output.
This is how we can customize the menu slide with highlighted buttons in Articulate Storyline. Hope you found this post useful. Also, here is another post that highlights on how to show or hide menu in Articulate Storyline. Do share your thoughts.


