Adobe Captivate: Customizing Smart Shapes and Captions for Simulations

Adobe Captivate has made the task of creating software simulations quite easy. However, many of us still look to customize its elements. The good news is, Adobe Captivate makes customizations easy. In this blog, we will see how to customize elements such as smart shapes, highlight boxes, and captions that are generated in online simulations developed in Captivate.
You can do this in three ways:
- You can change all the highlight boxes and captions at once, after the screen recording.
- You can standardize the template before recording the screens.
- You can create your own captions, using Photoshop.
Let’s start with the 1st option.
Changing all highlight boxes and captions, after the screen recording
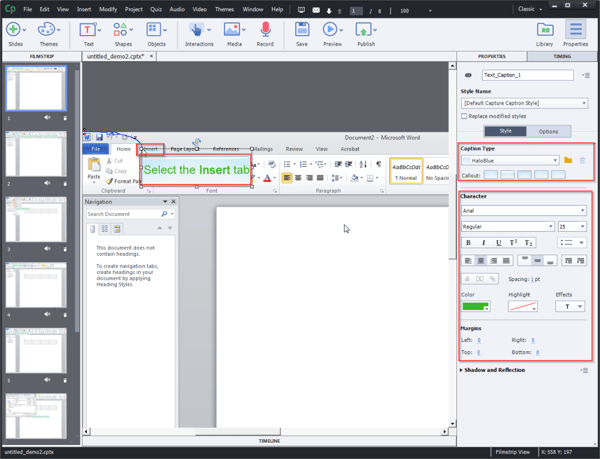
Select the captions/highlight boxes you want to change in the course after recording.
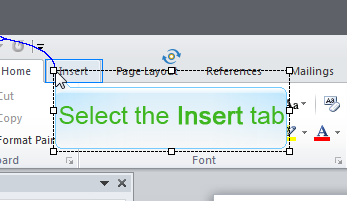
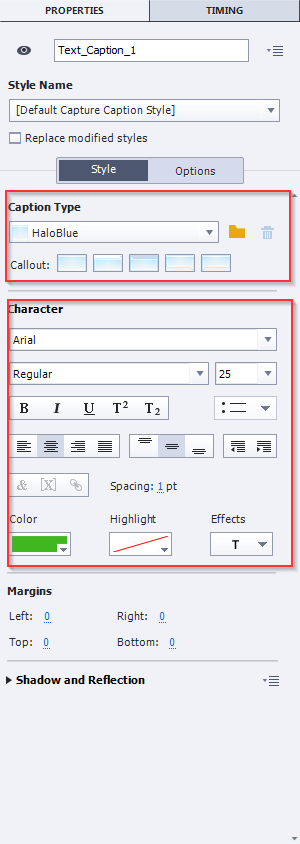
As you select the caption, the Properties panel appears on the right, you can change the caption text and also its color as shown in the screenshots below.
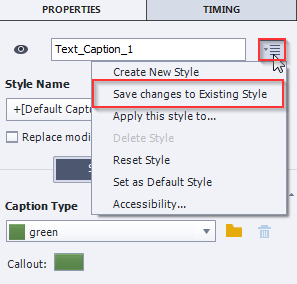
The Properties panel has a small icon on the top right corner. On clicking that icon, a drop down list appears, where you need to select the option Save changes to Existing Style, after doing your edits. On selecting this option, it will take a few seconds to replace the old captions/highlights boxes with the new ones in the entire course.
Now let’s see the 2nd option.
Standardizing the template before recording the screens
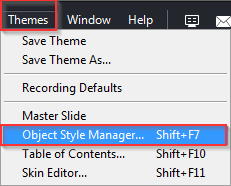
To standardize the captions/highlight boxes before recording the screens, select Themes in the Menu. Select Object Style Manager from the drop down list.
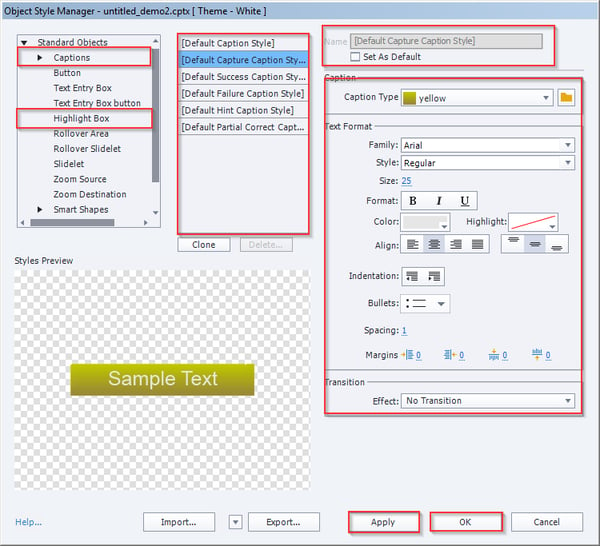
You will be able to see all Captivate objects; select the objects (captions/highlight boxes) you want to mark as default.
Customize them and check the Set as default option
Click Apply and the OK button as shown in the screenshot below.
Let’s start with the 3rd option.
Creating your own captions using Photoshop
- You can design your own captions in Photoshop and save in the .bmp format
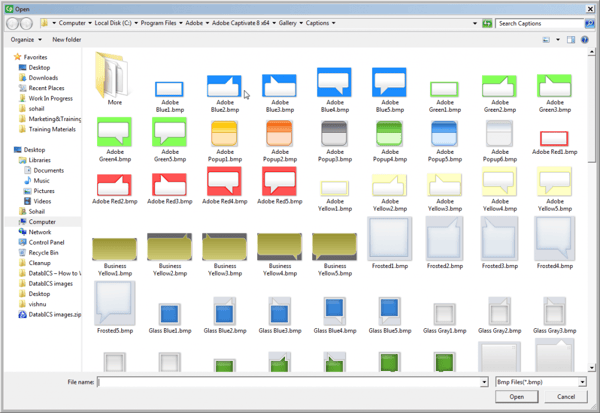
- Copy the created captions and paste in the path shown below
C:\Program Files\Adobe\Adobe Captivate 8 x64\Gallery\Captions
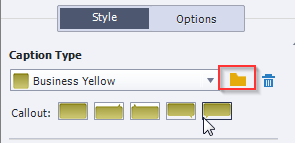
You will be able to apply them from the Caption Type option by clicking the folder icon.
This is how you can customize smart shapes, highlight boxes, and captions in Captivate 9. Please share if you know any other way to do the job.


