4 Things About Articulate Storyline You May Not Know

According to a survey conducted by the eLearning guild in 2013, Articulate Storyline is the most preferred rapid authoring tool. However, despite its immense popularity, there are several useful features of this tool that many eLearning designers, online course developers and training managers are not aware of.
In this post, I would like to share 4 such features.
1. Adding selectable content
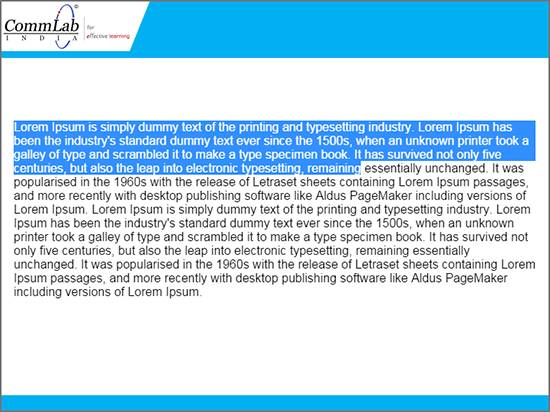
Do you know that we can add selectable content (the content which we can copy) in our eLearning courses, using Articulate Storyline?
This can be done by adding the content as HTML file (as Web Object). Follow the steps mentioned below.
Step 1:
Create a HTML file with your content.
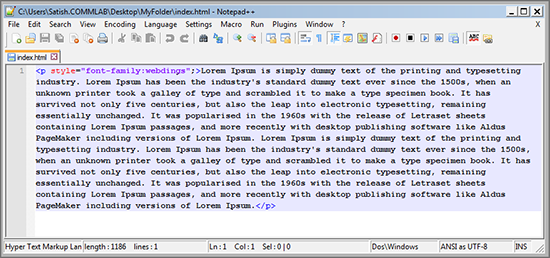
Note: Save your HTML file with the name index.html in the folder (from which you select to insert the Web Object). You can apply any text formatting within this file using styles.
Step 2:
In Articulate Storyline, select the Insert tab and click on the Web Object option.

Step 3:
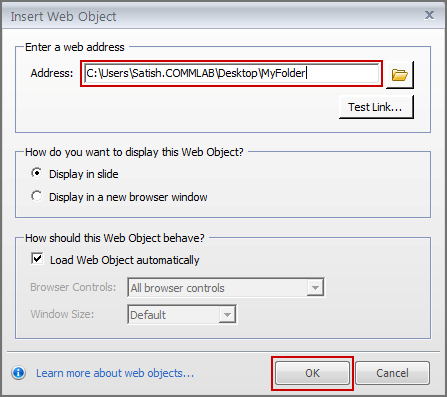
Browse for your index.html file or paste the location of your folder directly and then click the OK button.
Step 4:
Publish your eLearning course and open the Story_html5 file to view the output.
2. Knowing your eLearning course duration
Do you know that we can know the duration of our eLearning course without calculating? Follow the two steps mentioned below.
Step 1:
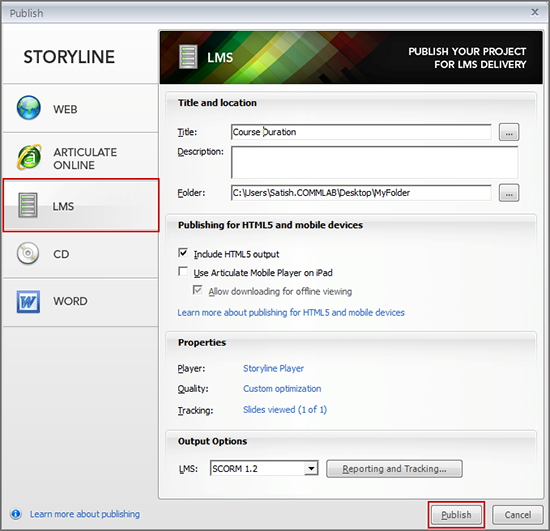
Publish your eLearning course to the LMS.
Step 2:
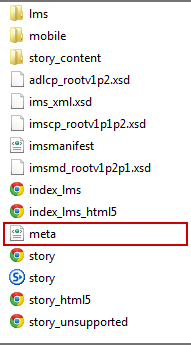
Open the published folder. You will find an XML file with the name meta.xml.
Step 3:
In the meta.xml file, you will find the duration property. You can find the total course duration here.
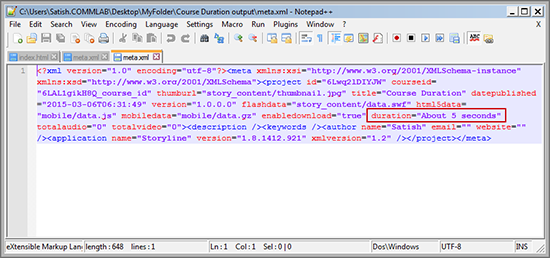
You can even reset this value here itself (within the quotes). This doesn’t have any effect on the source.
Articulate Storyline, by default, rounds the time value based on the fraction of a second. Have a look at below image to understand how Storyline rounds the time values.
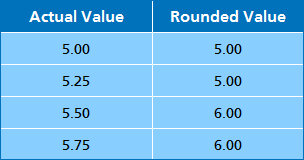
Note: Storyline, by default, ignores the timeline of slide layers.
3. Setting your eLearning course duration
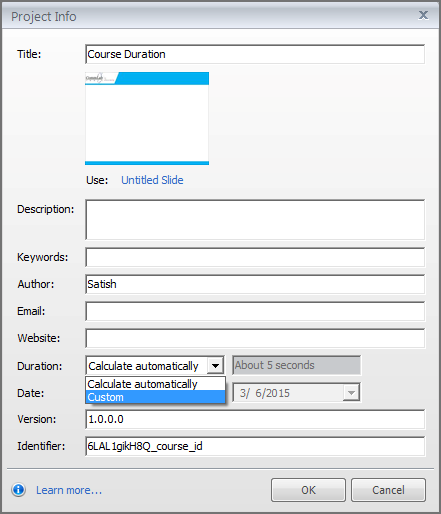
I have explained how to view eLearning course duration. Now, I will explain how to set the duration of an eLearning course in Articulate Storyline.
Step 1:
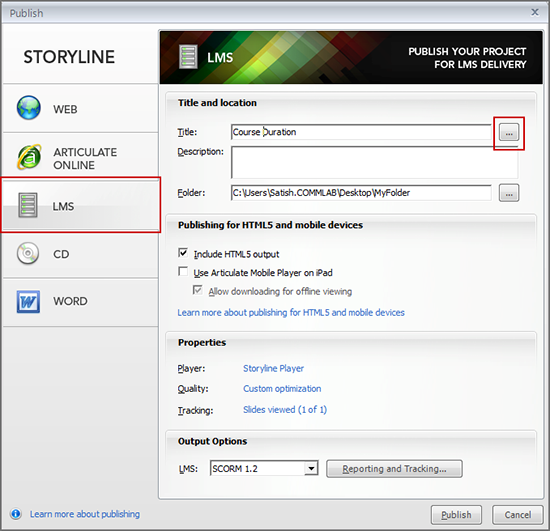
Open the publishing window and click the button beside the title.
Step 2:
Click the dropdown beside the Duration option and type the duration, based on your course. For instance, you can type About 2 minutes.
4. Inserting tables
Though Storyline is considered as one of the best authoring tools, it doesn’t have an option to insert tables. But, we can add a table easily through a web object.
Create a table in HTML and save it with the name index.html and insert it into Storyline as a Web Object.
Note: Inserting a web object was explained in point 3.
Hope you find this blog useful.
Have anything to say? Please do share.


![Challenges to eLearning Implementation and Ways to Mitigate Them [Video]](https://blog.commlabindia.com/hubfs/Imported_Blog_Media/elearning-implementation-challenges-solutions-video.jpg)
