How to Convert Text-to-Speech in Articulate Storyline 360

Articulate Storyline 360 possesses a powerful feature called “Text-to-Speech” that helps add audio narration to an eLearning course. It is quite time-consuming to prepare audio scripts, record audio, and integrate them in the course. With Articulate Storyline 360, you can speed-up the process by converting text to speech with the integrated feature that helps in the quick and easy creation of audio.
Articulate Storyline 360 allows you to choose the voice and language to convert audio script into smart audio files. It supports a wide range of languages and you can choose from 7 different narrator voices. English voiceovers include UK, US, Australia, and Indian English accents. The Text-to-Speech feature makes it easy to choose the narrator’s voice and you can also check the voice before incorporating it in your eLearning course.
Reference Source: Text-to-Speech
If you wish to include narration in your course, just follow the steps mentioned below.
Step 1: Select the Insert tab > select the Audio dropdown list > choose Text-to-Speech from the media ribbon.

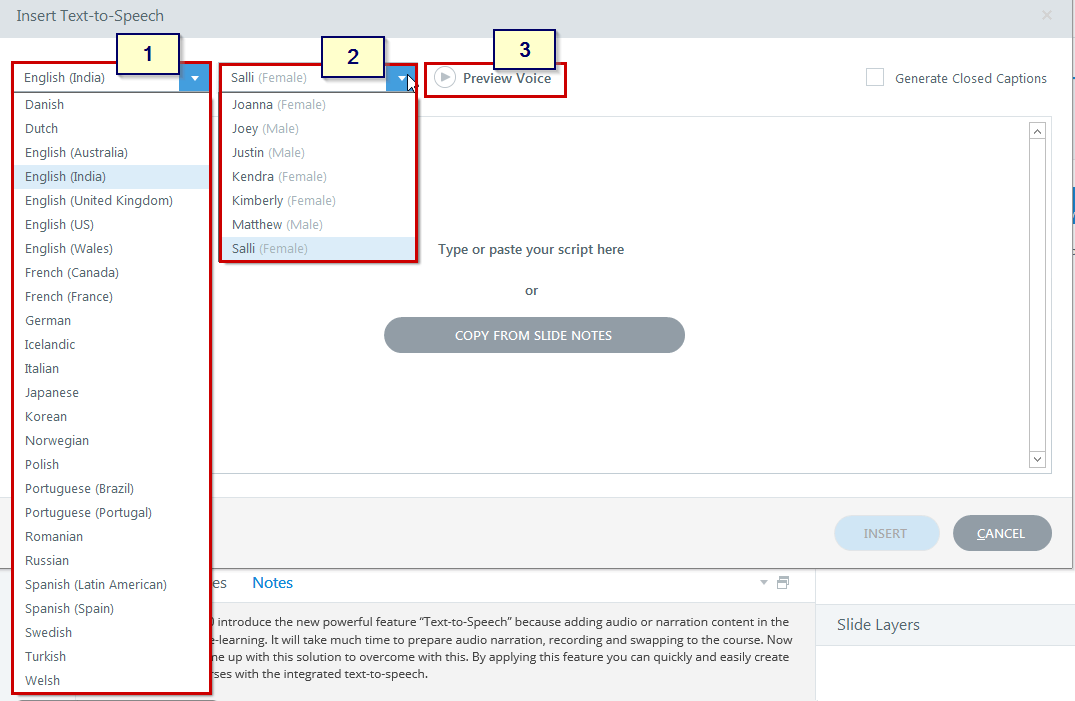
Step 2: Select the preferred Language (1) > choose the Voice (2).
You can hear a demo of the voice before finalizing, by clicking the Preview Voice (3) button.

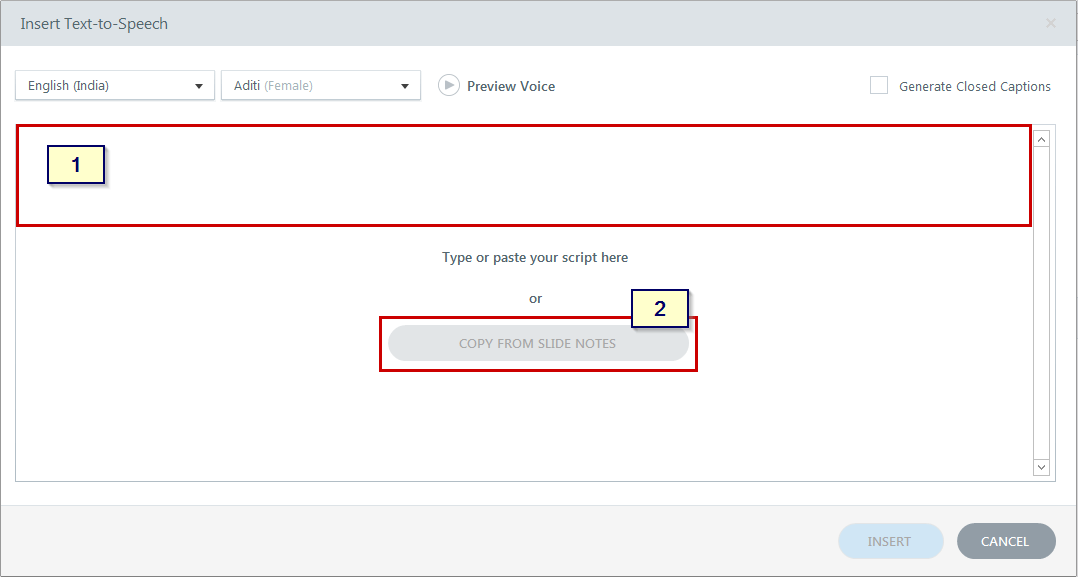
Step 3: Articulate Storyline automatically converts the narration text to audio. There are two methods to incorporate audio narration text into Articulate 360.
- You can type or paste the script in the input field.
- You can also use the Notes Script in the slides to import text directly by clicking the Copy from Slide Notes This is a handy option where you can incorporate the entire script in a single click.

Note:
- The maximum limit of text that can be converted at a time is 10,000 characters. If your text exceeds the stipulated limit, you will have to break it into multiple files.
- To process and generate the Text-to-Speech feature, you must have an Internet connection.
- Certain words may not be pronounced well, to overcome such shortcomings, you need to add punctuation such as hyphens, commas, and semicolons to enable proper reading.
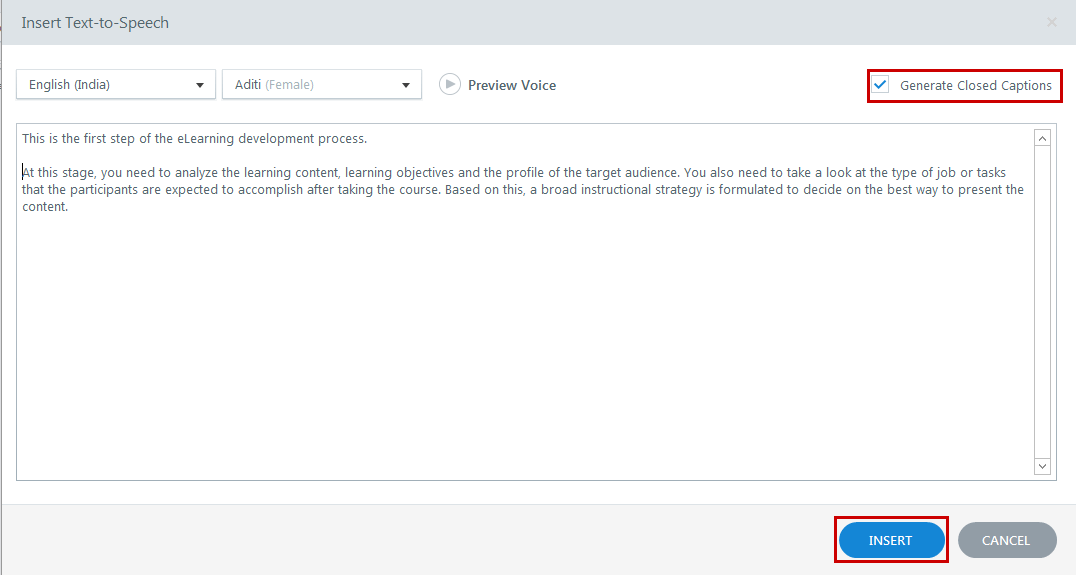
Step 4: To enable closed captions for your course, just check the option “Generate Closed Captions” and click the Insert button.
Step 5: To update or modify the inserted audio script, you need to click the audio icon or select the audio layer to enable the OPTIONS tab and then select the Text-to-Speech option.

Step 6: Finally, you can update/edit any caption by simply clicking Edit Captions. Once you are done with all the edits, click the Save & Close button.

This feature is especially useful while sending the first version of course to the client. After the first cut of the review is done, you can swap the system voice with professional voice narration. All you need to do is just replace the new audio with the timeline audio. This feature makes it quite easy to add narration to your eLearning courses.
The Text-to-Speech feature is available only in the latest version of Articulate Storyline 360. We hope this blog helps you understand the Text-to-Speech feature of Articulate Storyline 360. Do share your ideas and thoughts.


