Articulate Storyline: 4 Easy Steps to Create a Digital Clock

Articulate Storyline is the best authoring tool I know. We can create many rich, Flash-like components using this tool. In this blog, I will share how to create a Digital Clock (we can create a clock in both 12 and 24-hour formats).
A digital clock is very useful to measure and track the time spent by a learner on a course, accurately. Just follow the 4 simple steps described below to create a Digital Clock in Articulate Storyline.
Step 1: Take a blank slide and design the background as you prefer.

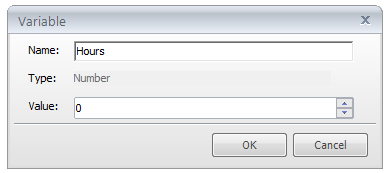
Step 2: Create three Numeric variables to store the System time in terms of hours, minutes, and seconds. Here I’ve used the names Hours (for hours), Minutes (for minutes) and Seconds (for seconds) respectively. Here is a sample screenshot.

Step 3: Create a reference for all three variables (a variable name between % symbols is called a Reference) as shown below. These references will display their values on Preview/Publish.
![]()
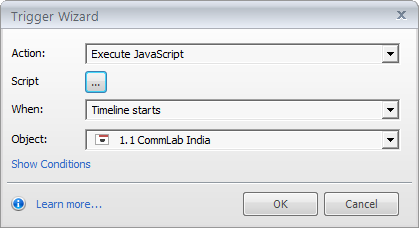
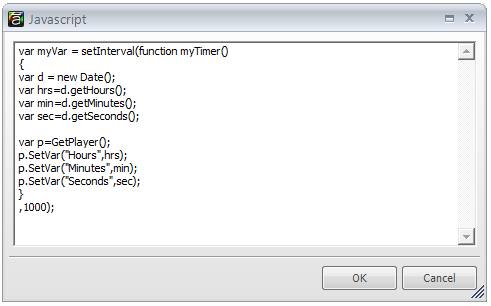
Step 4: The last step is to add a Trigger to execute a JavaScript code when the timeline of the base layer starts.


You are done! You can now publish your e-learning course to view the Digital Clock.
Note: You can add variable references in the slides in which you want to display time. Alternately, you can place the variable references in the Master slide and use that layout. Both give the same output.

Have anything to say? Please do share.


![Why is SCORM Cloud a Must for eLearning Development? [Infographic]](https://blog.commlabindia.com/hubfs/Imported_Blog_Media/scorm-cloud-elearning-1.jpg)