How to Publish SCORM Content in Lectora Inspire 16

In my previous blog, I talked about the important features of Lectora Inspire 16; in this blog I will show how to make your online courses SCORM compliant in Lectora. This step-by-step blog will help you choose the best settings when publishing your courses to an LMS.
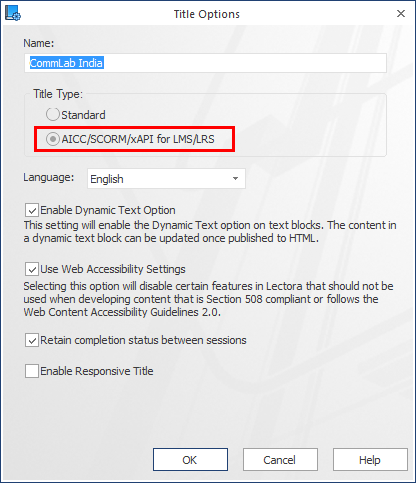
Before developing an e-Learning course, select the “AICC/SCORM/xAPI for LMS/LRS” option.
- Click the Design tab and select ’Title Options’ from the Title Setup Group.
- Enable the ‘AICC/SCORM/xAPI for LMS/LRS’ radio button.
Step 1
Click Publish in the Home Menu, and select SCORM from the dropdown list (The keyboard shortcut is “Ctrl+F”).
The “Publish Tittle to SCORM Compliant Web Content” window will appear.

Step 2
Click the “Publish” button, and the “Publish SCORM” window appears (see Step 2 screenshot).
Step 3
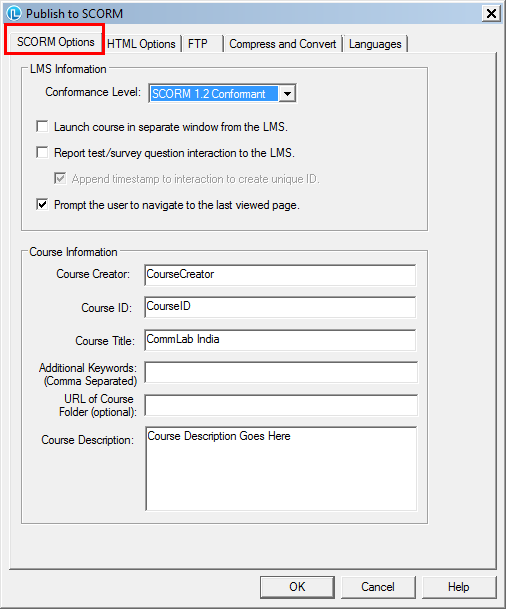
Specify the SCORM Settings Options
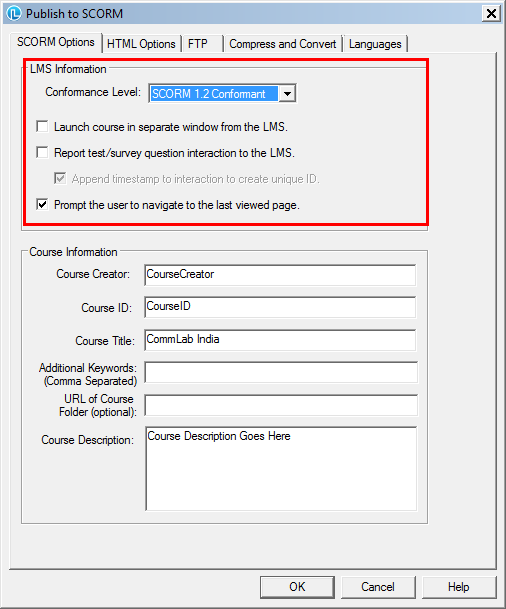
- Conformance Level – Select the conformance type and level from the dropdown list.
- Launch course in separate window from LMS – If you want the published course to be launched from the LMS in a new window, select this option.
- Report test/survey question interaction with LMS – Select this option to record interaction data for questions in the graded quiz being submitted to the LMS.
Interaction data includes the following:- Question
- Learner’s response
- Whether the answer is correct/incorrect
- Append timestamp to interaction to create unique ID The option is selected by default when the “Report test/survey question interaction to the LMS” option is selected. Deselect the option if you do not want a unique ID created each time the quiz or survey is taken.
Prompt the user to navigate to the last viewed page – Enables the automatic bookmarking feature for the published course.
Let’s now look at the course information to be provided.
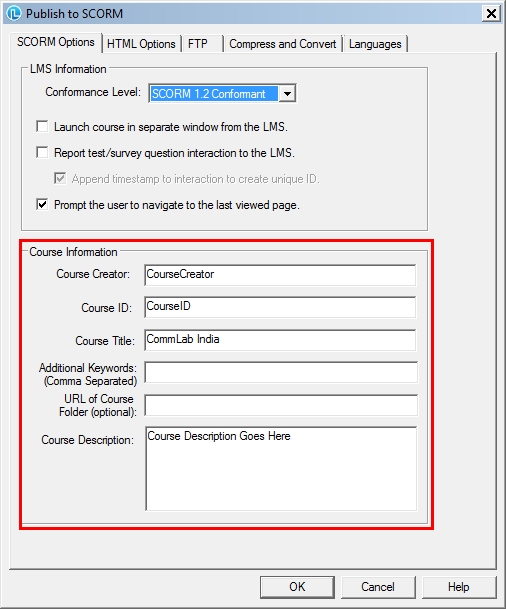
- Course Creator – Enter the name you want the LMS to display as the creator of the course.
- Course ID – Specify the ID of the course as it will be known to the LMS.
- Course Title – Enter the title of the course as you want to be displayed in the LMS.
- Course Description – Specify the description of the course as you want it to be displayed in the LMS.
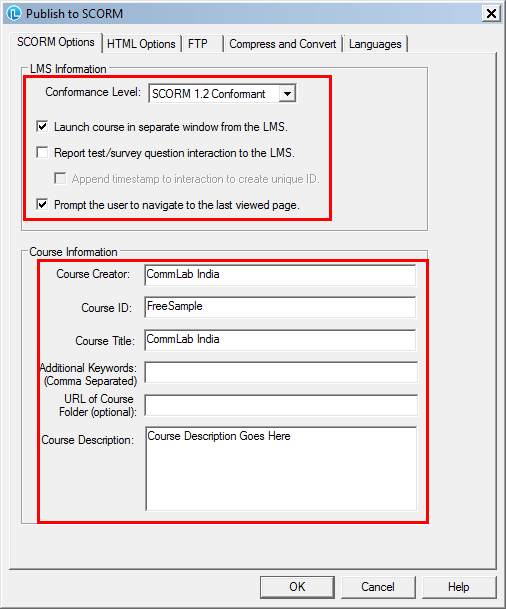
Shown below are the required SCROM settings.
Step 4
Specify HTML Settings Options
After completing the SCORM options, click the ‘HTML Options’ tab in to the ‘Publish to SCORM’ window.
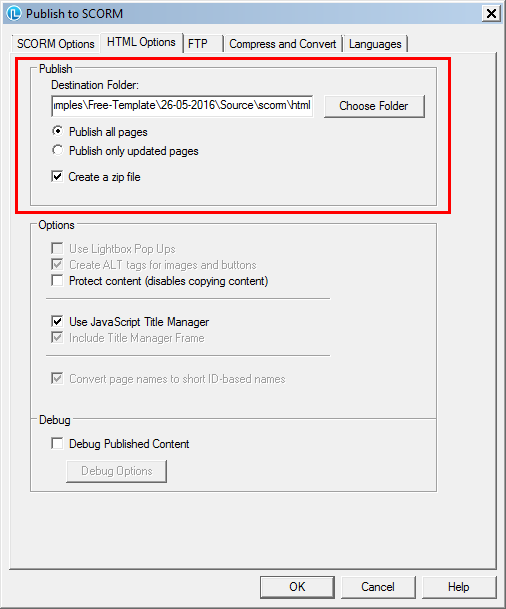
- Destination Folder – Specify the location in which you want to save the course files. Click the ‘Choose Folder’ button and navigate to the location.
- Publish all pages – Select this option to publish all the slides/pages and resources, irrespective of whether they have been updated or not.
Shown below are the required HTML settings.
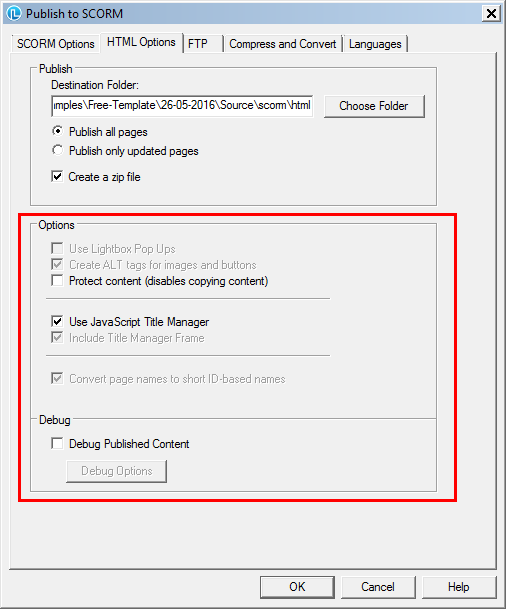
These settings make your course ready to be published to SCORM.
Hope you find the blog useful. Do share your views.


