Printing Results in a HTML Page, without Articulate Storyline’s GUI

Recently, we met an interesting requirement from one of our clients. The client wanted to develop a course having 3 modules. The learner needed to answer a quiz at the end of each module. The client wanted to display the score for each of the modules as well as the average of the 3 scores. We can meet this requirement easily using variables and triggers. But, the client wanted to display them in a separate window, ‘outside’ the Articulate Storyline environment (without the tool’s GUI) and print them.
To meet this requirement, we have to call an external HTML page. First, we need to send all the variables to the HTML page and open it in a separate window.
Thereafter, we need to follow the steps given below.
Step 1:
Create three tests with the required number of questions and a result page for each test.
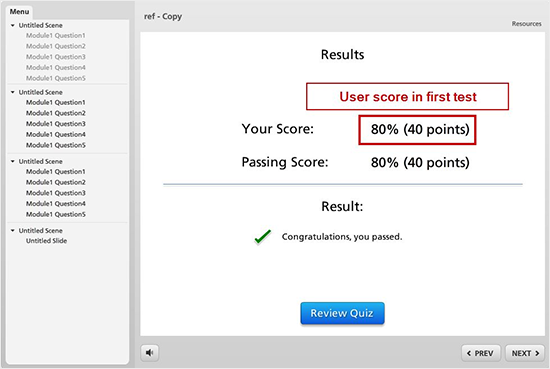
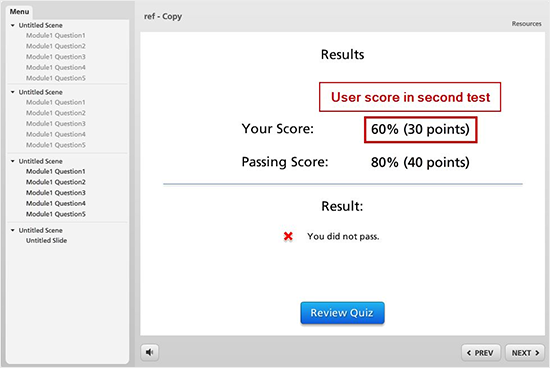
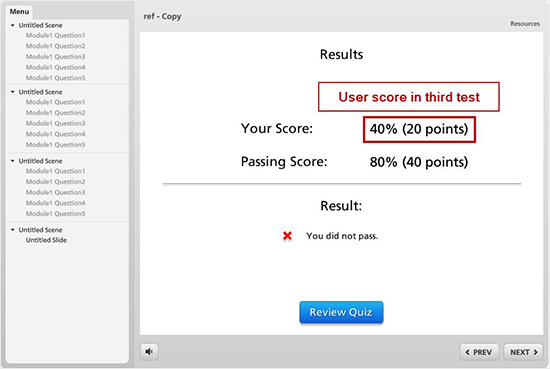
In the below example, I have created three quizzes, with each quiz having 5 questions and a result page.
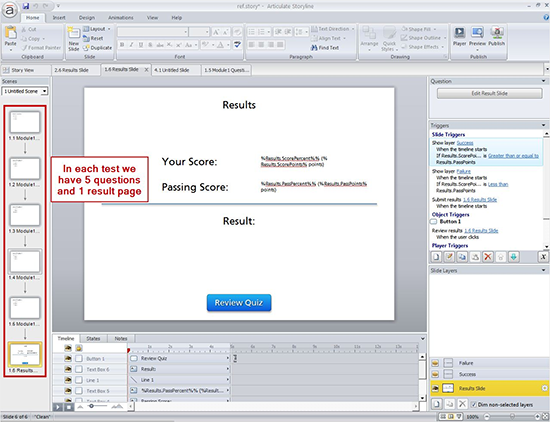
When we insert a result page, the default result variables are generated. “(%Results.ScorePercent%%, %Results.ScorePoints% points)” is the user’s score,
“(%Results.PassPercent%%, %Results.PassPoints% points)” is the passing score.
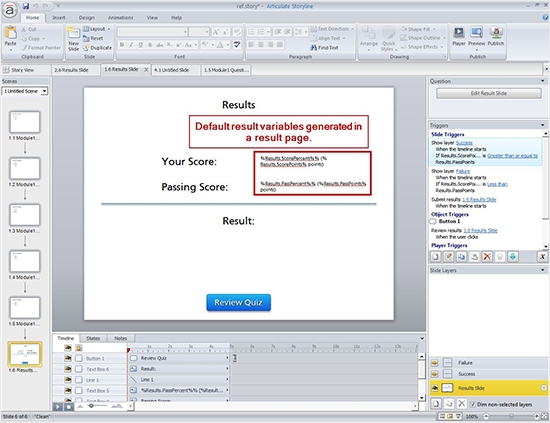
Here we have three tests and three result pages. So, the variables should be as follows.
First quiz:
“(%Results.ScorePercent%%, %Results.ScorePoints% points)”
“(%Results.PassPercent%%, %Results.PassPoints% points)”
Second quiz:
“(%Results1.ScorePercent%%, %Results1.ScorePoints% points)”
“(%Results1.PassPercent%%, %Results1.PassPoints% points)”
Third quiz:
“(%Results2.ScorePercent%%, %Results2.ScorePoints% points)”
“(%Results2.PassPercent%%, %Results2.PassPoints% points)”
Step 2:
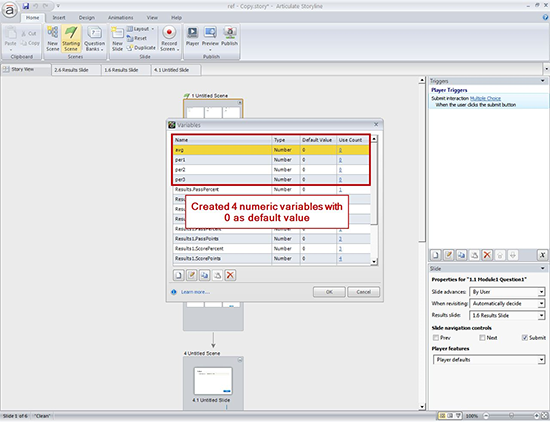
Now, create four numeric variables (per1, per2, per3 and avg) with 0 as default value.
Step 3:
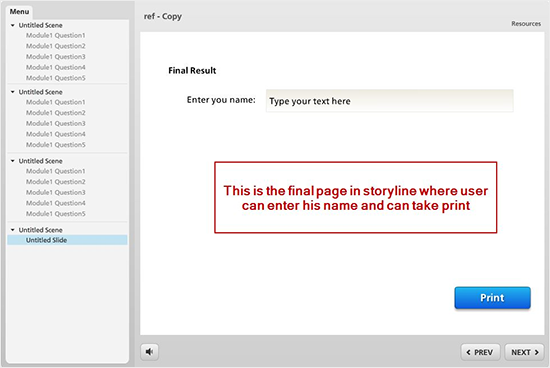
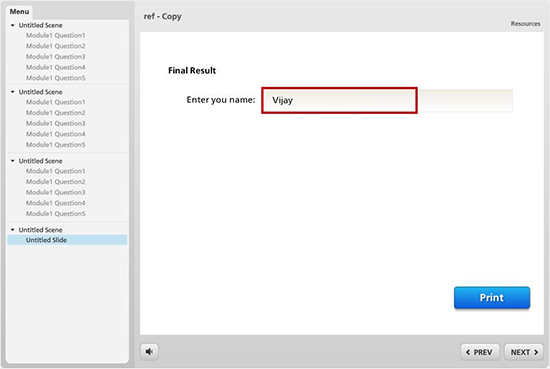
Insert a text entry field (where the user can enter his name) in a new slide and add a print button in this slide.
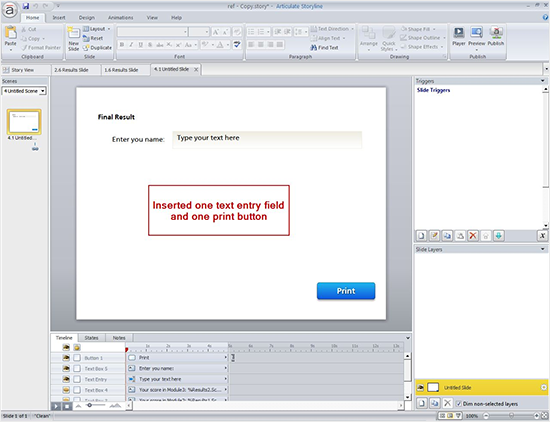
When we insert a text entry field, by default, a text variable called “TextEntry” is created.
Step 4:
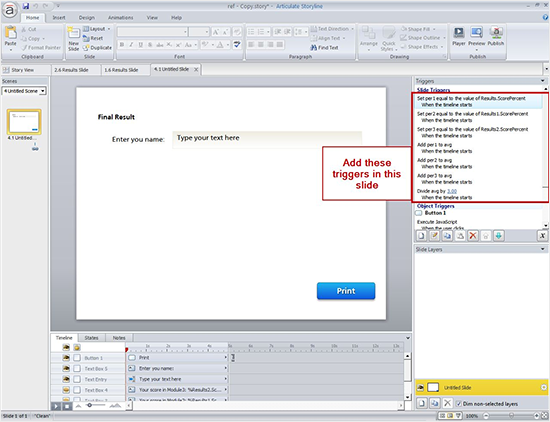
Add the following triggers to this slide in the same order.
Trigger1:
Assign the value of the “Results.ScorePercent” to “per1” when slide timeline starts.
Trigger2:
Assign the value of the “Results1.ScorePercent” to “per2” when slide timeline starts.
Trigger3:
Assign the value of the “Results2.ScorePercent” to “per3” when slide timeline starts.
Trigger4:
Add the value of the “per1” to “avg” when slide timeline starts.
Trigger5:
Add the value of the “per2” to “avg” when slide timeline starts.
Trigger6:
Add the value of the “per3” to “avg” when slide timeline starts.
Trigger7:
Divide the value of the “avg” with 3(number of tests) when slide timeline starts.
Step 5:
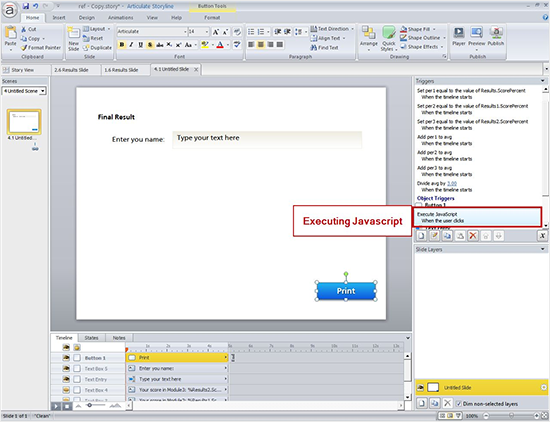
Now execute the JavaScript when the user clicks “Print” button.
Step 6:
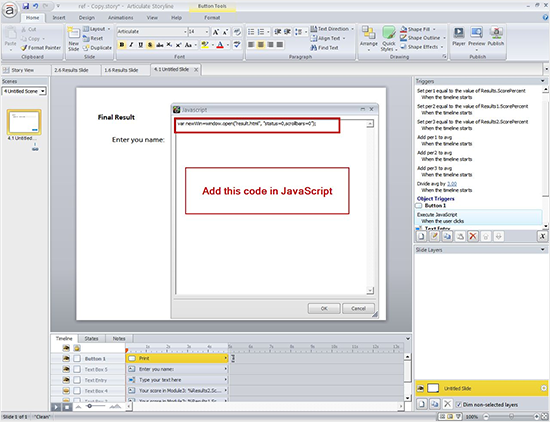
Write the following code in JavaScript.
var newWin=window.open(“result.html”, “status=0,scrollbars=0”);
Here, “result.html” is an external page. We can send the result variables (per1, per2, per3 & avg) and name (TextEntry) into this page.
Step 7:
Now, open a notepad and add the following code in it.
<!doctype html>
<!–[if lt IE 7 ]> <html class=”ie6″> <![endif]–>
<!–[if IE 7 ]> <html class=”ie7″> <![endif]–>
<!–[if IE 8 ]> <html class=”ie8″> <![endif]–>
<!–[if IE 9 ]> <html class=”ie9″> <![endif]–>
<!–[if (gt IE 9)|!(IE)]><!–> <html class=””> <!–<![endif]–>
<head>
<TITLE>Results</TITLE>
<STYLE>
div { margin:0px; padding:0px;}
#res_text {
text-align: left;
position: absolute;
left: 100px;
top: 50px;
z-index: 2;
width: 460px;
color: #000000;
}
#res_percent {
text-align: left;
position: absolute;
left: 100px;
top: 100px;
z-index: 2;
width: 550px;
color: #000000;
font-size: 12pt;
font-family: “Myriad Pro”, “Lucida Grande”, “Lucida Sans Unicode”, Arial, sans-serif;
}
</STYLE>
</HEAD>
<BODY onload=”window.print();”>
<div id=”res_text”><div align=”left” style=”width:100%;”>
<SCRIPT>
var player=top.window.opener.GetPlayer();
var learnerName=player.GetVar(“TextEntry”).replace(/(\r\n|\r|\n)/g, ‘<br />’);
document.write(“<P><H2> Hi ” + learnerName + “,</P>”);
</SCRIPT>
</div>
</div>
<div id=”res_percent”><div align=”left” style=”width:100%;”>
<SCRIPT>
var player=top.window.opener.GetPlayer();
var name=player.GetVar(“TextEntry”); //Extracting name from storyline
var percen1=player.GetVar(“per1”); //Extracting first test result from storyline
var percen2=player.GetVar(“per2”); //Extracting second test result from storyline
var percen3=player.GetVar(“per3”); //Extracting third test result from storyline
var aver=player.GetVar(“avg”); //Extracting average result of the 3 tests from storyline
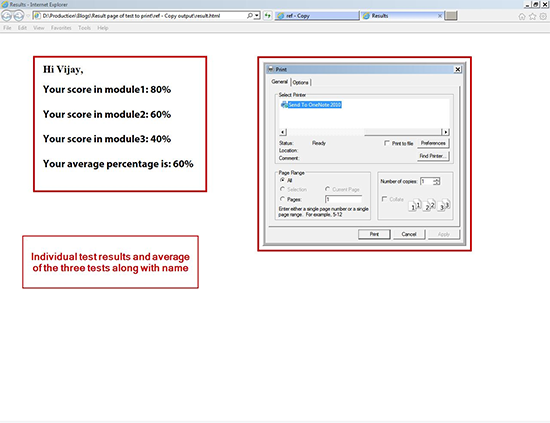
document.write(“<P><H2>Your score in module1: ” + percen1 + “%” + “<br/><br/>Your score in module2: ” + percen2 + “%” + “<br/><br/>Your score in module3: ” + percen3 + “%” + “<br/><br/>Your average percentage is: ” + aver + “%” +”</P>”);
</SCRIPT>
</div>
</BODY>
</HTML>
Now save it as result.html.
Step 8:
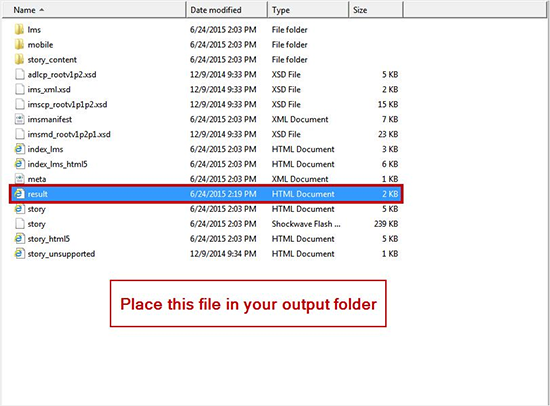
Now, publish the file and paste the “result.html” file in the output folder.
Now, check your output.
Hope you find this post useful. Do share your views.


