How to Add a Progress Bar in Articulate Storyline
The Progress bar, in e-learning courses is used to show learners the percentage of course that has been completed. Articulate Storyline, by default, doesn’t have an option to add a progress bar to the slides. But, do you know Articulate Storyline helps us create a customized progress bar? Let’s see how.
Recently, we’ve created a custom progress bar in Articulate Storyline for one of our clients.
In this blog, I would like to share how it was done following these easy steps.
Step 1:
Go to the Slide Master tab in the Menu, and draw a rectangle as a background for your progress bar at the bottom of the slide using the shapes tool.
Step 2:
Now provide States to the rectangle. The number of states depends on the number of slides in the course.
Now draw a smaller rectangle for each of the states to display the status of the slide as shown below.
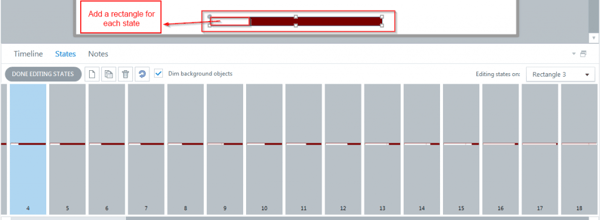
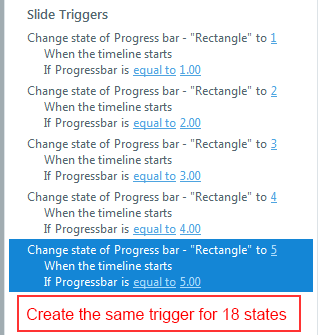
For example, in the screenshot shown above, there are 18 slides in the course, that’s why we’ve created 18 states.
Step 3:
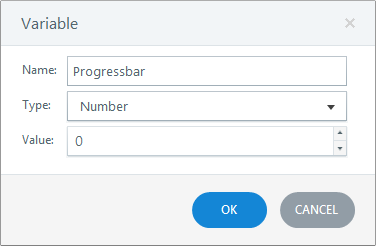
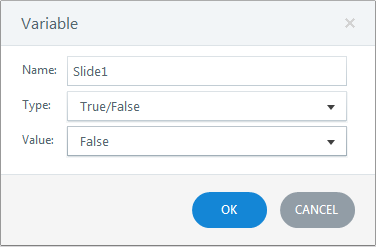
Go to the individual slides and create a variable for each slide. Create one Numeric variable, i.e, Progressbar that will be used in all the slides. Also create a True/False type variable for each slide as shown in the screenshots shown below.
Step 4:
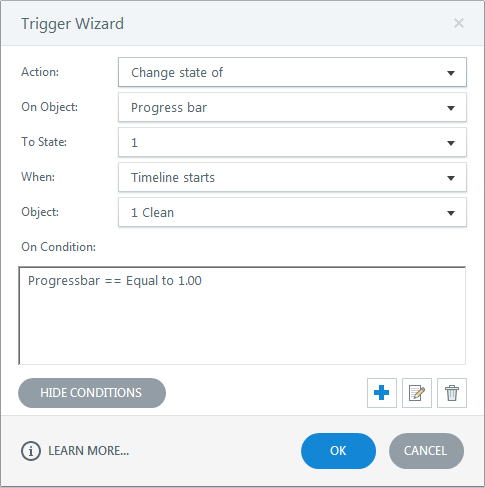
Add triggers to each slide as shown in the following screenshot.
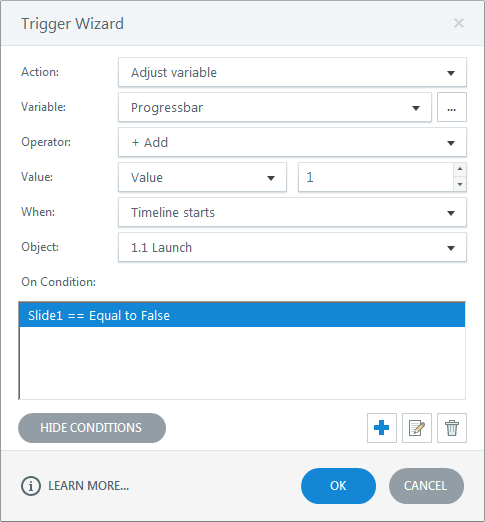
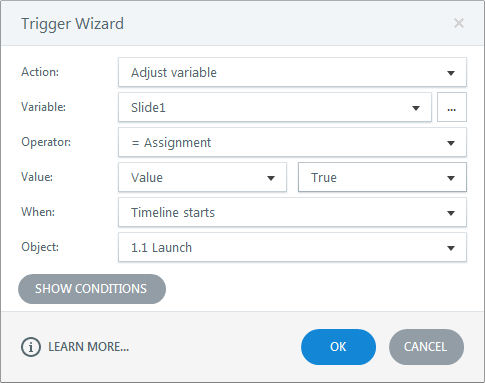
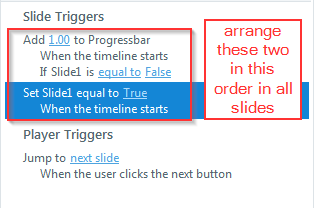
Add this trigger in all the slides.
Step 5:
Go to Slide Master and add some triggers to the Slide Master, as shown below.
Step 6:
Finally, publish the course and check the output.
This is how we can create a customized Progress bar in E-learning courses using Articulate Storyline.
I hope you’ve learnt something new out of my blog, please do share your comments.


