Best Practices in Developing Software Simulations using Articulate Storyline
In a classroom if you are teaching about software and want that tutorial to be recorded, Screen capturing tools like Adobe Captivate, Lectora and Camtasia can help you by capturing and recording anything that is on the computer screen. In Articulate Storyline it is quite easy to create both screencast videos and software simulations with the “watch-try-do” approach.
In this blog, we will see how you can record simulations for your software training using the Articulate Storyline tool.
Step 1:
If you have already recorded or working with an existing project, click the Record screen under the home tab.
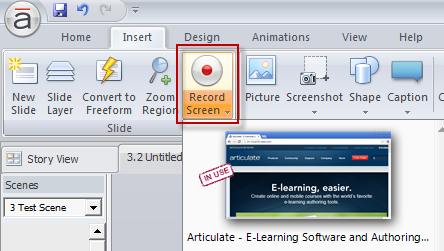
I use drop drown arrow of the record screen button to convert recording in other Try and text mode.
Step 2:
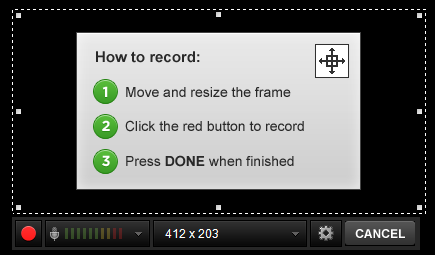
After clicking on the record screen option, thestoryline window disappears launching the screen recorder. You can use gear icon if you want to resize your recoding.
Step 3:
Once your recording is done you can change the name of default title of your video to your choice.
![]()
Step 4:
With Articulate Storyline you can present the Recorded video in the following ways:
1. Video on a single slide: You can insert the captured recordings on a single slide as full motion video.
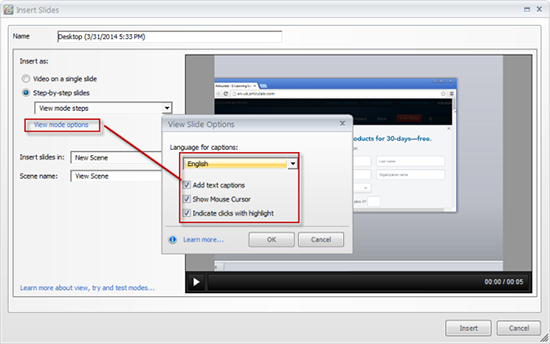
2. Step-by-step slides: The second way to embed your screen recordings into your projects is by selecting the option “step-by-step slides” in Articulate Storyline. The “step-by-step slides” option consists of 3 more options, View mode steps, Try mode steps, Test mode steps.
In this blog we will see how to present the step by step slides. From the record screen drop-down list, I selected the View mode steps to demonstrate the software to the user/learner. Select the specific language from the language option to add captions for your recordings. Click the OK button once you are done.
Step 5:
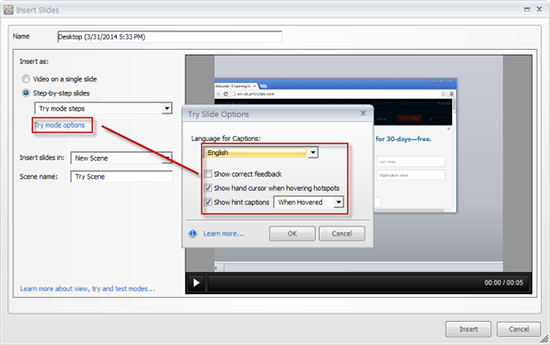
Once you are done with the View mode, you can give a chance to your learners to practiceit in the try mode and set the property as earlier. See the image below.
Note:
- If you find the text field outside the slide, you just have to place it on a particular text area.
- If you don’t want the feedback popup like: Correct and incorrect or hint popup you have to delete those layers.
- Apply the trigger as jump to next slide for hotspot and also adjust the hotspot to the particulate area.
- As per your requirement you can change the font and color of the callout.
Step 6:
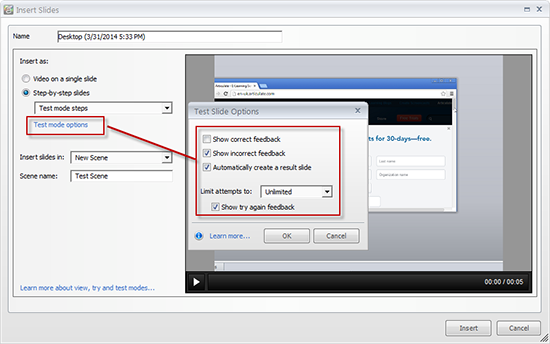
Once you are done with the Try mode, you can test you now apply your knowledge in Test Mode without instructions. If you have difficulties completing this challenge, use the feedback popup and set the property as earlier. See the image below.
These are steps to create “slide by slides recording” in Articulate Storyline. If you have used any tricks while recording the screen, do share with us.


![Why Use Simulations for Online Sales Training [Infographic]](https://blog.commlabindia.com/hubfs/Imported_Blog_Media/create-successful-online-simulations-3.jpg)