A One-to-Many Drag-and-Drop Interactivity in Articulate Storyline
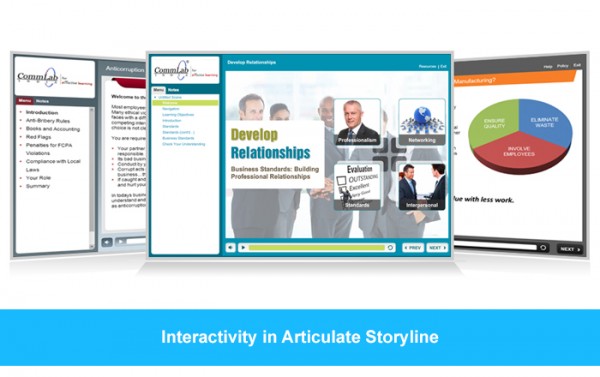
‘Drag-and-Drop’ interaction in Articulate Storyline is one of those wonderful inbuilt features that make high-level functionality very easy. But one of our client’s requirements made us create a custom drag-and-drop slide.
What was the requirement?
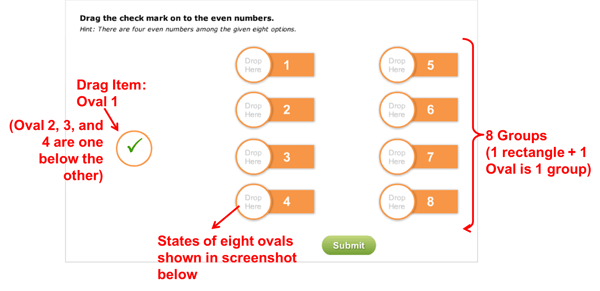
A question has 8 options, and among them four are correct. The learner would be provided with a check mark, which he has to drag and drop on the correct options (as shown below). This means that we need to drag and drop one check mark on to 4 options. This type of Interactivity is called “One-to-Many” drag-and-drop interactivity. This was quite a challenging requirement.
Why it was not possible with the default features?
The drag-and-drop interaction feature of Articulate Storyline allows us to create many-to-one drag-and-drop interactivity; that means we can create an interactivity where many options can be dragged and dropped on one answer. But we cannot create one-to-many drag-and-drop.
So let’s see how I customized it:
Create eight shapes for options as shown in the screenshot above. Give states for the circle as shown in the screenshot below:
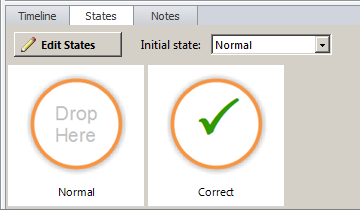
Create four checkmark circles and place one on the other so in the output it looks as if we have only one check mark to drag on all the options. Create feedback layers “Correct” and “Incorrect” and create a submit button.
Now, start creating triggers as shown in the screenshots below:
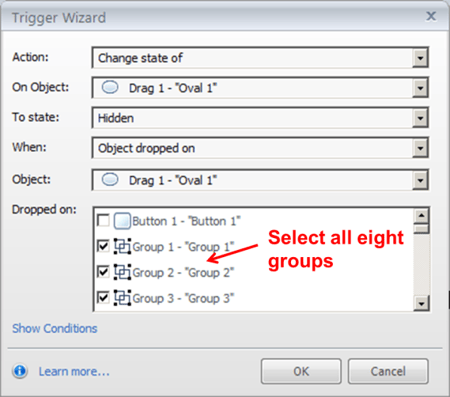
This trigger will hide the check mark (Oval 1) when it is dropped on any of the eight groups. In the same way, create triggers for other three check marks (ovals) so that they too hide when dropped on any of the eight groups.
Now, create triggers to change state of the “Drop Here oval” from the normal state to the correct state when any of the four check mark ovals is dropped on it.
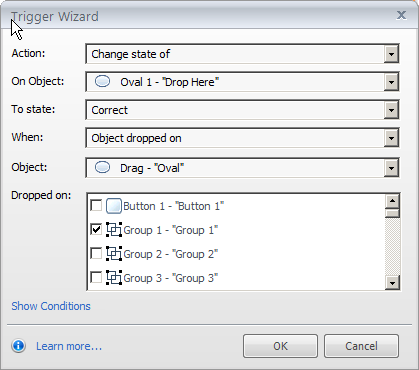
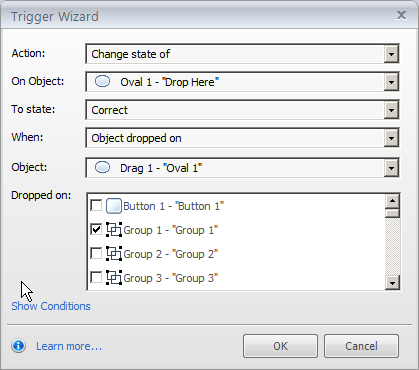
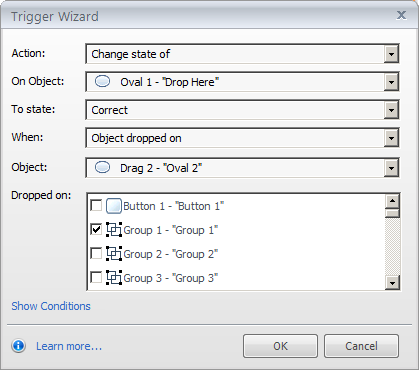
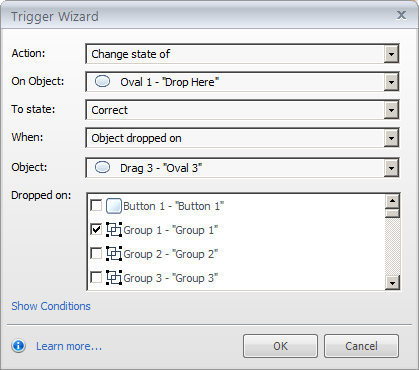
These triggers will change “Drop Here Oval 1” from the normal state to the correct state when any of the four check marks is dropped on it.
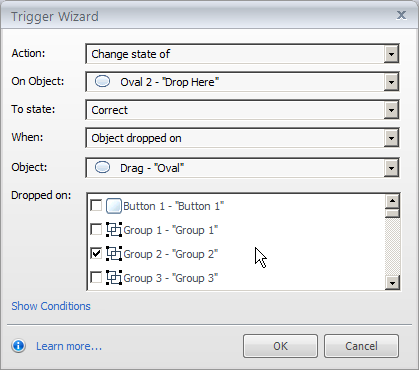
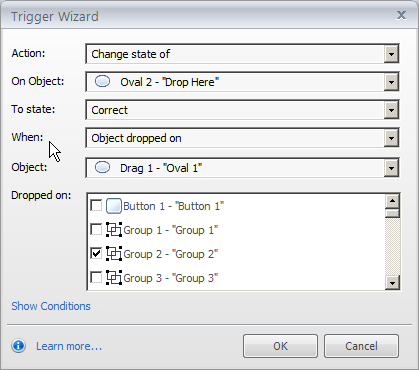
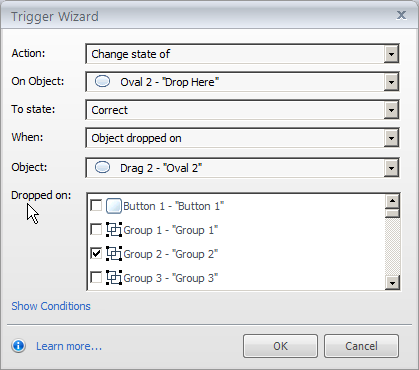
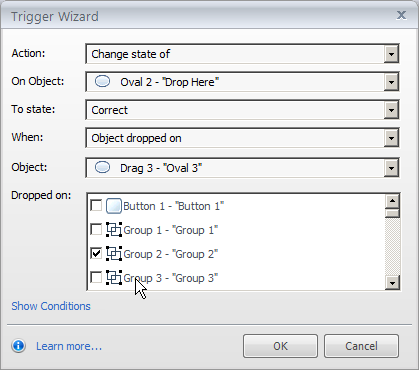
These triggers will change “Drop Here Oval 2” from the normal state to the correct state when any of the four check marks is dropped on it.
Follow the same way to create triggers that change the state of all the other “Drop Here Ovals” from the normal state to the correct state.
Create a variable.
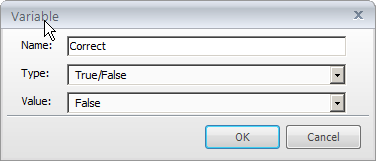
Adjust it as shown in the screenshot below:
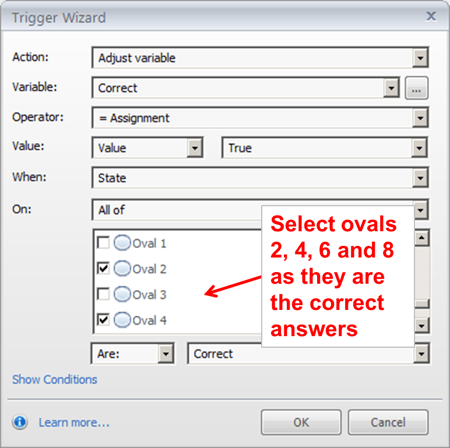
Now, create the following triggers to submit the interaction: (Feedback layers are created when you insert the inbuilt drag-and-drop slide.)
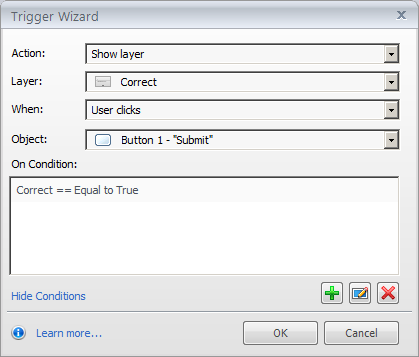
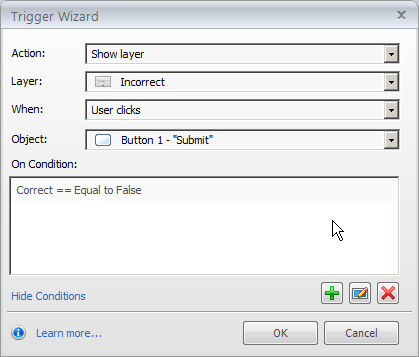
Preview and check the functionality.
This was how we achieved the requirement of our client by creating a high-level interactivity. For more such blogs on critical functionality, stay tuned to my blogs.


