How to Customize Matching Drag and Drop in Articulate Storyline?

Now-a-days, developing eLearning courses has become very easy because of rapid authoring tools. The tools come with many default features which may not suit the content you are handling. Some amount of customization may be essential. If you want to know more about how one can customize the tools, check out our “How to Series on Authoring Tools“.
Articulate Storyline is one of the tools that has the capability to develop the courses with rich interactivities. With a little customization, you can have interactivities that suit the content and needs of the course. In this blog, I would like to share how you can customize the drag and drop feature in Articulate Storyline to provide more options and convenience to your learners.
Customizing Matching Drag and Drop
There are two types of drag and drop question types. They are:
- Matching drag and drop
- Sequence drag and drop
If you would like to have a firsthand experience of what I am talking about, Click here to try out the simple drag and drop exercise and then read on for further explanation.
In the default matching drag and drop interactivity, a learner drags content from one column and drops it in the second column. However, if the content is more on the drag side, and the learner drags it into the drop area or vice versa, it leads to distortion of content or illegible content as shown in the figure below.
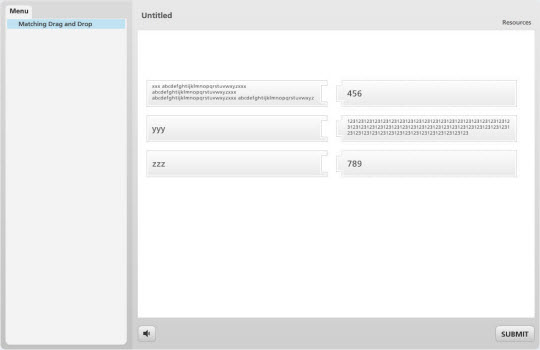
To avoid this situation, you can customize this interactivity in Articulate storyline with the help of visible lines linking the content in column A with the one in column B.
Here is a step by step guide to customize this feature.
Step 1:
Let’s see how you can create a matching drag and drop with 3 items.
First you should create drag items and drop areas and also the lines that connect between drag items and drop areas. You should initially place the lines in hidden state. So here you have 3 matching lines for each drag item. So in total you have 9 lines say (line1, line2, …….., line9).
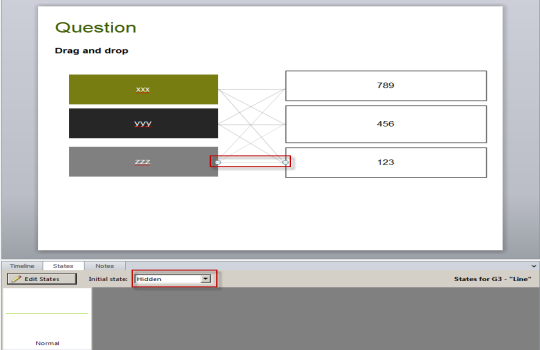
Step 2:
Now you can change the “line1” to normal when you drag the first item in the first drop area, “line2” to normal when you drag the first item in the second drop area and “line3” to normal when you drag the first item in the third drop area. Also you should change the state of the lines to hidden such that “change line1 to hidden when line2 or line3 or line4 or line7 are normal”. Similarly, you can apply the same function to the remaining two drag items and lines.
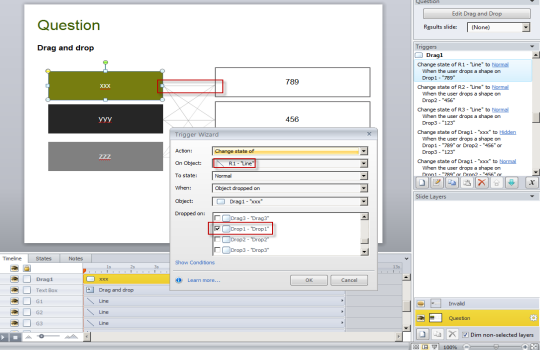
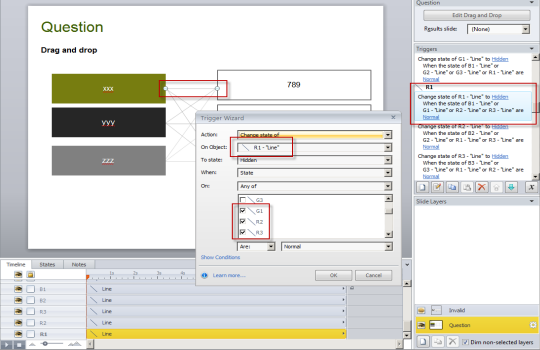
Step 3:
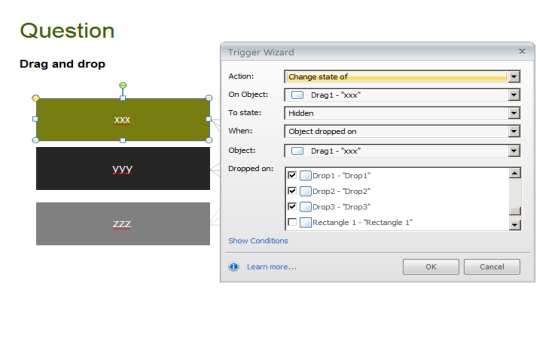
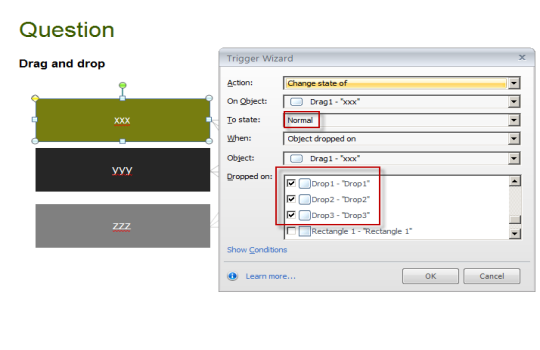
With the help of this interaction, learners match the items any number of times before submitting. For this purpose you can change the state of drag items to hidden when you drop in any drop area and at the same time you change it to the normal state.
Step 4:
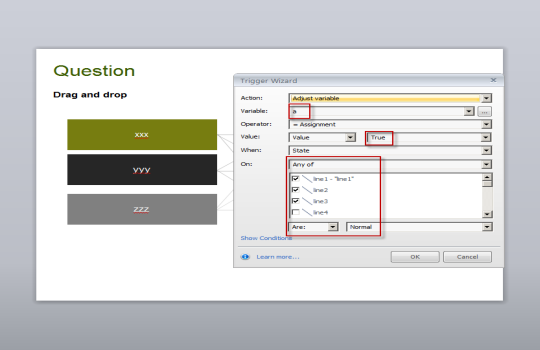
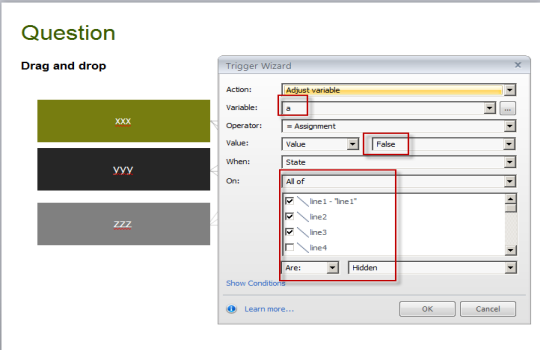
Now we can take the 3 variables for this interactivity say (a, b and c with default value “false”). Now we can change the value of “a” to “true” if line1 or line2 or line3 is in normal state and change the value of “a” to “false” if both line1, line2 and line3 are in hidden state.
Step 5:
The last step, a very important one, is that, when will you allow submission by learner. We should allow learners to submit the answers only if all the three drag items drop in three different drop areas. If any drag item does not drop or overlaps with the same drop area, then the interactivity should not be submitted. For this purpose, you should write a function such that “Submit interaction when all variables a, b, and c are equal to value true”.
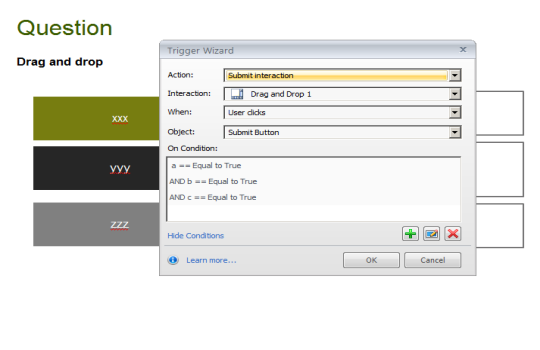
After following the above steps the matching drag and drop interactivity works fine.
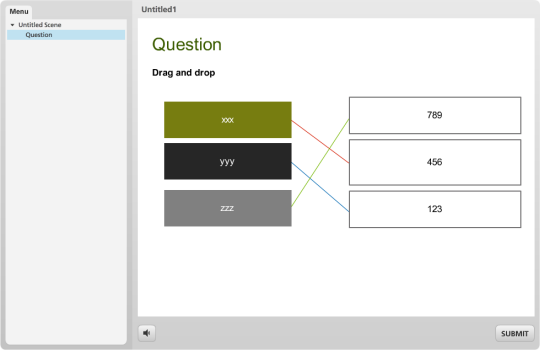
Customization provides you with more options to create various types of interactivities in Articulate Storyline. By creating these types of interactivities, you can develop graphically rich eLearning courses in storyline.


