Creating a Crossword Puzzle is Easier than Ever with Articulate Storyline
According to the report “Gamers Over 50 Study: You’re Never Too Old to Play” by the Entertainment Software Association, 48% of adults aged 50 and more play games and 70% of them use computers and mobile devices for that. So, this busts the myth that games attract only kids.
→ Download eBook Now: Rapid eLearning Authoring Tools
Games attract only kids is a MYTH! we can replace bland multiple choice questions in online courses with small games. This helps learners overcome the “test” fear and complete assessments playfully. In my previous blog, we have seen how to create a crossword puzzle in Articulate Storyline. In this blog, we will see a simpler method to create the same game.
Step 01: Creating the Puzzle Table
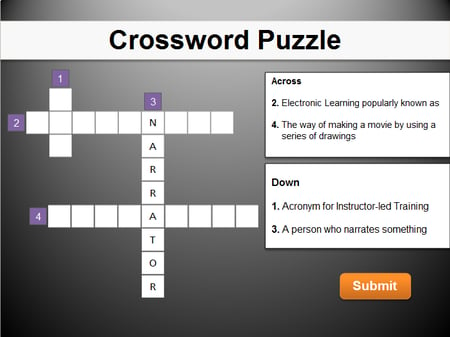
Create the crossword table and add numbers to indicate the questions as shown in the screenshot below. The number of blocks in each answer will depend on the number of characters your answer accommodates. My answers elearning, ILT, Narrator, and Animation have 9, 3, 8, and 9 characters respectively.
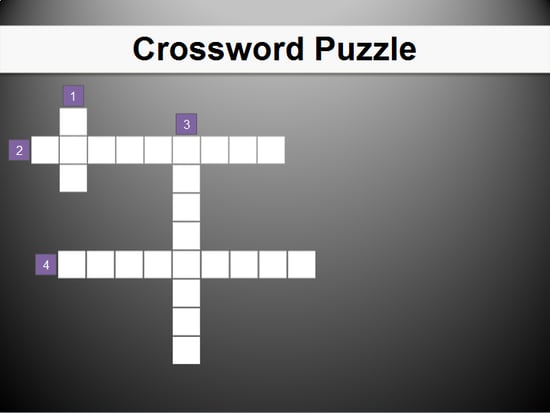
You can create the table using the shapes available in the tool; but to simplify the process, I’ve created it using Photoshop and saved it to the .PNG format with a transparent background. I’ve created the number blocks in Articulate Storyline so that they can be clickable.
Step 02: Placing Questions
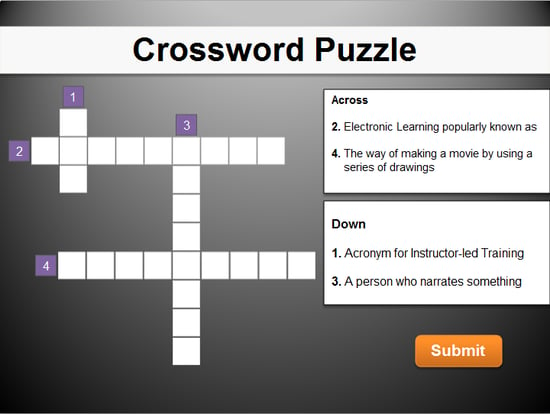
Besides the table, place your questions sorted according to the alignment (across or down) of their answers as shown in the screenshot below. Also, create a Submit button.
Step 03: Creating Answers
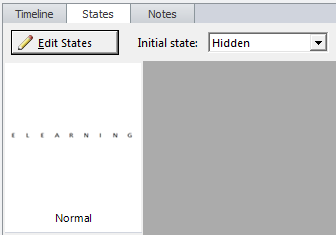
Again in Photoshop, break the table into individual rows and columns populated with right answers. Save it to the .PNG format as well. Import these individual bits and place them on their respective rows or columns as shown in the screenshots below.
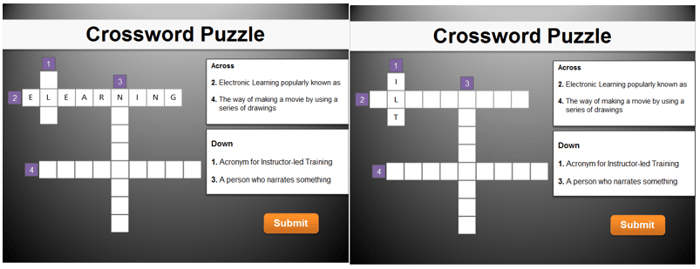
Ensure these images with the answers are initially in the Hidden state.
Step 04: Creating Slide Layers
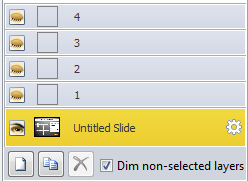
Now, create slide layers. The number of slide layers depends on the number of questions you have in the puzzle. I have 4 questions, so I create 4 slide layers.
Step 05: Creating a Popup
In each of these slide layers, create a popup as shown in the screenshot below.
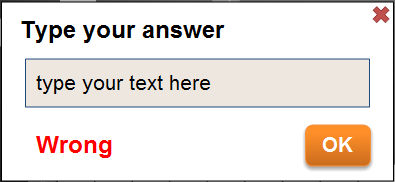
As I mentioned in the earlier post, the game of crossword is all about entering text in the correct slots. So you must have a Data Entry field. Apart from this, you must have a button to submit your entry and a statement or a word to inform learners if they enter a wrong word. The Data Entry would either be Text entry or Numeric Entry, based on the characters it would accommodate as the answer. The statement or a word (that informs learners in case of a wrong attempt) should be in the Hidden state.
Do not forget to add a trigger to the ‘X’ button to close the layer.
Step 06: Creating Feedback Layers
Now, create two layers to display feedback – one for the right answer and another for the incorrect.
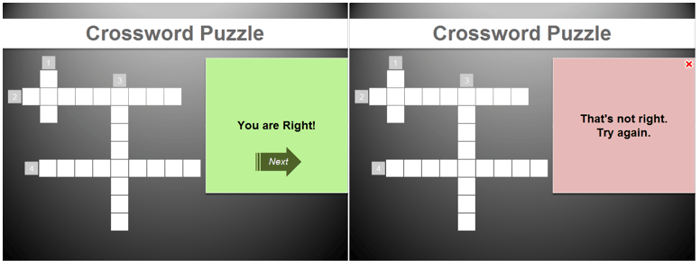
Step 07: Add Triggers to Show Layers
Now that all the components are in place, it’s time to add a few triggers and make the game functional.
Select block number 1 and add a trigger to show layer 1 when it is clicked.
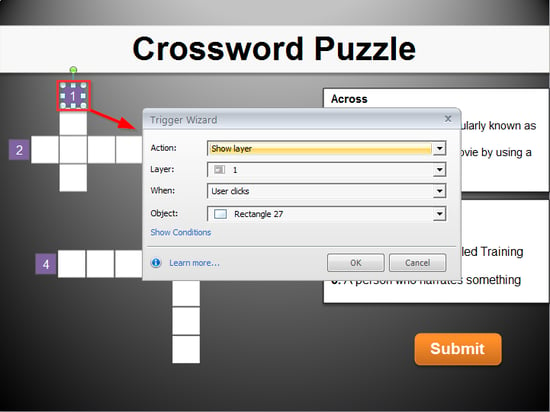
Add similar triggers to blocks 2, 3, and 4 so that they show the respective layers when clicked.
Step 08: Add Triggers in the Slide Layers
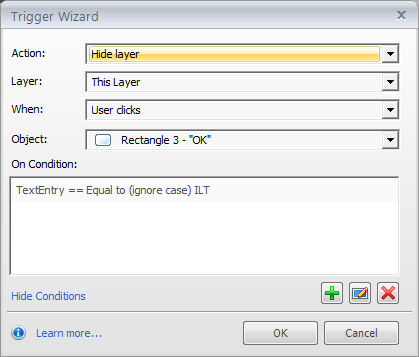
Now, go to layer 1, select the OK button, and add a trigger with a condition as shown in the screenshot below. This trigger is to accept the right answer.
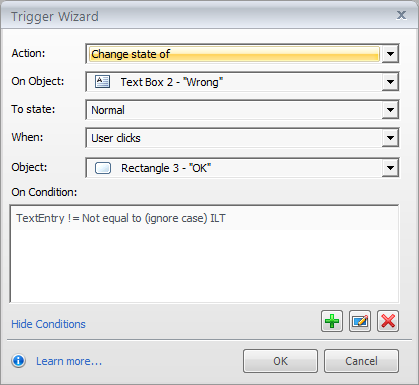
Add another trigger as shown in the screenshot below to reject the incorrect answer.
Step 09: Add Triggers to Display Entered Answers
Remember, we created the images of answers, put them on the respective rows or columns, and hid them? It’s now time to add a trigger to reveal them.
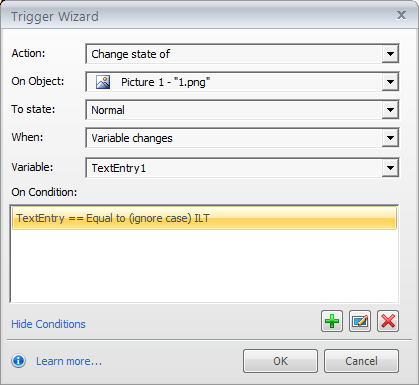
Similarly, add triggers to reveal all the others answers when a learner enters the correct answer.
Step 10: Add Triggers to Submit the Answers
Finally, select the Submit button created in the base layer to add a trigger to.
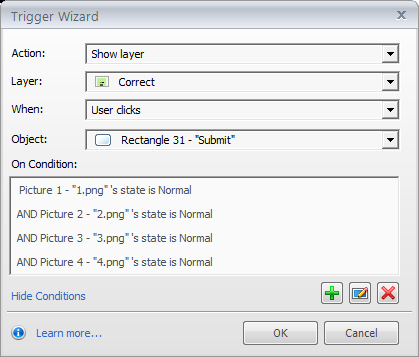
This trigger shows the feedback layer of the correct answer. Now add a trigger to show the feedback layer of the incorrect answer.
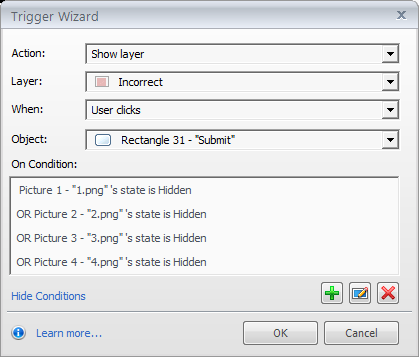
That’s it! I know it seems a bit lengthier than the previous method; but when you compare it with the confusion of adding numerous conditions, you’ll find this one a bit easier. So what are you waiting for? Create such crossword puzzles instead of bland multiple choice questions in your e-learning courses and let your learners play instead of undergoing a test. Do share your views.


