How to Create Click on Tab with Advanced Action in Adobe Captivate 7?

Do you know how to apply the conditional and advanced action in Adobe Captivate 7? Do you know how to create customized interactive slide with these actions? These actions will be really helpful for those people who want to create their own Interactivity. Let’s see some tips for creating multiple interactivities with advance actions and conditional actions that will help you to work fast in captivate project.
In this blog, we will explore the steps to create a design which is shown in the image below.
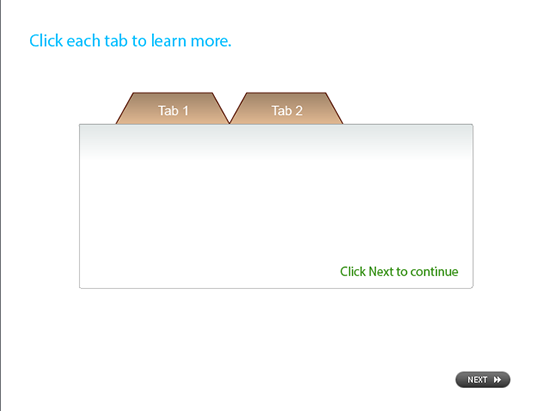
Step 1: Here are the basic steps
- Insert a name for all the slide objects.
- Make the check marks invisible for tab1 and tab2 text, Instruction text and next button.
- When we click the tab1, text should appear; in the same way, when we click the tab 2, text should appear. After you click both the tabs, instructions and the next button should appear.
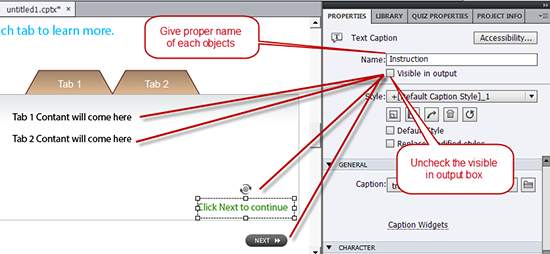
Note: If there are more objects on the screen, then make it a group and name it for easy identification.
Step 2: Create user variable for tab1 and tab 2 buttons
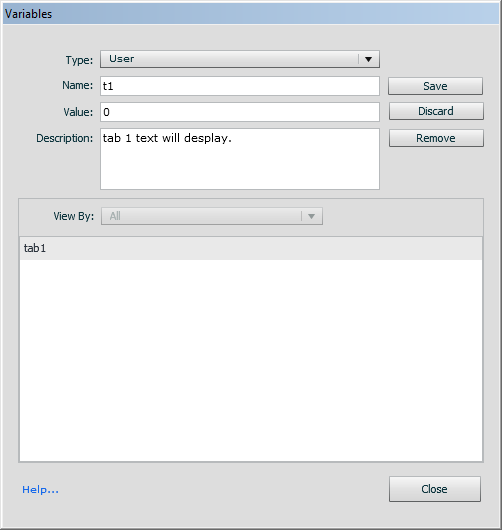
- Project>variable>Add New and name it (I have named it as t1 and t2). (See the screen below.)
- Click Save.
- Repeat steps for tab 2 button, that you want clicked.
- Close the variable window.
Step 3: Create Conditional Advanced Actions for each interactive object
-
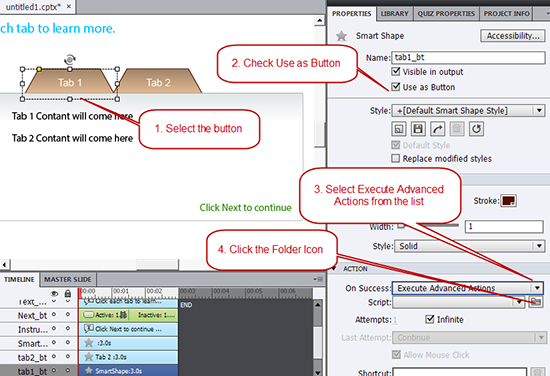
- Select the tab 1 and tab 2 buttons
- Go to the Properties Panel
- Check the Use as Button
- 4. In Action>On Success, click the drop down list and select Execute Advanced Actions
- In Script> click on the folder to open the Advanced Action box
-
- Click the plus sign to add a New Advanced Action.
- In the Action type, select Conditional actions.
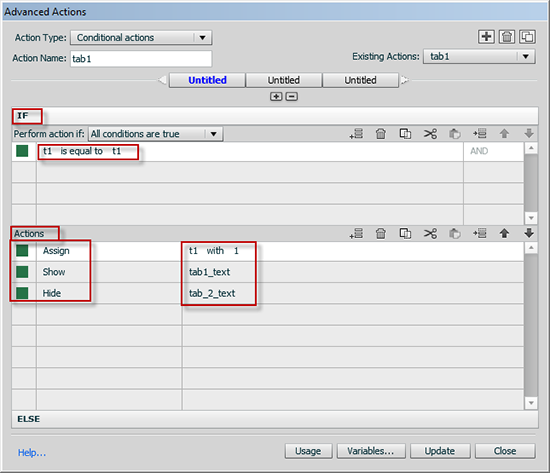
- Action Name: type in t1.
- Under IF create the Script: t1 is equal to t1.
Under Actions:
- Assign: t1, with 1.
- Show the tab1 text.
- Hide the tab2 text and click the update button. (Make sure this is the order in which you do these steps.)
Step 4: Create All Clicked Advanced Conditional Action
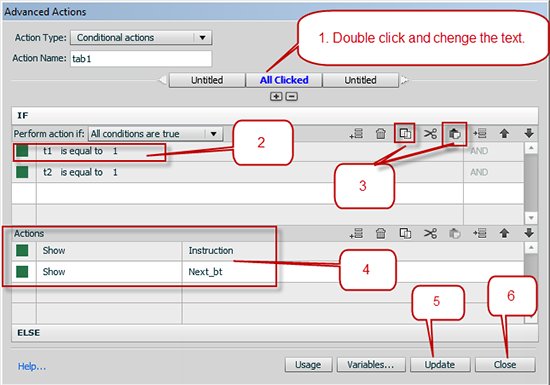
- Go to the second tab and double click to rename it as “All Clicked”.
- Double click in the first column and select your variable (t1), then click in the second column and select “is equal to“; then click in the 3rd column and select “Literal“. Type in the number 1 and select enter on your keyboard or just double click in the next row down.
- Duplicate this for the variables (t2) that apply or you can copy/paste the script and just change the variable name.
- Under Actions show the Instruction text and the Next button.
- Click the Update button.
- Then click the Close button to close the Advanced Action window.
Step 5: Duplicate the action
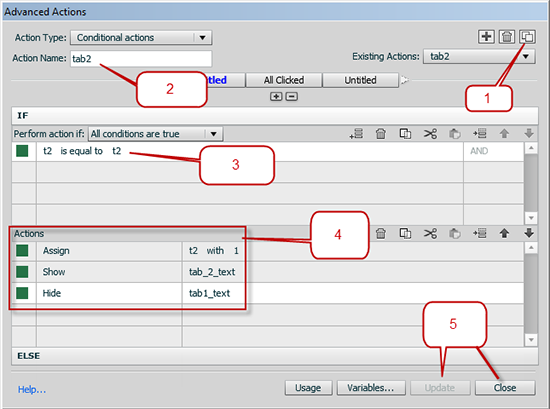
- Duplicate the action by clicking the icon in the upper right corner.
- Rename the actionas “tab2”.
- Change the Actions to the next variable (t2).
- Show tab 2 text and hide the rest of your objects.
- Click Update and Close.
Step 6: Ensure your Smart Object is attached to correct Advanced Conditional Action
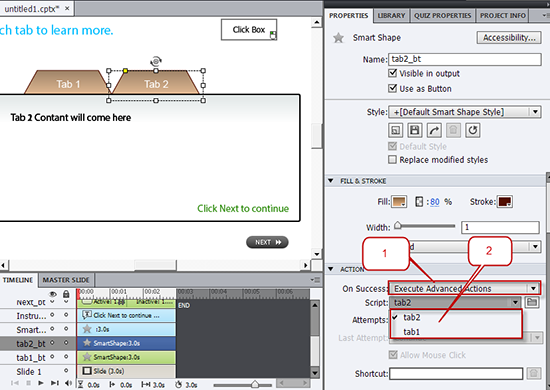
- With the button selected on the slide, go to Properties/Action/On Success, ensure that select Execute Advanced Actions would be selected.
- Properties/Action/Script, click on the drop down and select the advanced action that matches for tab 1 and tab 2.
Step 7: Add the click box to stay on the slide
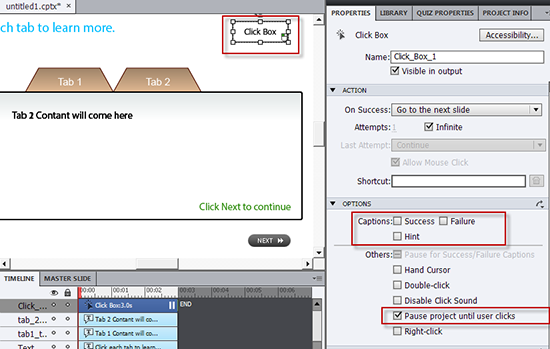
Here is the video, which clearly explains the steps.
[jwplayer mediaid=”38815″]
Using the above steps, you can develop click on numbers, click on images, slide shows FAQs and many more. In my next blog, I will explain the steps to create branching scenarios.


