Adobe Captivate to Convert PowerPoint Presentations to E-learning

Rapid e-learning is on the rise. Many organizations prefer to convert their PowerPoint presentations, used in classrooms, into interactive e-learning courses using rapid authoring tools. According to the Training Industry 2015 Report2, 51% of organizations have used this method for creating e-learning courses for their employees.
A key element in the conversion of PowerPoint presentations, used in instructor-led training sessions, into interactive and engaging e-learning courses, is the use of the right rapid authoring tool3. Today, we will see how to accomplish the task using a widely used rapid authoring tool – Adobe Captivate.
Here are the steps:
- Open the PowerPoint presentation you want to convert to an e-learning course.
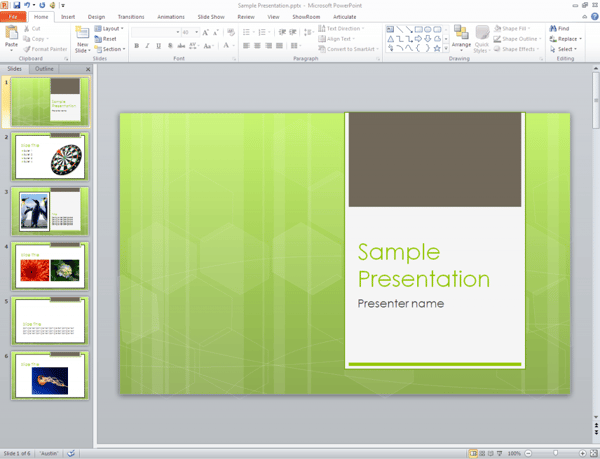
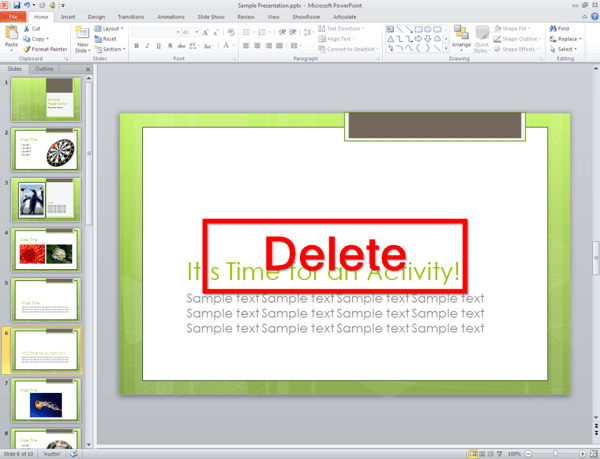
- Identify and delete unwanted slides from the PowerPoint. For example, you might have a few slides containing activities to be performed in the classroom such as a contextual role play. Such slides might not help in an e-learning course as it is self-paced.
- Add a blank slide to the PowerPoint as we will need it to copy the theme to the assessments, interactivities, and other slides we might add in Adobe Captivate.
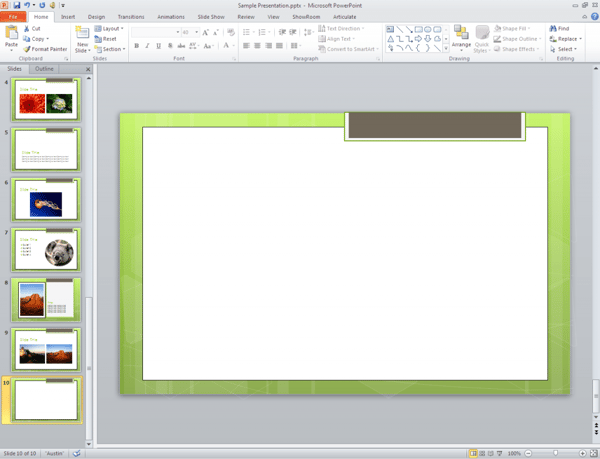
Save this document in the desired location.
- Now, open Adobe Captivate installed in your computer.
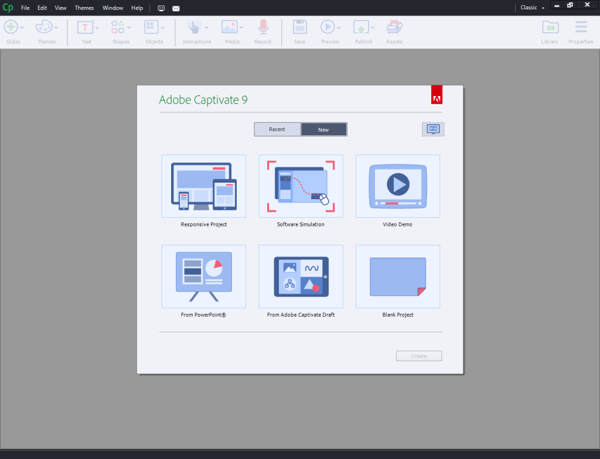
- From the new project options, select From PowerPoint® and click Create.
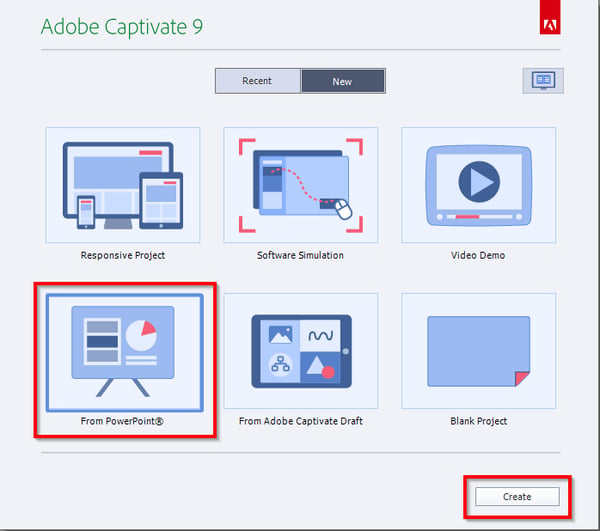
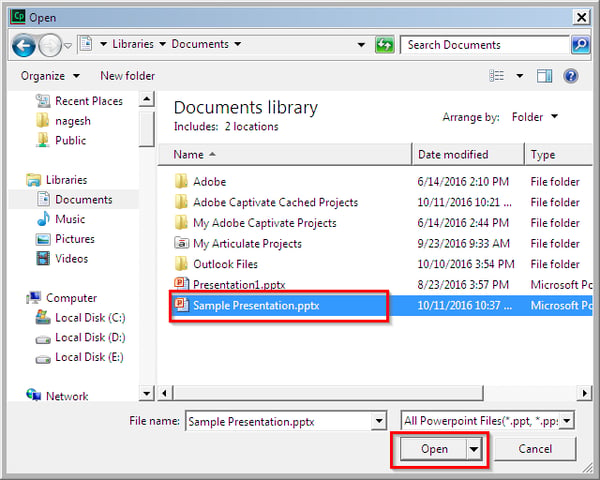
- Browse through your drives to the location where you saved your PowerPoint document. Select the file and click Open.
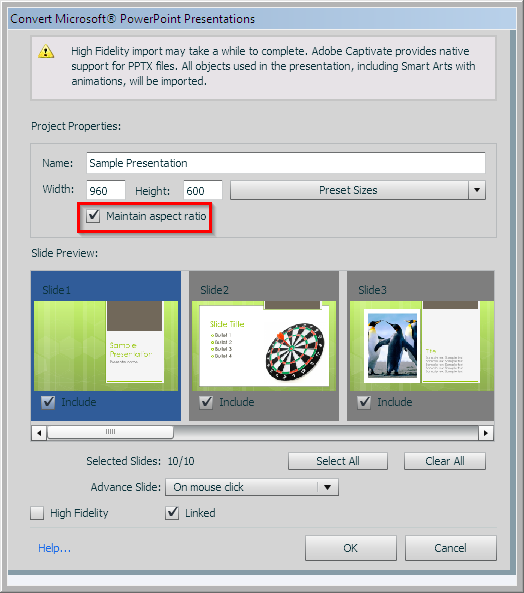
- You will see the Convert Microsoft® PowerPoint Presentations Ensure the Maintain aspect ratio is on.
- Choose the way you want to navigate from the available options.
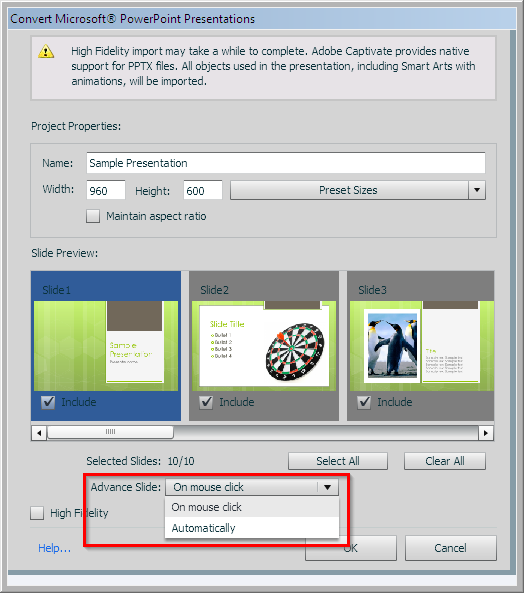
The option on mouse click would create a click box on every slide to navigate to the next slide. If you choose automatically, the slide automatically navigates forward on completion.
- Ensure the Linked option is on so that whenever you do any modifications to the PowerPoint presentation, it will be updated automatically to the Adobe Captivate file, while developing the e-learning course.
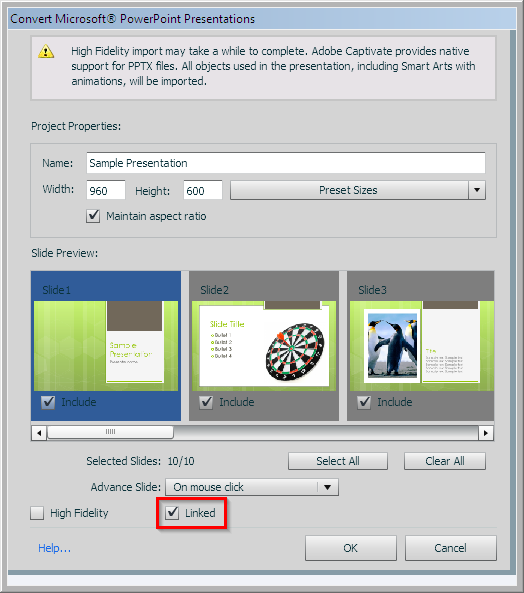
Note: The PowerPoint document must be in the same location from where you imported it into Adobe Captivate. If you change the location or the any folders’ names in that path, the modifications will not be reflected in the Adobe Captivate file.
Once you have completed all the settings, click OK. You can see all the PowerPoint slides have been imported into Adobe Captivate.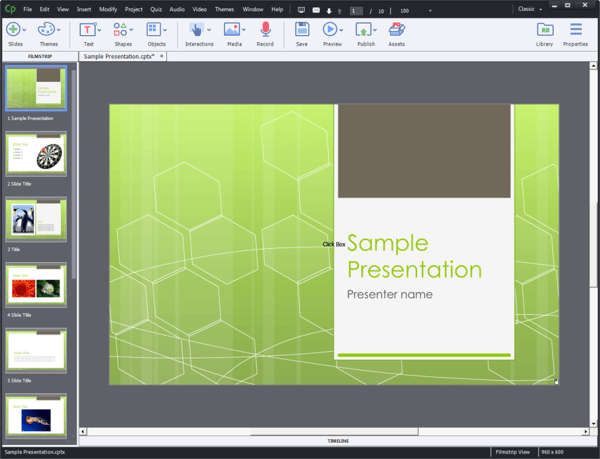
- If you want to add audio narration to the slides, Adobe Captivate allows you to record narration using built-in machine voice. To record the narration, connect your microphone to your computer, and select the Record option on the ribbon.

To create machine voice narration, click Speech Management from the Audio menu.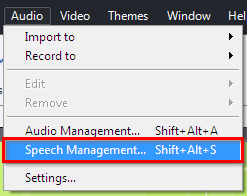
The Speech Management window appears. Select the Speech Agent you like.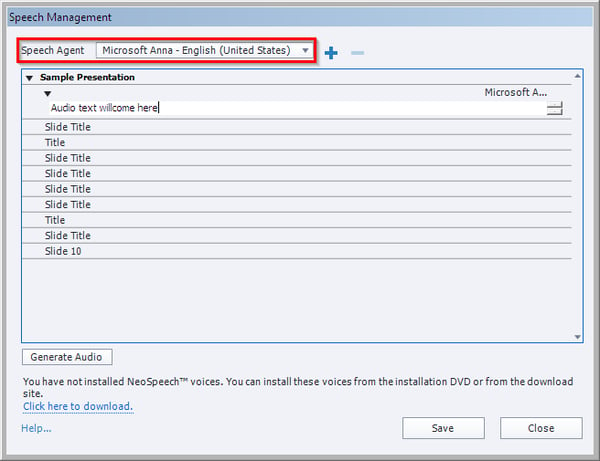
Now, click the plus mark to enter the text to be narrated.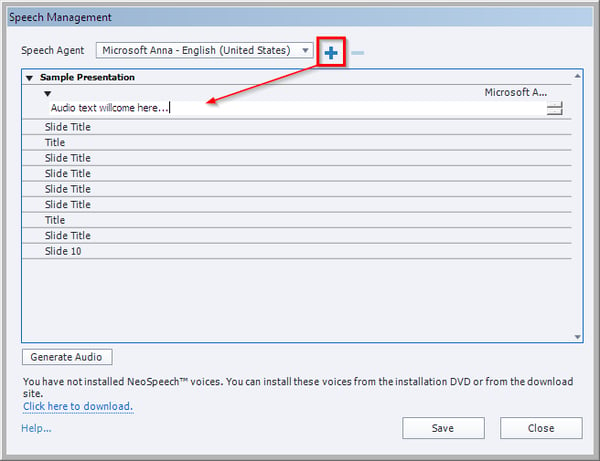
Now that we have added the audio narration to the slides, let’s start adding some interactive slides.
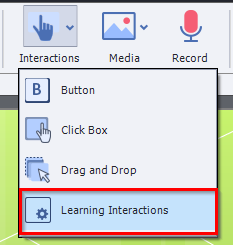
- Click the Interactions tab on the ribbon and select Learning Interactions from the dropdown list that appears.
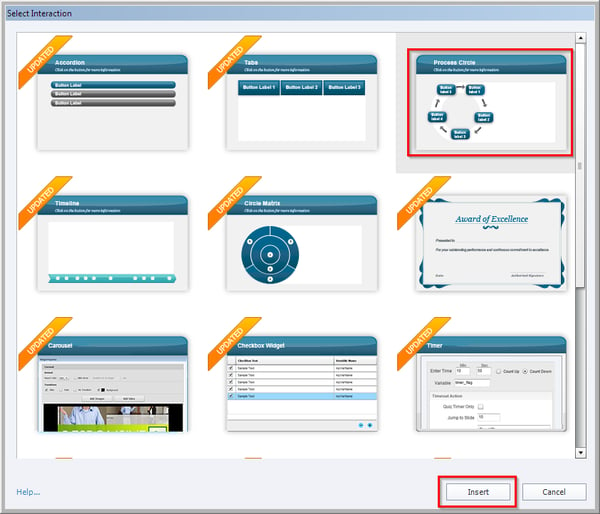
- The Select Interaction window appears. Select a template appropriate for the content and click Insert.
- The Configure Interaction window appears. Add the desired text to it and modify its look using the options on the left.
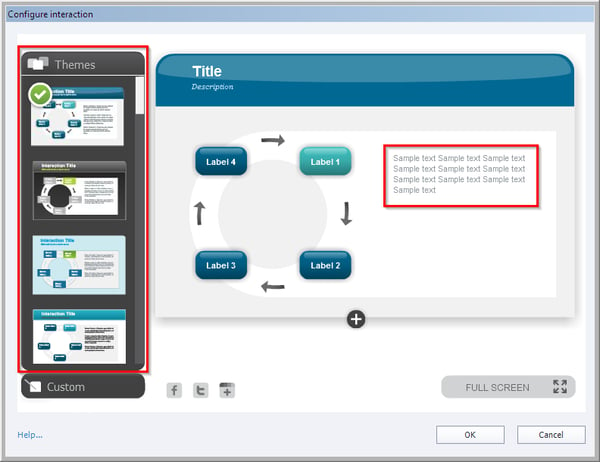
Click OK once you are done. Now, let us add an assessment slide.
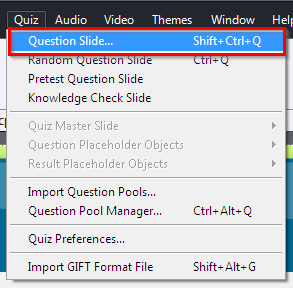
- Click Quiz from the Menu and select Question Slide.
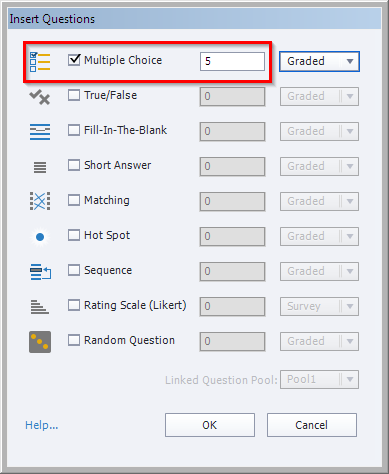
- The Insert Question window appears. Select the type of assessment you want to add, the number of slides, and click OK.
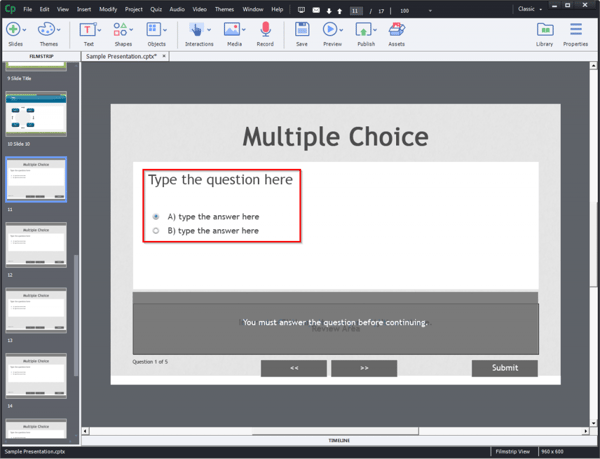
- Once the slide is added, enter the question and options.
- The assessment slide comes with default feedback text. You can modify it if you need to. Also, when the slide is inserted into the project, you see that the theme you have used for the other slides is not applied to the quiz slide. It has a default theme. To apply the theme, go to the blank slide you have inserted from PowerPoint, right click on the slide, and select Copy Background.
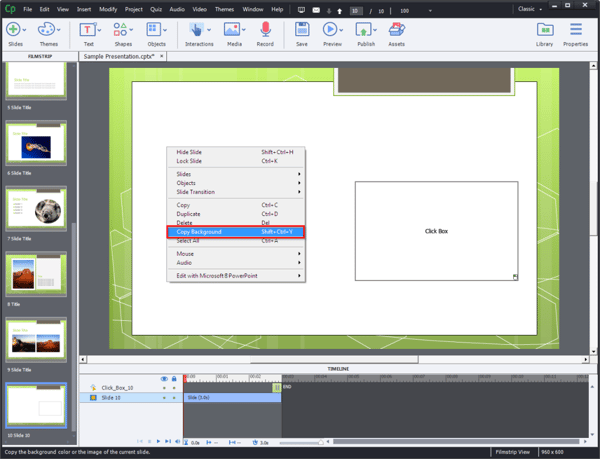
Go back to the interaction slide, right click on the slide, and select Paste.
Now that you have added all the elements to your e-learning course, it’s time to review the course for functionality, design, and other issues.
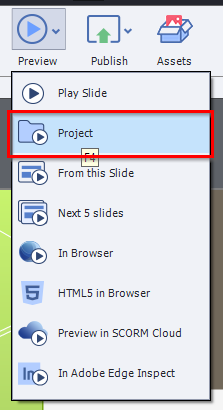
- To preview the course, click Preview on the ribbon and select Project.
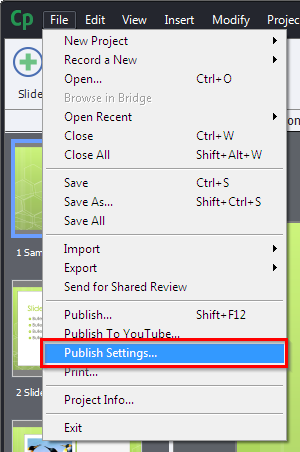
- Once the review is done and the issues, if any, are addressed, you can go ahead and publish the course. Select File from the menu and click Publish Settings from the dropdown.
- The Preferences window appears. In the Category you see on the left, select Reporting under Quiz and ensure the Enable reporting for this project is on.
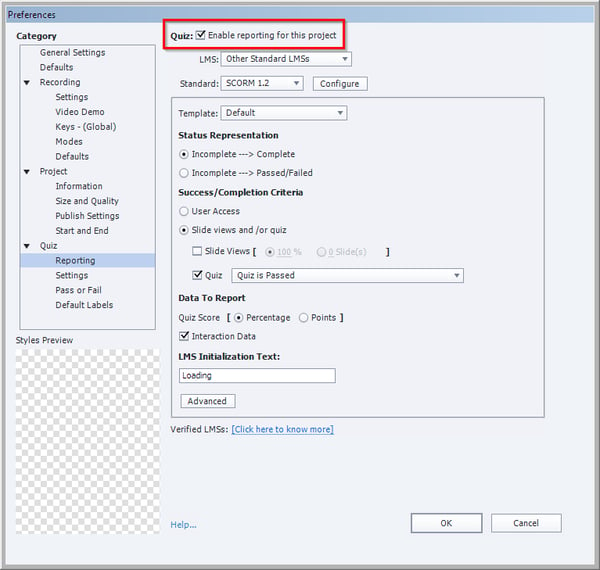
- Configure the LMS settings as per technical requirements, such as the course completion status and passing score, and then click OK to publish the course.
That’s it! Your PowerPoint presentation has been successfully converted into an interactive and engaging e-learning course and is ready to be uploaded to the LMS for your learners to use. You can go ahead and add a few videos or record your own narration to enhance your e-learning course.
Hop you find the post useful. Do share your views.


