How To Zoom In and Out Particular Part within An Object In Articulate Storyline?

Articulate Storyline tool is a weapon choice for the developer who wishes to develop out of the box eLearning course. It gives the power to develop interactive animations, apply effects, and add characters to the slide and many more. In this blog, I am going to discuss about adding zoom in effect to an object. This effect is especially effective when you want to highlight the particular part of an object. Let’s see how to zoom an object using Articulate Storyline
If we want to zoom a picture, we usually look for the option Zoom Picture, which will zoom the whole picture. But if what if you want to zoom a particular part of a picture.
We will see how it works by following these steps.
Step 1:
Go to Insert TAB.

Step 2:
After clicking on the insert tab, Click on the Zoom Region button. Add a zoom effect to the slide or picture.

Step 3:
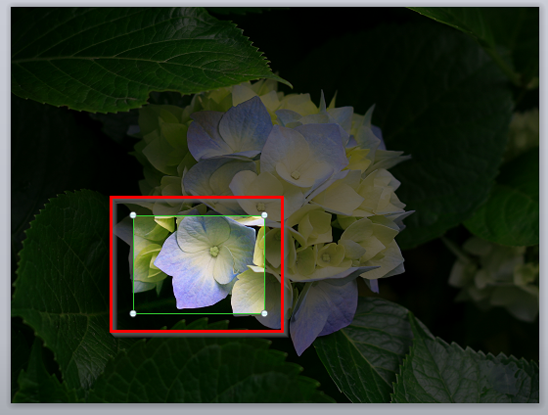
In the image below, you can see a green rectangle; the area covered under the rectangle can be zoomed.

Step 4:
Now I am selecting a particular part of an image that needs to be zoomed.

After selecting the required area, once we need to check the alignment on the TimeLine. Because to set when the zooming has to begin, is it from the middle of the slide or from the beginning.

If the object is aligned in the middle of the timeline as shown in the below image, the original size is displayed and when the when timeline reaches to the zoom area, the selected area of the object will be zoomed. Zooming time can be set in the timelines. Once the set time is elapsed, the object will zoom out to its original size.

So depends on client requirements we need to align our object into the Timeline. This is all about about the zooming feature in Articulate Storyline.
Try this and let me know your feedback.


