Creating an Interesting E-learning GUI Design in Articulate Storyline – Part 4

In my previous blog 1, I shared a few tips to customize the Resources button (in the Graphic User Interface). We have also seen how to add resources in that button. We can also customize other GUI features such as the Menu, Notes, and Help buttons.
→ Download eBook Now: Rapid eLearning Authoring Tools
In this blog, let us see how to add a “Help Button” to the GUI in Articulate Storyline.
Adding the Help Button:
It is the best way to provide navigation help so learners can proceed through the course. In the Help page, you will provide a brief explanation of the course navigation features.
As the Help button is to be available throughout the course, we need to add it in the Master slide.
We follow similar steps as used for the Menu button and Resources page.
Step 1:
Design or insert the Help button in the Master Slide.
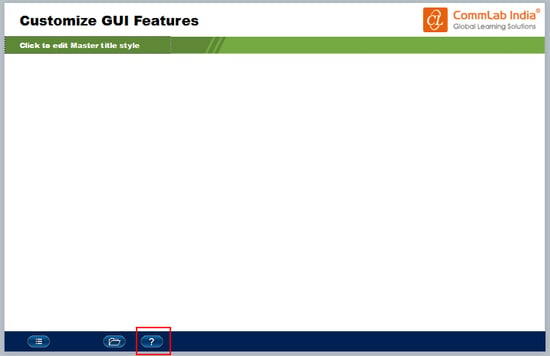
Step 2:
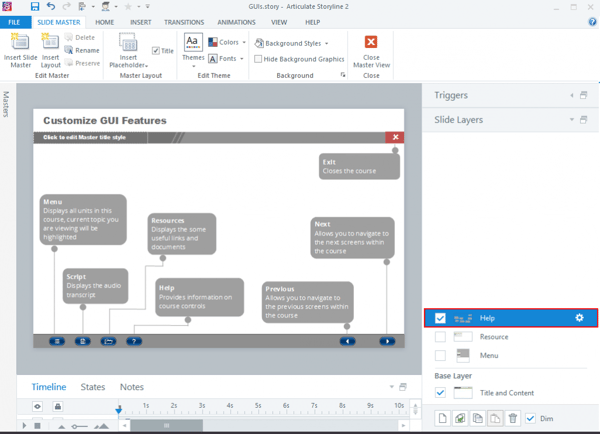
Insert a slide layer and name it “Help“. Design the Help content you want to be displayed, like the image shown below.
Step 3:
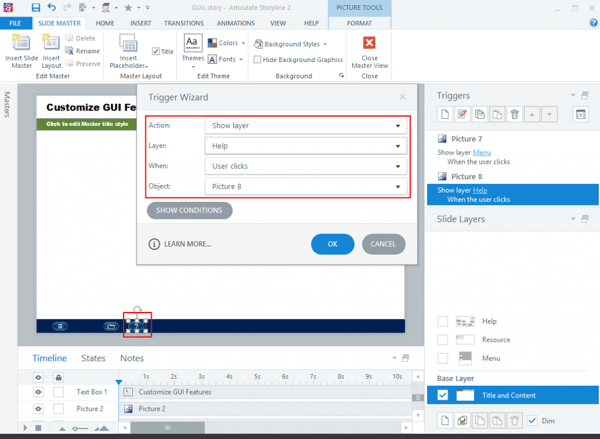
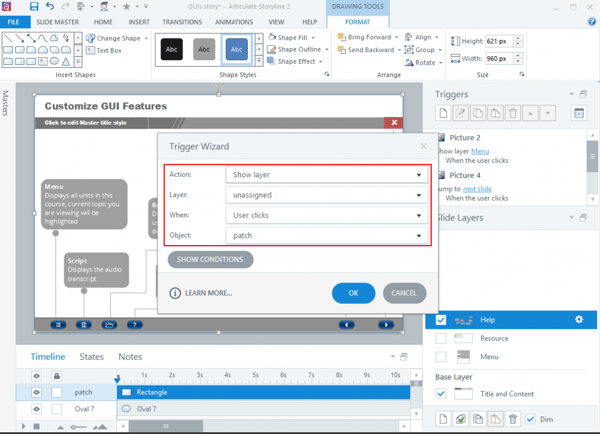
Assign a Trigger to show the layer when the “Help” button is clicked.
Step 4:
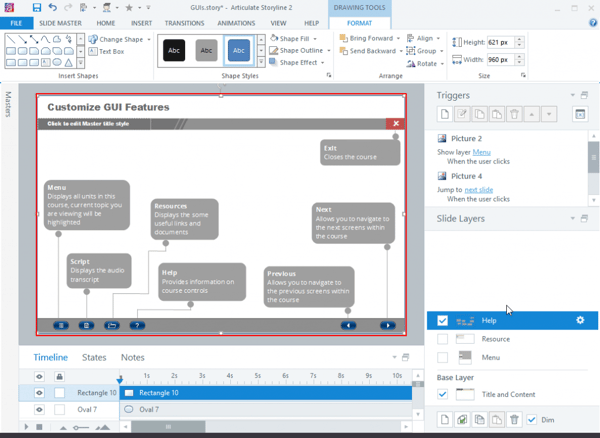
Now, add a transparent patch (when the learner clicks anywhere in the Help page, the page will be hidden).
Step 5:
Finally, add a Trigger to hide the “Help” page.
Now, Preview/Publish and check the course. The customized “Help” button is ready.
Hope these 4 parts of my blog will help you save valuable time the next time you need to customize a GUI in Articulate Storyline.
In my next blog, I will show you some useful tips. See you soon!
[1] CommLab India


