Drag and Drop Interaction without Submit Button in Articulate Storyline

Usually, in order to complete a Drag and Drop interactivity in an e-learning course, learners click the Submit button after dragging the drop options to the respective drop locations.
But you can also let your learners complete the activity without clicking the Submit button. The drag and drop interaction can automatically reveal the answers once all the objects are dropped into the targets (either correct or incorrect). Let us see how we can do this in rapid authoring tool like Articulate Storyline!
First step: Inserting a Slide
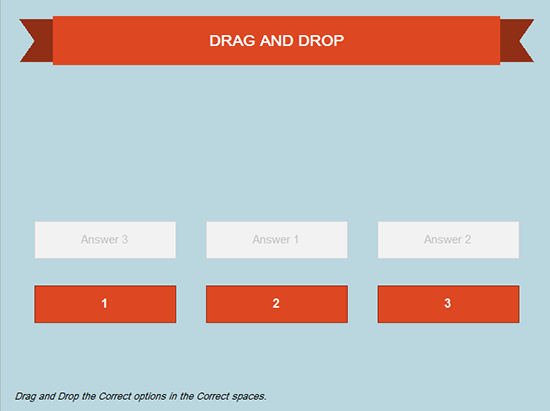
Insert a new slide and convert it to a free form drag and drop. Arrange and assign drag objects and drop targets from the Form View menu. Take a look at the screenshot below.
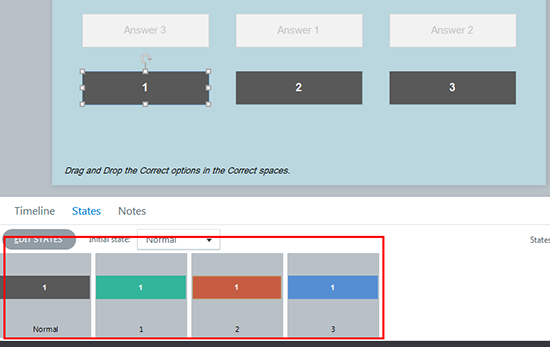
Create three states for each drag object from the Edit States option (with three different colors to observe the changing of states when we preview the slide) as shown in the screenshot.
Second step: Creating Basic Triggers
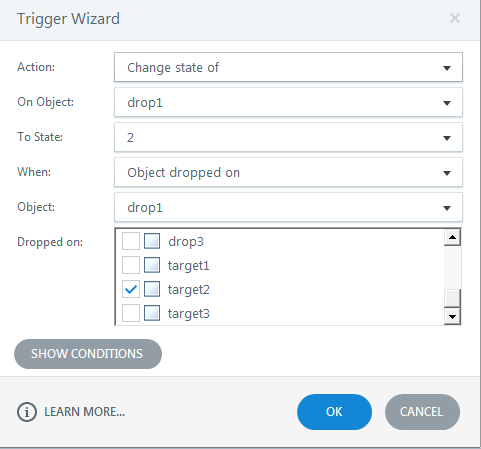
We need to create four basic triggers for each drag object.
Trigger 1:
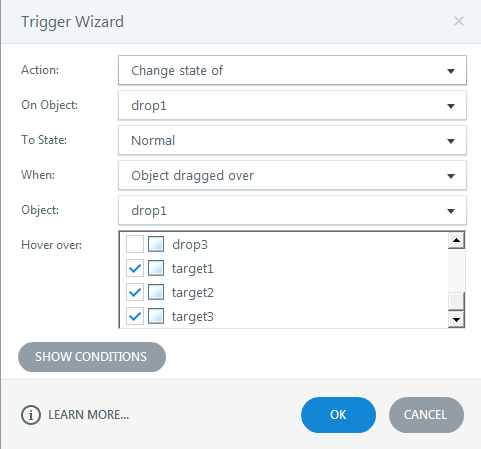
Trigger 2:
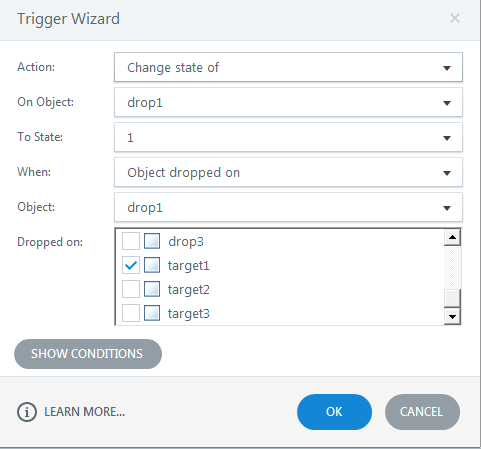
Trigger 3:
Trigger 4:
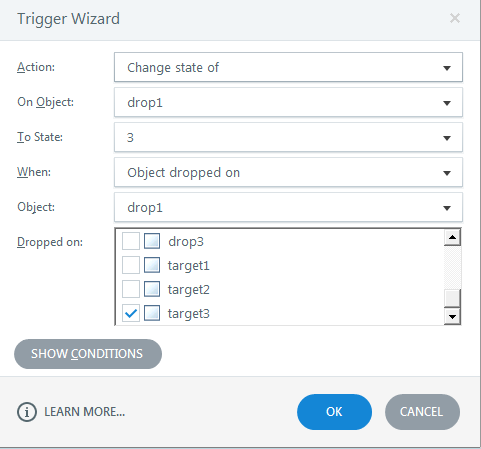
Follow the same step for all the drag objects.
For example if “drop1” is dropped on “target1”, change state of “drop1” to “1”,
if “drop1” is dropped on “target3”, change state of “drop1” to “3”.
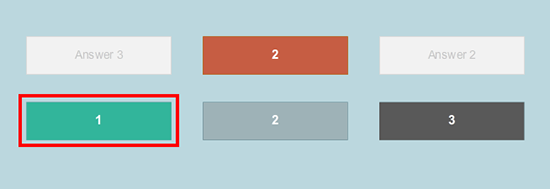
When you preview the slide now, you will observe that the states change when you drop the objects in the targets. Please observe that the returned back objects state should change to Normal state (dark gray), but instead, they settle with the previous state’s colour as shown below.
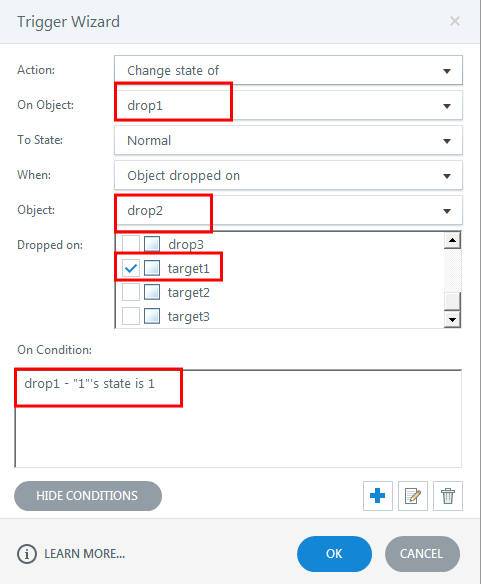
To adjust this problem, we need to add six more triggers for each drag object using conditions.
You may get a doubt as to why write more triggers with conditions. But at the end of these steps, you will fully understand this functionality.
Let’s continue.
Step 3 : Creating Triggers Using Conditions
Trigger 5:
Trigger 6:
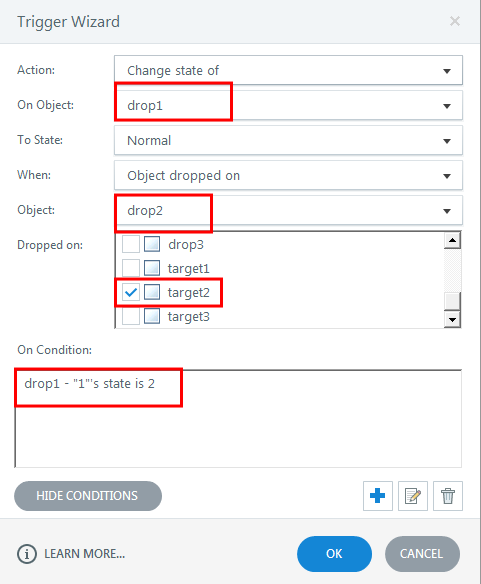
Trigger 7:
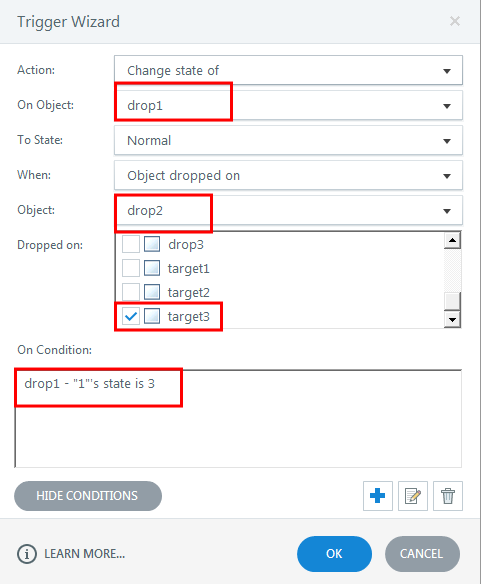
From the above three triggers, we can observe that the state of a returned back drag object will be reset to Normal state if any other drag object is dropped to a non-empty target.
These trigger combinations may create confusion, but if you observe carefully, you will understand the logic.
Create the same triggers for all the three objects.
Step 4: Adjusting a Variable for Tracking
We need to create a “number” variable named “counter” and adjust the triggers for the three drag objects as shown in the screenshot.
![]()
Step 5: Submit Interaction Trigger
Now, as the final step, we need to assign a ‘Submit interaction’ trigger as shown below.
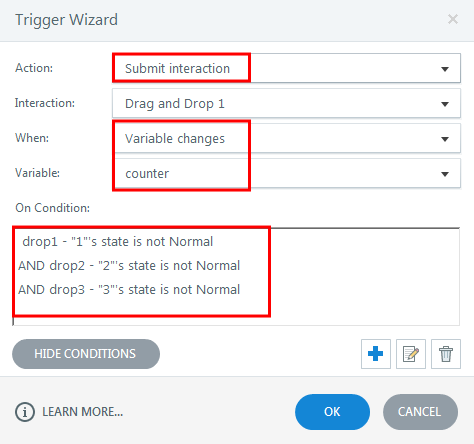
If you preview the course now, you will see the output as shown below.
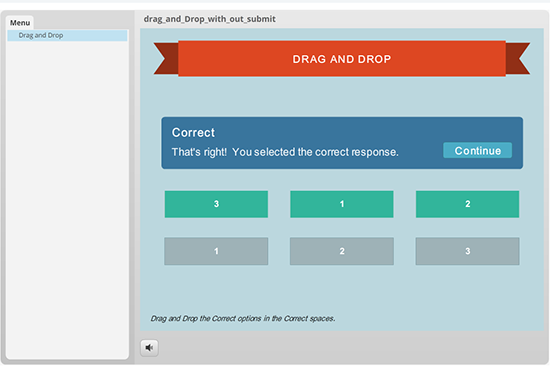
In this screenshot, we see the correct feedback has popped up automatically when all the objects are dropped in the targets.
Hope this blog was helpful. Please share your thoughts and views.


