How to Create an Interactive Menu for Online Courses in Articulate Storyline
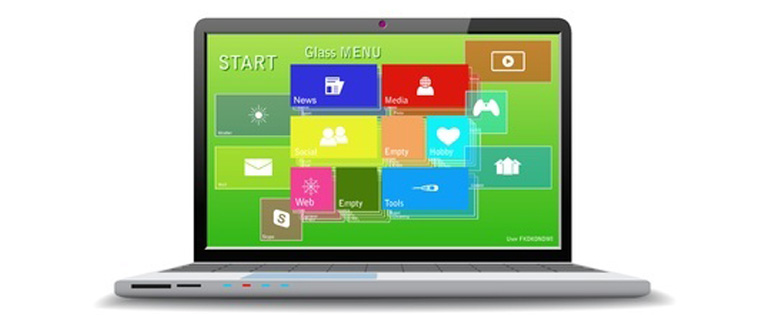
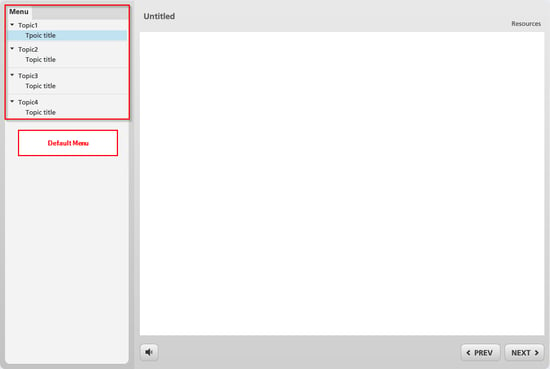
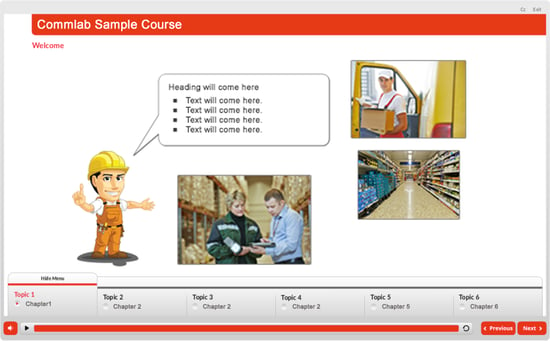
Articulate Storyline, by default, has a menu option as shown below.
But most learning designers seek to customize the Menu to make the course engaging and interactive. Here, I will share one such interactive customized menu we developed in Articulate Storyline.
The requirement of our client was to show the course topics in the menu such that the learner will be able to show/hide it a with slight up/down movement of the mouse as shown in the screenshots below.
Cusotmized Menu:When the learner wants to hide the menu
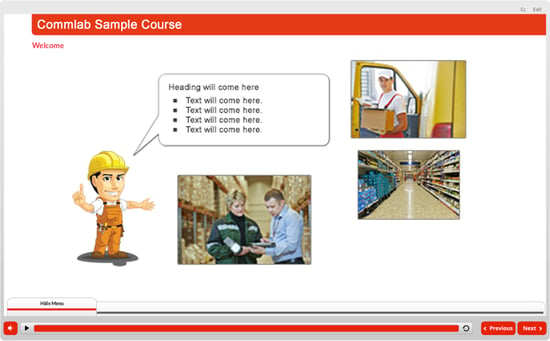
Customized Menu: When the learner wants to see the menu
Here is the detailed process of how to create such a menu :
Follow these steps to create an interactive menu.
Step 1:
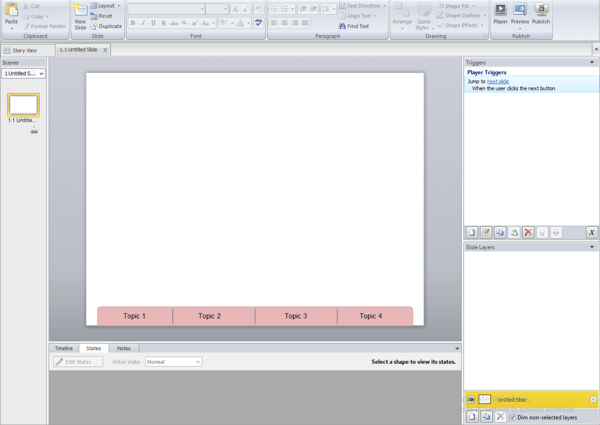
Draw a rectangle and divide it into equal partitions. Assume we have 4 topics in a course, so we divide the rectangle into 4 partitions.
Step 2:
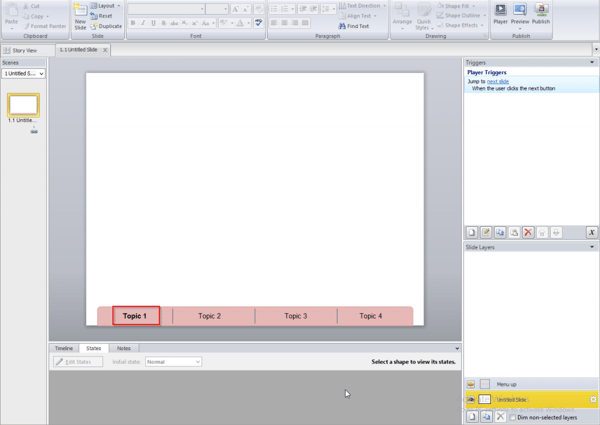
Highlight the respective topics in the slides.
Step 3:
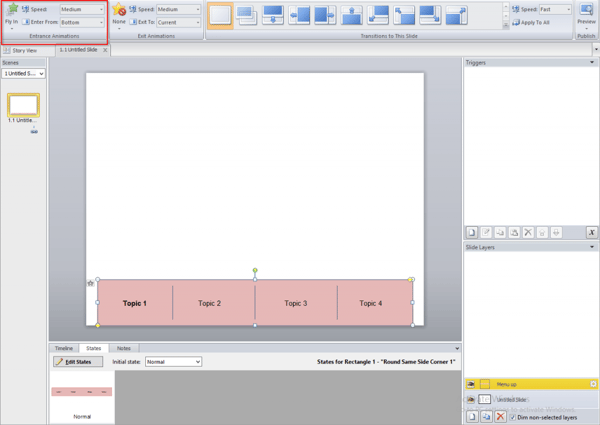
Create a layer (Menu up) and repeat Step 1and Step 2, but the rectangle should be larger than the rectangle in the base layer. Then give fly-in animation from the bottom.
Step 4:
Duplicate the layer (Menu up) and remove the animation. Rename the layer if needed. Here, we’ve renamed it Menu open.
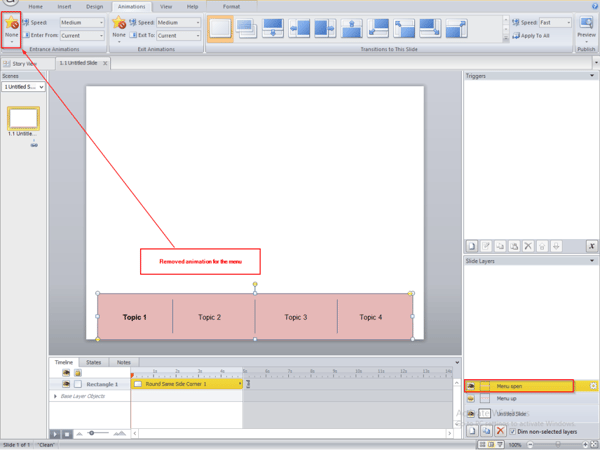
Step 5:
Duplicate the layer (Menu up) and change the animation. Give fly-out animation to the bottom. Rename the layer if needed. Here we’ve renamed it Menu down. Make sure the timeline of this layer is 1 second.
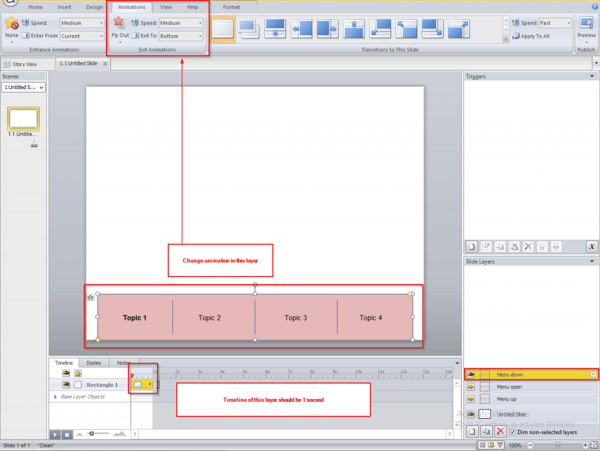
Step 6:
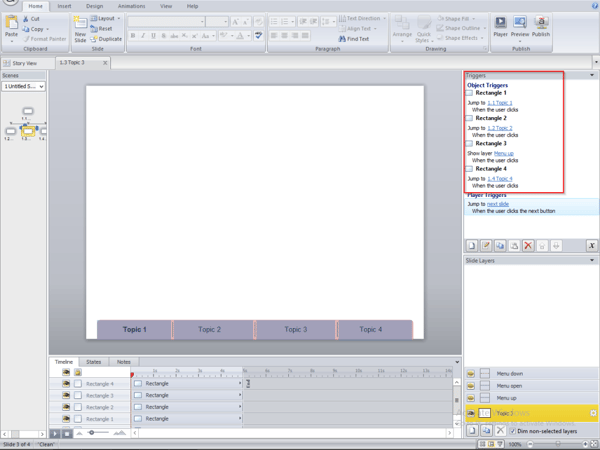
Now draw rectangles (make sure these are 100% transparent) on each topic in each layer except the Menu down layer, in all slides. Then assign triggers to those rectangles so that when the learner clicks on a rectangle, he/she will be redirected to the respective topic. If the learner clicks the same topic where he/she is, the Menu slide in slide out animation will be executed.
For that, follow the triggers given below.
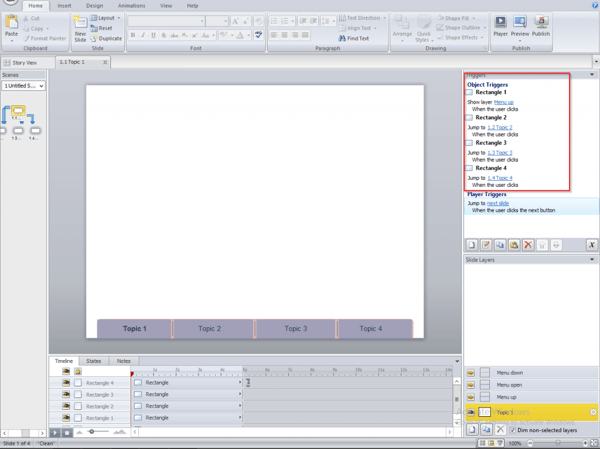
Triggers in Topic 1:
Trigger 1:
In the base layer:
Show layer Menu up when user clicks rectangle1.
In the menu layers:
Show layer Menu down when user clicks rectangle1.
Trigger 2:
In both base layer and menu layers:
Jump to slide Topic 2 when user clicks rectangle2.
Trigger3:
In both base layer and menu layers:
Jump to slide Topic 3 when user clicks rectangle3.
Trigger4:
In both base layer and menu layers:
Jump to slide Topic 4 when user clicks rectangle4.
Repeat these triggers in all the slides in this topic.
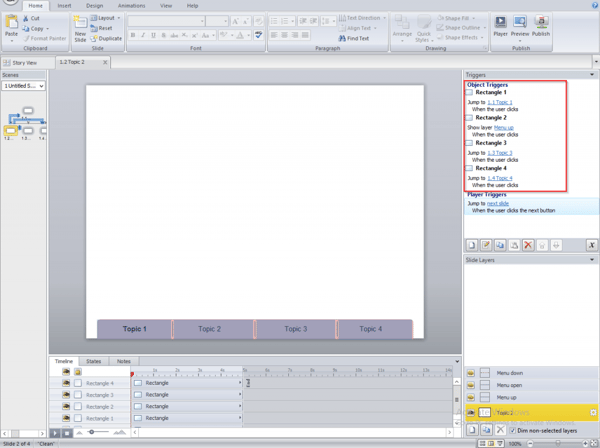
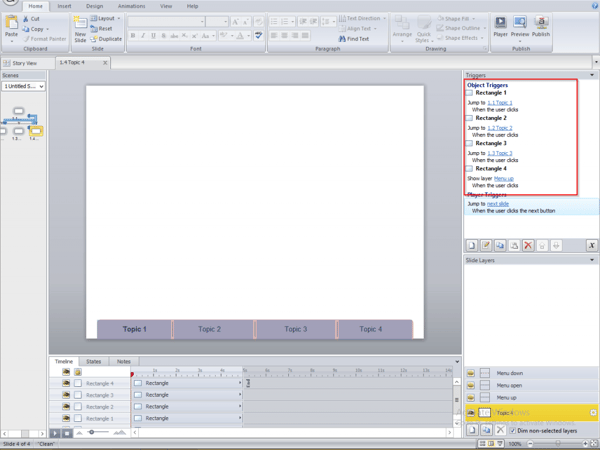
Triggers in Topic 2:
Trigger 1:
In both base layer and menu layers:
Jump to slide Topic 1 when user clicks rectangle1.
Trigger 2:
In the base layer:
Show layer Menu up when user clicks rectangle2.
In the menu layers:
Show layer Menu down when user clicks rectangle2.
Trigger 3:
In both base layer and menu layers:
Jump to slide Topic 3 when user clicks rectangle3.
Trigger 4:
In both base layer and menu layers:
Jump to slide Topic 4 when user clicks rectangle4.
Repeat these triggers in all the slides in this topic.
We thus add these triggers in all the slides.
Step 7:
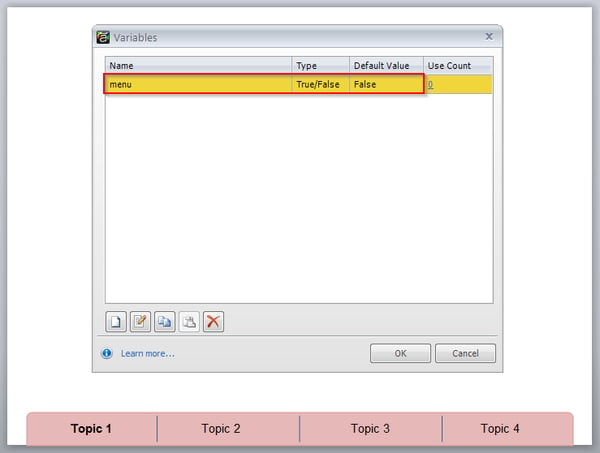
Create a Boolean variable (Menu) with False as the default value.
Step 8:
Now change the value of the Boolean variable Menu to true when the menu up layer timeline starts.
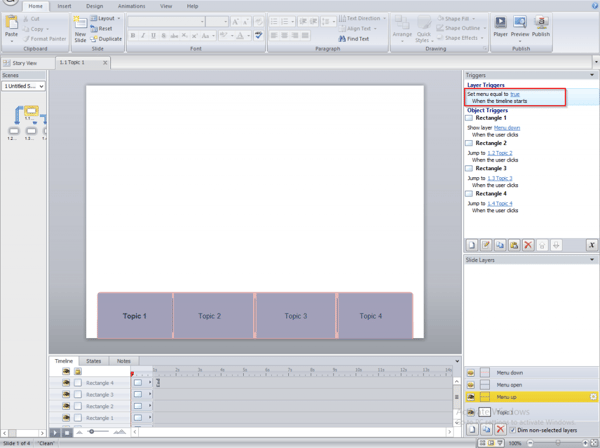
Repeat step 8 in the menu up layer in all slides.
Step 9:
Now change the value of the Boolean variable Menu to false when the menu down layer timeline starts.
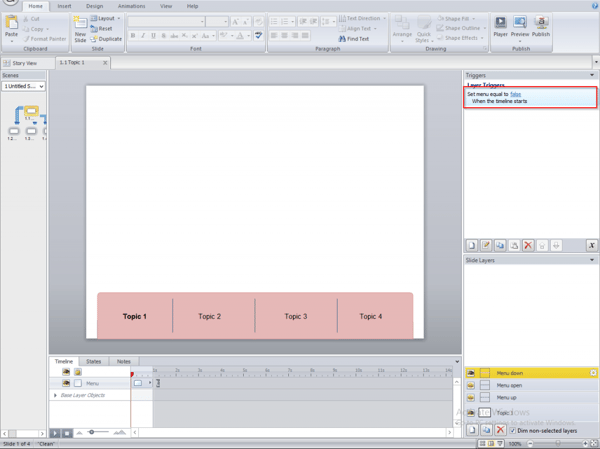
Repeat step 9 in the menu down layer in all slides.
Step 10:
Now add these triggers in all the slides.
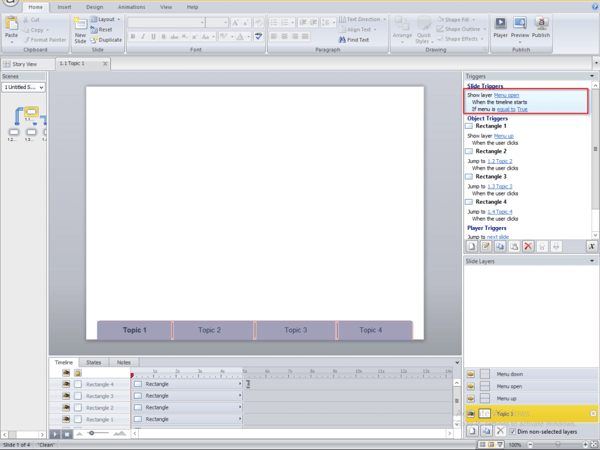
Trigger 1:
Show layer menu open when the timeline starts on the condition, Menu is true.
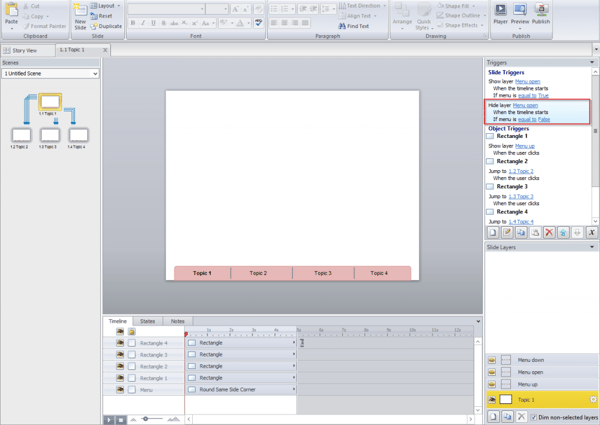
Trigger2:
Hide layer menu open when the timeline starts on the condition, Menu is false.
These are the steps to create an interactive menu in Storyline. So the next time you develop courses in this tool, hook your learners by offering them an engaging experience.


![How to Use Microlearning Before, During, and After Training [Infographic]](https://blog.commlabindia.com/hubfs/Imported_Blog_Media/microlearning-before-during-after-training-infographic-1.png)
