How to Create Customize Result page in captivate – Part 3

In my previous blog, we have seen how to assign variable values to questions, let’s now start calculating the stored variable values in the Result page.
Go to the Result page.
Before creating an action, we need to rename text in the Result page.
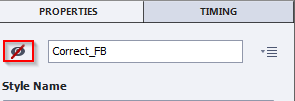
Select the “Congratulations” textfield, go to the Properties panel where you can see the defult text. Rename it as Correct_FB or anything of your choice and hide the Eye icon. Do the same do with the “Sorry” textfield. You also need to rename the RetakeQuiz button.
Score:
- Go to the Actions tab; On Enter click the folder icon where you can see the Advance Action window, select Conditional actions from the option Action Type, and rename Action Name (Score).
- In the IF condition, select YouScored variable, (select comparison operator) if the literal value is greater or equal to 50.
We need to allocate actions for final calculations of the score; to understand better, see the below table where the actions and their respective variables are shown.
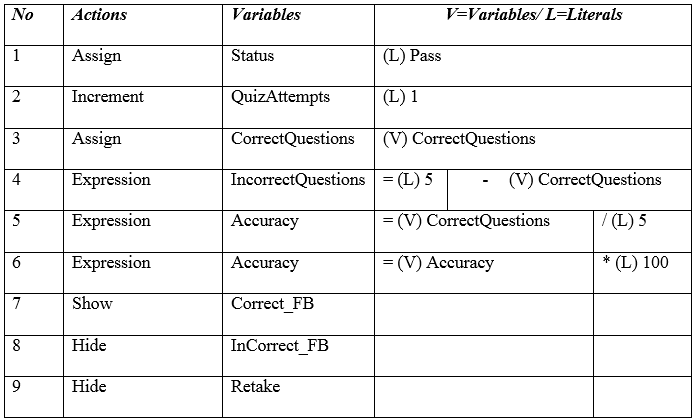
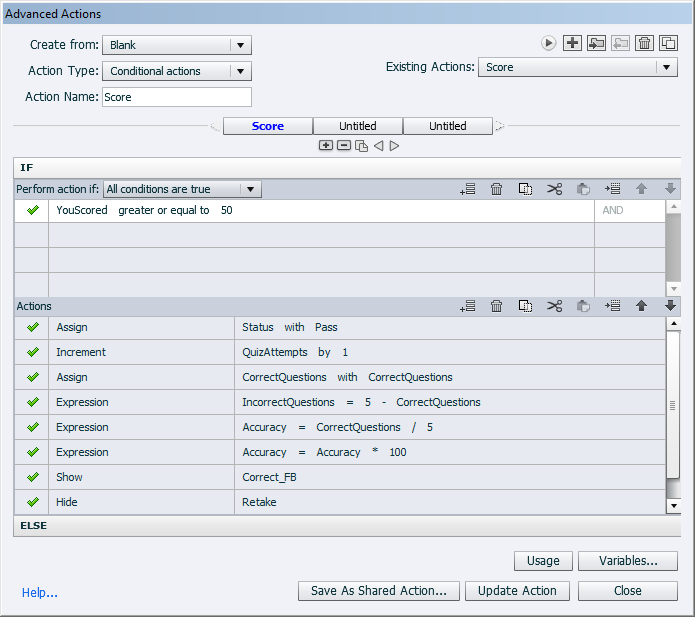
With this we complete the IF condition.
Now let’s copy all the actions and paste to the Else Conditions.
Here we need to change a few actions and delete the last Retake action.
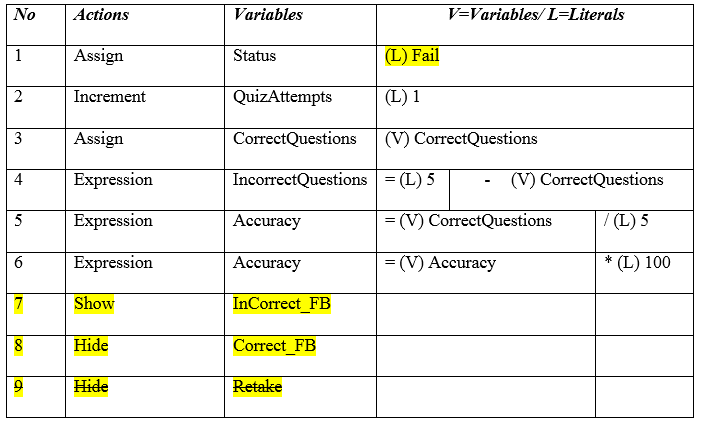
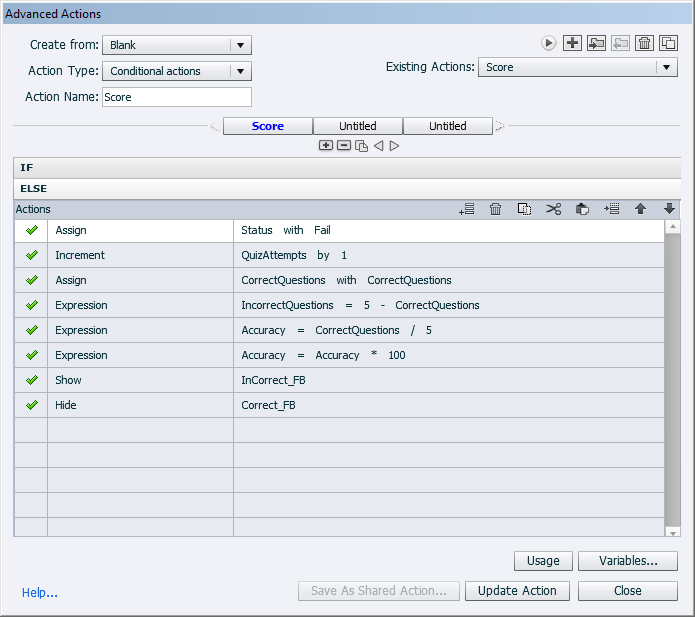
Why we add these values:
YouScored:
We assign a IF condition to show the actions in the IF column when the value of YouScored is greater or equal to 50 points, if it is below 50, show the Else Actions column.
To be more specific, if the learner achieves a total quiz score of 50 or more show the pass text (Congratulations), else display the t fail text (Sorry).
Status:
We show the status to the learner – Pass or Fail.
QuizAttempts:
To track the number of times a learner attempts the quiz.
CorrectQuestions:
We’ve already tracked the correct points at On Success for every question. Here we display the CorrectQuestions points in the Result page.
InCorrectQuestions:
If the learner clicks the correct option, he/she will get 10 points; that value is stored in the CorrectQuestions variable. Now that we have the correct value, to get the Incorrect value we need to subtract the correct questions from total questions.
Accuracy:
Accuracy is the correct questions divided by total questions and then we calculate the accuracy percentage.
InCorrect_FB and Correct_FB: We show and hide the correct and incorrect text which is in Result page, i.e., Congratulations and Sorry.
Retake: We hide the RetakeQuiz button if the learner passes the quiz.
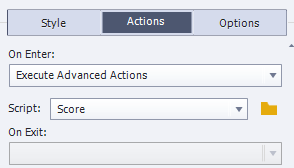
Update actions, click the OK button and assign the Score action On Enter in the Result page.
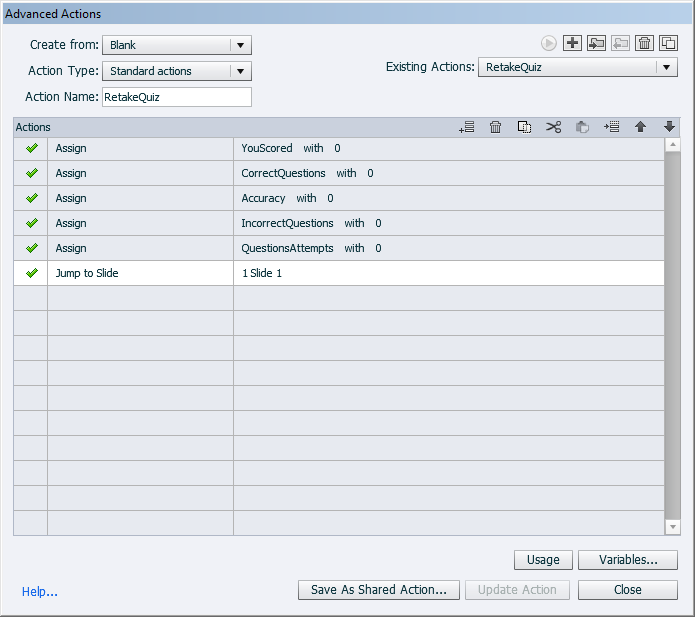
RetakeQuiz Button:
The variables we use to create the Result page store certain values. Upon clicking the RetakeQuiz button, the quiz will start again and the variable values start adding points.
To avoid the addition of points, we need to make all variable values zero. We also need to add one more action, move through the slides to revisit the quiz.
As of now, I created the Result page in Captivate 8. You can also create this in lower or higher versions of Captivate.
To download the source file, Click here.
I hope you understand how to customize a Result page in Adobe Captivate. If you have any issues, you can refer the screenshots and the Captivate source file. If you still face problems, please do share, I will be glad to help you out.
Please do share if you have an easy alternative.


