4 Types of Triggers in Articulate Storyline to Develop Interactive E-learning Courses

Creating functionality for eLearning courses involved writing lengthy action scripts. This was a Herculean task, for learning experts, who had little programming knowledge. But, today, thanks to Articulate Storyline, learning professionals can easily create complex functionality for online courses easily. Wondering which feature of the tool made such a complex task so easy? It’s the Trigger.
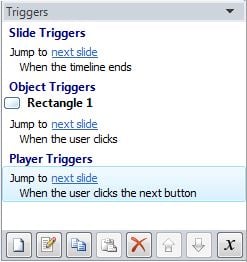
You can find the triggers panel on the right hand side in Storyline’s interface. It has buttons at the bottom to create, edit, copy, paste, and move the triggers.
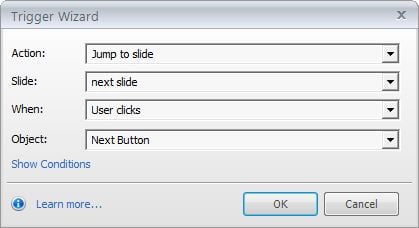
Click the first button, Create a New Trigger, for a Trigger Wizard to appear. This enables us to create triggers with the help of its built-in actions. These triggers can be described as shortened and simplified versions of complex and lengthy action scripts. The screenshot below shows how a Trigger Wizard looks.
For easy understanding of the working and execution of triggers, it is important to understand various types of triggers and the differences between them. There are four types of triggers- Slide triggers, Player triggers, Object triggers, and Layer triggers.
1. Slide triggers
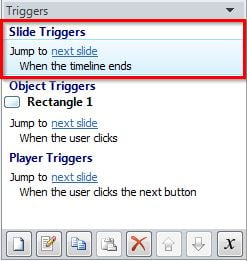
These are the triggers which are generally dependent on the timeline of the slide to execute an action. For example, the trigger executes an action when the timeline starts or ends. In Storyline 2 the trigger can also execute when the timeline reaches a certain point. These triggers are also executed when the user presses a key, when the state of an object changes, and when a particular variable changes. They are listed at the top in the triggers panel, under the Slide Triggers label.
2. Player triggers
These triggers are dependent on the built-in navigation buttons to execute an action. So, they are applied to the Next, Previous, and Submit buttons. They are listed at the bottom in the triggers panel, under the Player Triggers label.
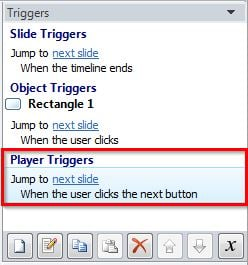
3. Object triggers
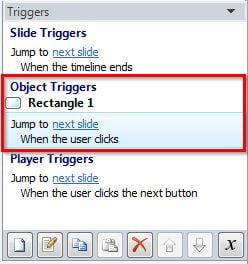
These are the triggers which are dependent on the objects on the slide to execute an action. So, they are applied to shapes, images or pictures. They are executed when the user clicks or hovers the mouse on the triggered object. They are listed in between the Slide Triggers and Player Triggers in the triggers panel, under the Object Triggers label. They are furthered classified by the objects they are triggered to and appear under a label of the object’s name.
4. Layer triggers
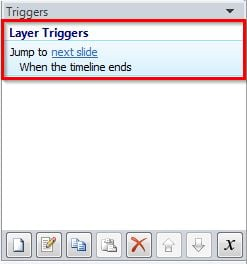
These triggers are similar to slide triggers; the only difference is that they are dependent on the timeline of the layer to execute an action. They are listed at the top in the triggers panel of the layer, under the Layer Triggers label.
You can use an unlimited number of triggers. But, it is advisable to use as few triggers as possible; the more triggers you use, the heavier your file.
Hope this blog is helpful. Please share your thoughts. For more tips on eLearning design and development, stay tuned to my blogs.


![Creating Online Compliance Training: Tips & Best Practices [Infographics]](https://blog.commlabindia.com/hubfs/Imported_Blog_Media/tips-for-impactful-compliance-communication1.jpg)
![6 Best Practices to Get the Most Out of Your Corporate Training [SlideShare]](https://blog.commlabindia.com/hubfs/Imported_Blog_Media/corporate-training-best-practices-value-slideshare.jpg)
