How to Add the Customized Timer in Storyline 2

Articulate Storyline 2 is one of the best tools to develop customized courses. Sometimes, we get the requirement to add timer for each slide, thereby restricting the user to view the slide only for a limited time.
In most of the cases, we use javascript to add the timer to the slide, but this is a tedious and time consuming task. Instead of just adding the timer to the slide you can set the timer with just a few triggers, using storyline.
Apart from adding the timer to the slide, we can also add more customized functionalities, such as changing the timer value color into Red, to alert the learner. Once time runs out, we can add a popup saying, ‘Timeout’.
In this blog, I will share 5 simple steps on how timer can be added in a storyline course with effective countdown (from 30 -0) functionality. Upon reaching 5, the color changes to red and when time collapse, the message will be displayed on the screen.
Here are the Simple Steps:
Step 1: Create one variable with a number type, with the default value as 30. And insert that variable into the slide with the help of the Reference option available in the Insert tab menu.
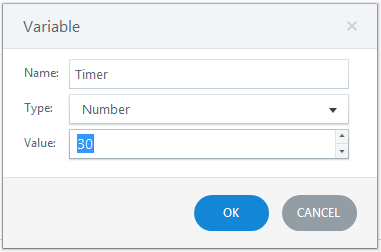

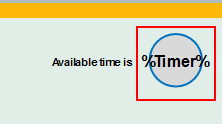
Step 2: Create a slide layer and name it ‘Time’ and adjust the timeline to 1 sec. and create another slide layer to show the message and name it ‘message’.
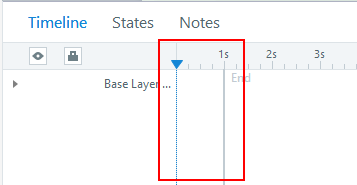
Step 3: Add the below triggers inside the Time slide layer.
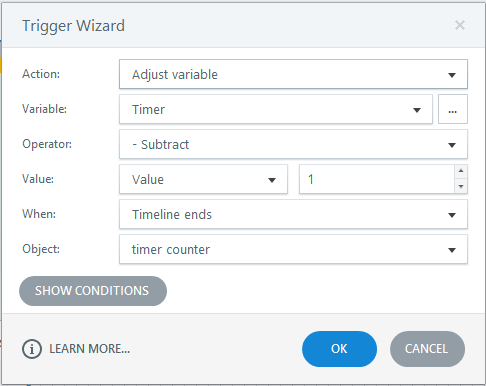
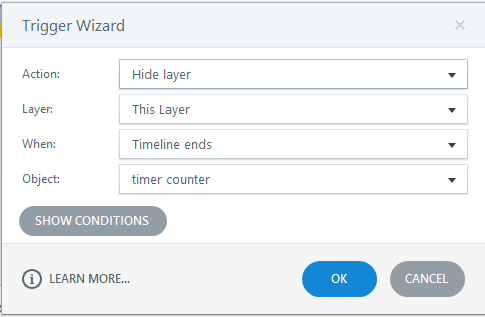
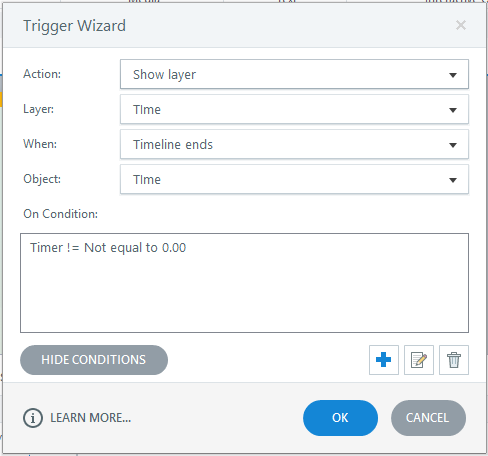
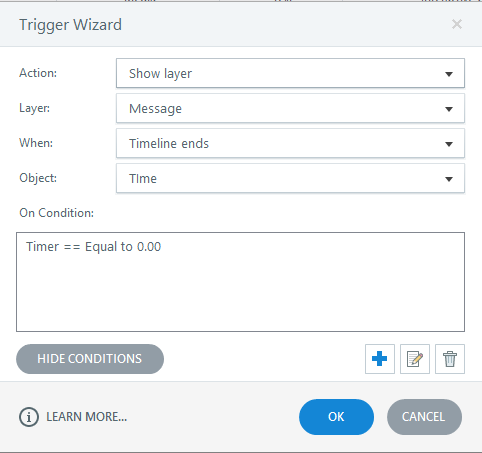
Step 4: Add the below triggers on base layer.
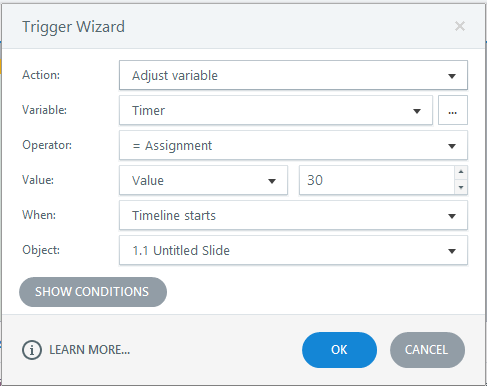
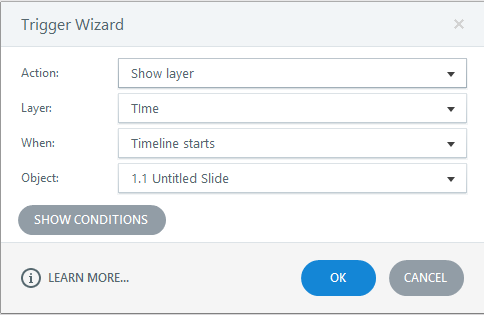
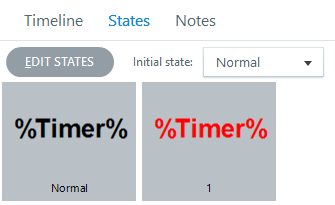
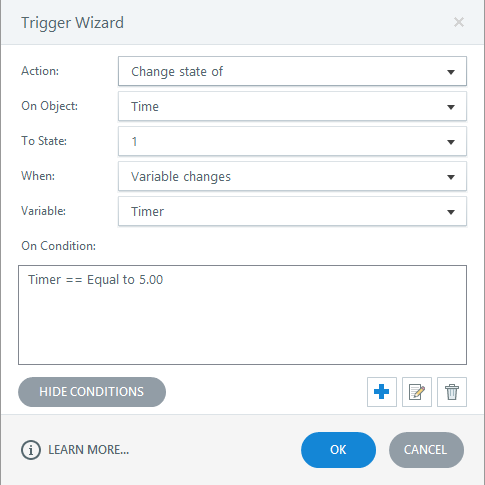
Step 5: To turn the timer value color into Red on reaching the value 5, create one state for timer text box with font color Red, name it ‘1’ and add the below trigger to the base layer, as shown in below pictures.
In this simple way we can add the customized timer into the storyline course without using javascript.


![Authoring Tools – The Secret Behind Rapid eLearning Solutions [Infographic]](https://blog.commlabindia.com/hubfs/Imported_Blog_Media/authoring-tools-rapid-elearning-solutions-infographic-v2.png)
![6 Best Practices to Get the Most Out of Your Corporate Training [SlideShare]](https://blog.commlabindia.com/hubfs/Imported_Blog_Media/corporate-training-best-practices-value-slideshare.jpg)
