How to Add and Sync Closed Captions Subtitles in Lectora?

Lectora Inspire is one of the popular authoring tools that allows developers to add and sync captions to a video, within your title. You can use these captions for complying with Section 508.
I would like to explain the procedure to display closed caption text, within a video, according to details specified within an XML file, in this blog.
Step 1:
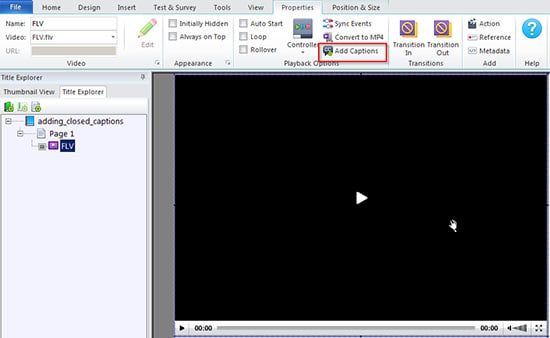
You can add closed caption text to videos in MP4 and FLV formats only, using this tool. So, you need to convert your videos into these formats. You can do this by inserting either WMV or AVI format video into your title, and double clicking on the video to view its properties. Then, it switches to the “Video Properties” ribbon. Click “Convert to MP4” option as shown in the image below.

Step 2:
Once the video gets converted to MP4, “Add Captions” option gets enabled under the video properties ribbon, and this means you have the ability to import an XML file.
Step 3:
It is easy to import the XML file, but some of you may not know what XML is, how to create an XML file and what to put in it, in order to define the captions.
Step 4:
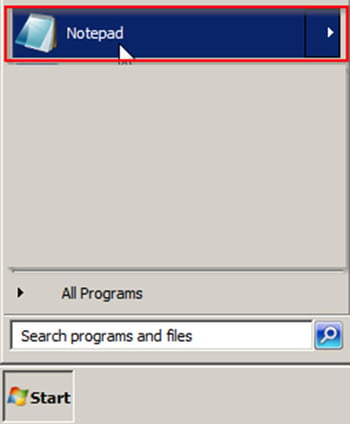
To create an XML file, Open “Notepad” by clicking on “Start” button as shown below.
Step 5:
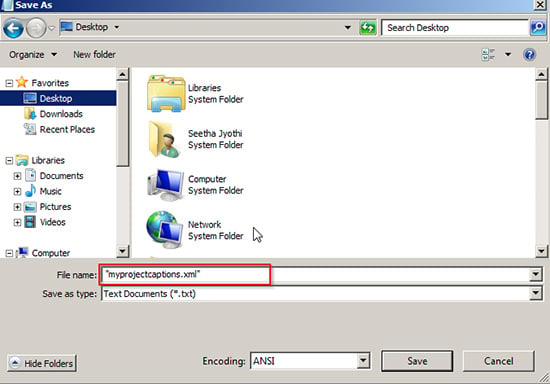
Add the required notes and save the file as an XML file. While saving your file, place double quotations (“) around the file name so you can save the file with a .xml extension. For example: “myprojectcaptions.xml”.
Step 6:
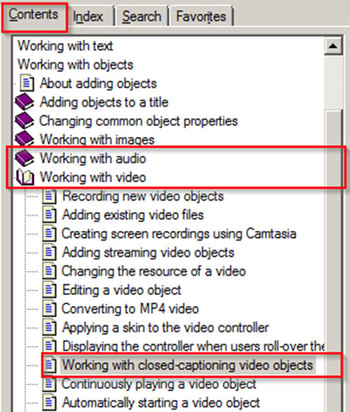
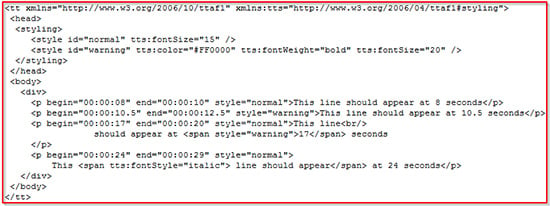
Specific syntax must be used to write your XML file properly. You find an example, within the Lectora Information Center. Press “F1” to get “Lectora Information Center” window.
Step 7:
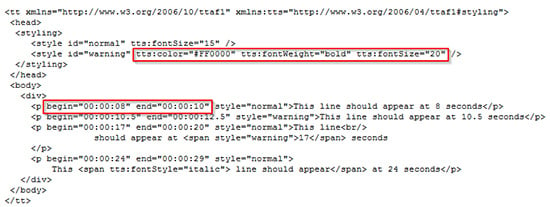
To synchronize your caption text with the video, you need to specify the time at which the caption should appear within your XML file. The following formatting can be applied to your closed caption text:
color;
FontSize;
FontFamily;
FontWeight;
FontStyle;
textDecoration
Step 8:
Copy the code as shown above and paste it in your XML file. Change the video timing, the caption text and the text styles, as you need.
Step 9:
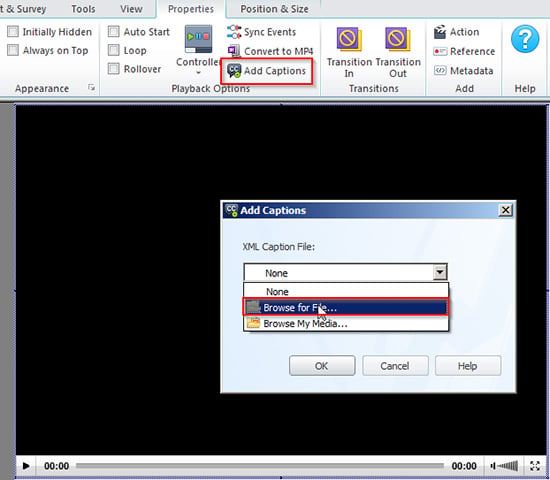
Click on “Add Captions” option under video properties ribbon and import this XML file into your title.
Step 10:
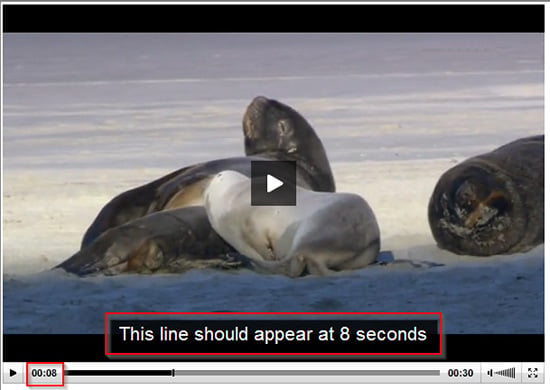
Now publish your title and check the output.See the screenshot below to understand better.
That’s it. These are the simple steps to add and integrate closed caption text to a video in Lectora. I hope you find my blog useful and interesting. Please share your views.


![Flash to HTML5 Conversion: Problems and Solutions [SlideShare]](https://blog.commlabindia.com/hubfs/Imported_Blog_Media/flash-html5-conversion-problems-solutions-slideshare.jpg)

