A Step-by-Step Guide to Design Effective eLearning

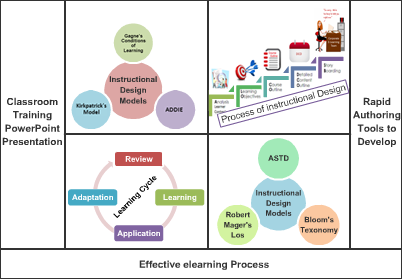
Elearning is not just publishing the classroom PowerPoint presentation using any rapid authoring tools like Articulate or Adobe Captivate. It is more than that. It is an effort to make effective elearning take place. The PowerPoint presentation that is used by the trainer is just a training tool he/she uses to structure his/her training. Without the trainer’s inputs in the class, the PowerPoint presentation is not complete. The trainer understands the learners’ motivation levels, uses adult learning principles, give live examples and case studies. He/she makes into a learning course rather than merely leaving it as a power point presentation of information.
→ Download Now: Instructional Design Strategies to Design Engaging eLearning Courses
If you are planning to convert your classroom training into elearning to reduce training cost per learner and to give him/her the flexibility to learn anywhere, anytime, and still retain the completeness of classroom training, here is the step-by-step guide.
Step 1:
Training Need Analysis– Setting Performance Goal: Start by gaining a thorough understanding of the problem that needs to be addressed by the training. Start determining what the learner will need to perform at the end of the training.
- Creating awareness about company culture for new employees
- Understanding a particular concept or a process.
- Performing a particular task.
Step 2:
Learner Analysis: Now that you have a fair idea what this elearning will need to accomplish, you should start understanding who the learners are. This understanding will help us develop a course that is in line with their motivational levels.
Step 3:
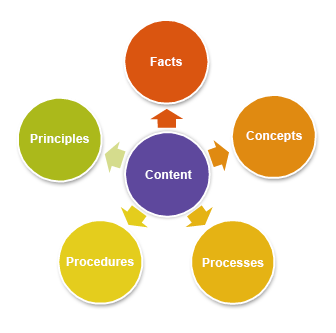
Content Analysis: Review your content, identify the content type – is it a process, procedure, fact or principle that you will develop learning strategies based on this information.
Step 4:
Learning Strategy: A very important step but mostly overlooked, is deciding or planning how the course will be presented. Many of them, before planning for this, go on to the next steps. In this step, based on the learner and the content, you should decide if the course will be Problem based Learning or Discovery Learning or Situational Learning. Then we can go on to deciding how the instructional design, visual design and assessments will be presented.

Step 5:
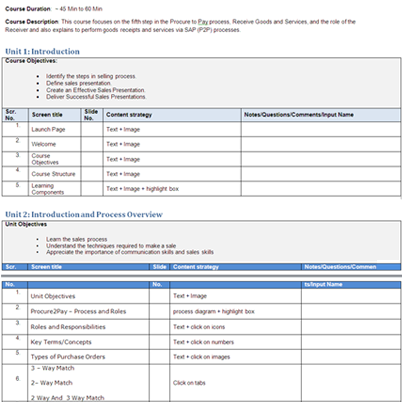
Detailed Content Outline: We take a deep dive into the content and organize it logically and come up with a page by page content outline. This step also includes deciding where the assessments and the final quiz will be placed.
Step 6:
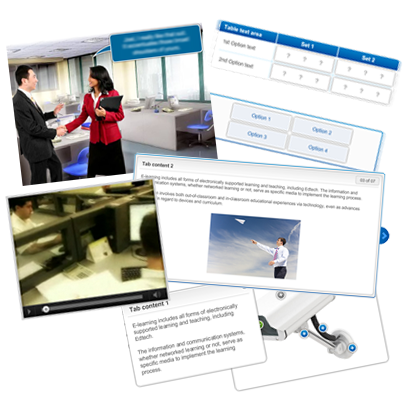
Learning Devices and Patterns: There are many learning devices like scenario, role play, reflection and simple information that can be used to impart training. In elearning, we apply instructional design principles to incorporate interactivities that engage the learner – slide shows, drag and drops, interactive visual hotspots, infographics, audio-video snippets. Here in this step, we decide on what learning devices and patterns to use.
Step 7:
Storyboarding: This is the scripting phase, where the content developers actually script the entire course. The goal of this step is to give a blue print for the course with every detail, incorporating effective instructional design strategies. It also contains notes to the developers. I recommend that you make the Storyboard in a PowerPoint form as it is more visual.
Instructional Design Strategies to Design Engaging eLearning Courses
Design Learner-Centric eLearning
- Importance of ID Strategies in eLearning
- Parameters to Select the Right ID Strategy
- ID Strategies for Effective Results
- Case Studies
Step 8:
Developing using Rapid Authoring Tools: Based on the storyboard, it is time now to actually produce the eLearning course using one of the rapid elearning authoring software tools – Lectora Inspire, Articulate Storyline or Captivate 6.
Step 9:
Course Upload on LMS: Once the course is ready, make it SCORM or AICC compliant to run on the Learning Management System.
Step 10:
Evaluation of elearning: Last but not the least, do a learnability test with a group of learners and check their performance.
I am sure going through these steps will help you understand that creating an elearning course is a complex process and is NOT just converting classroom PowerPoint using a rapid elearning tool.


