All About Player Properties in Articulate Storyline
Learn about the player properties in articulate storyline

Articulate Storyline, popular for its amazing in-built features, provides a default GUI player, whose properties are customizable to certain extent. This is possible with its Player Properties feature. Today, in this blog we will explore this feature.
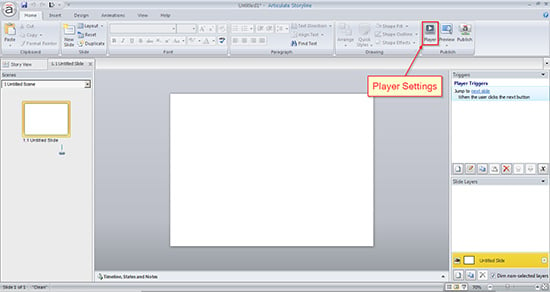
You find the Player properties button in the Home tab. Click it to open the Player properties window.
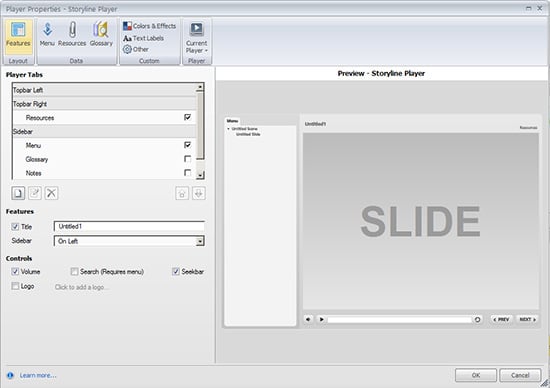
In the above screenshot of Player properties window, you can see options on the ribbon such as:
- Features
- Menu
- Resources
- Glossary
- Colors & Effects
- Text Labels
- Others
- Current Player
We will explore the options one by one.
Features:
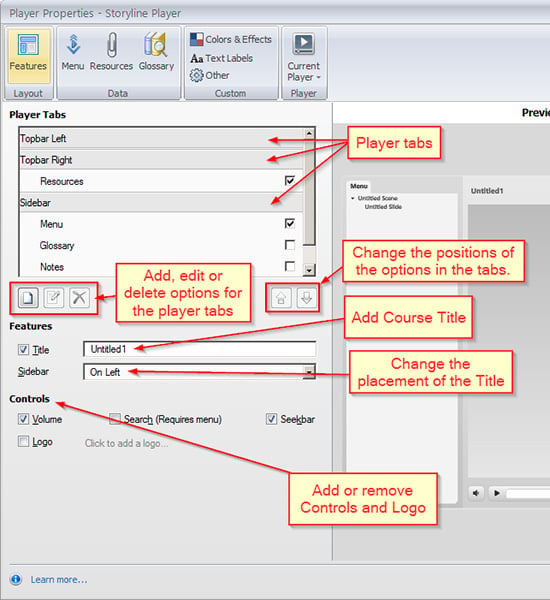
In this, you have player tabs such as Top bar left, Top bar right and side bar. In these bars, we have resource, menu, glossary and notes. You can uncheck these options to hide them in your player. You can change the placement of any option, using the arrow buttons, you see under the player tabs. For example, I can move notes to the sidebar. You can also create a new option with the small Add button you see below the player tabs.
You can add Title to the player using the Title option, which can be seen below the player tabs.
Now, below the Title option, you have the controls. With this, you can add a volume Controller, a search bar for the menu, a seekbar, and also a logo if required.
Menu:
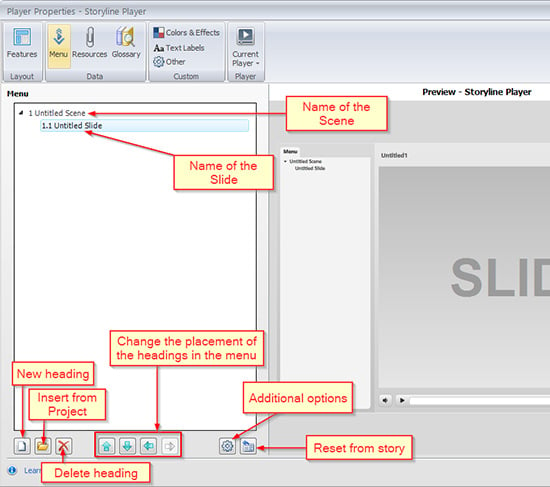
Here, you can see the names of the scenes and the slides, you have created in your course (see the screenshot).
You can add a new heading, insert a title from a previous project or delete the name, using the buttons you have at the bottom (see the screenshot). You can also adjust the position of the slide names, using these arrow keys. If you want to reset the changes you have made, just click on the “reset from story” button.
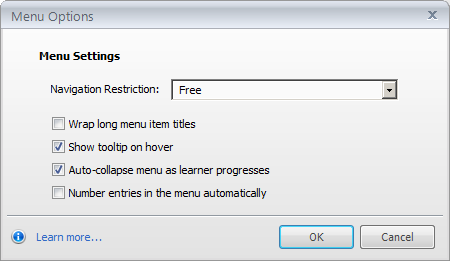
You also have additional options (see the screenshot) in the menu that allow navigation restrictions. You can allow the learner to freely navigate through the menu or restrict him from navigating further. You can even completely lock the menu. “Wrap long menu text titles” allows you to wrap the text of the title in your menu that is too long. “Show tooltip on hover” shows you a tooltip with the complete slide name when you take your mouse over it. “Auto collapse menu as learner progresses” option collapses the menu of a scene, whenever the learner completes viewing it and proceeds to the next scene. “Number entries in the menu automatically” allows you to enable or disable the numbers of the slides in your publish file.
Resources:
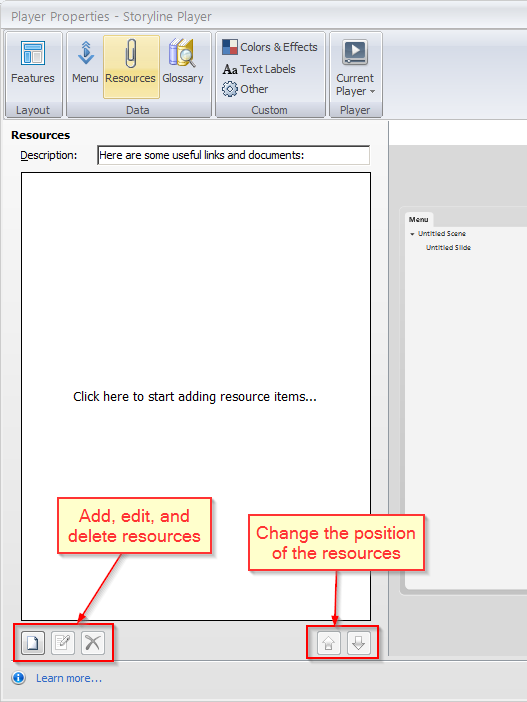
You can add, edit and delete any type of resource to your project, using the buttons you have at the bottom (see the screenshot). They are generally used to show information in attachments like PDF files or documents. The attachments may also be in the form of web links.
Glossary:
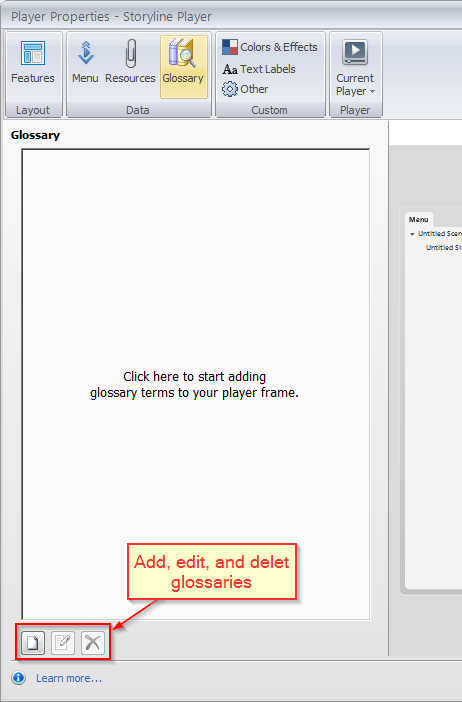
You can easily add a set of terms and definitions to your course, using the glossary option. Add, edit and delete glossaries with the buttons at the bottom (see the screenshot).
Colors and Affects:
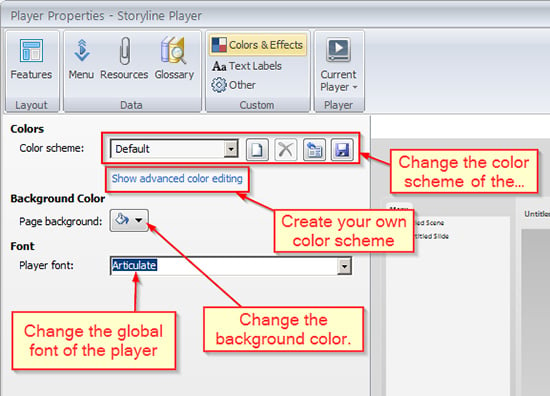
You can easily change the player color as per your choice with colors & effects option. You can even customize your color scheme and change the color of every item in your player, by selecting advance color setting. You can even change the page background color behind your player, which is visible when you publish the course in your webpage. You can also change the global font.
Text Labels:
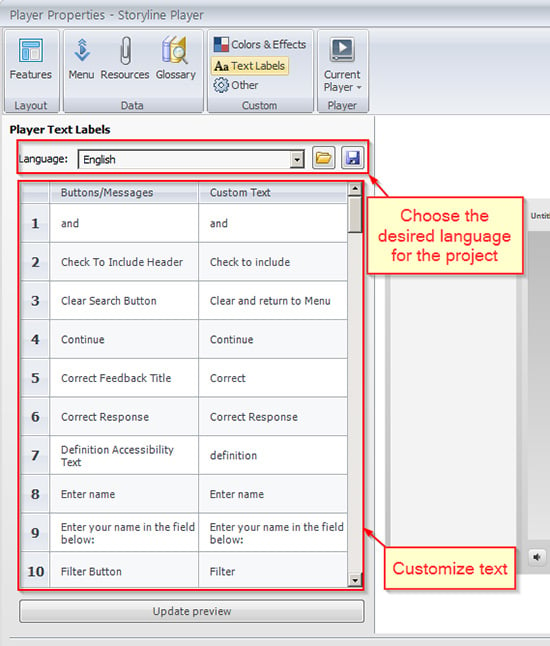
You can choose different languages from the drop down box available at the top (see the screenshot). You can also edit the text of the default label.
Others:
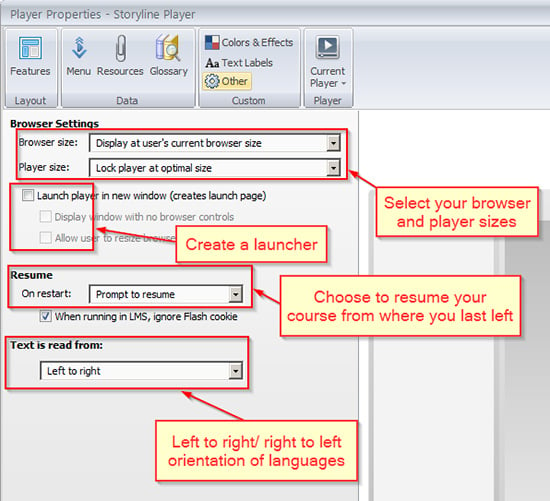
Here, you have Browser Settings to select your browser sizes. You can also choose the player size. The next check box (see the screenshot) would create a course launcher icon once you publish the course. Resume helps you to resume your course from where you had left. You have the freedom to choose the orientation of the languages, that is, from left to right or right to left.
Current Player:
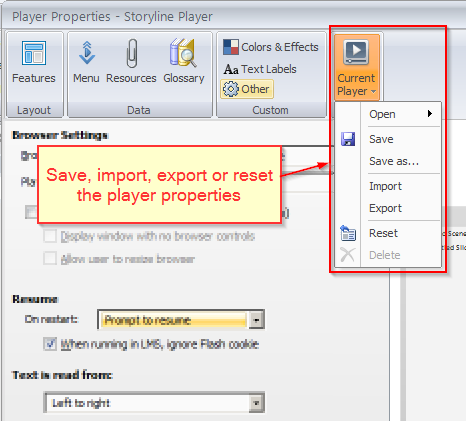
This option allows you to save, import, export or reset the player properties.
These are the important player properties. You can now customize your player with these options to give a different look to the GUI of your courses. To know more about Articulate Storyline, stay tuned to my blogs.


