Different Types of Publish Options in Captivate 9

Adobe Captivate has the ability to publish online courses in multiple devices such as Desktops, iPads, and mobile devices. The latest feature of Captivate 9 facilitates publishing the course as an Android/iOS app (App).
The important point here is, we can publish to multiple devices and apps with just one source file. We can now publish to various formats such as HTML5, SWF, Video, Executable, App, Adobe Connect and Captivate Prime.
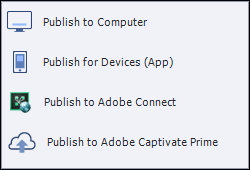
Here we have publishing options to Computer, Devices (App), Adobe Connect and Adobe Captivate Prime.
- Publish to Computer
- HTML / SWF
- Video
- Executable
- Publish to Devices (App)
- iOS / Android
- Windows 8
- Publish to Adobe Connect
- Publish to Adobe Captivate Prime
1. Publish to Computer
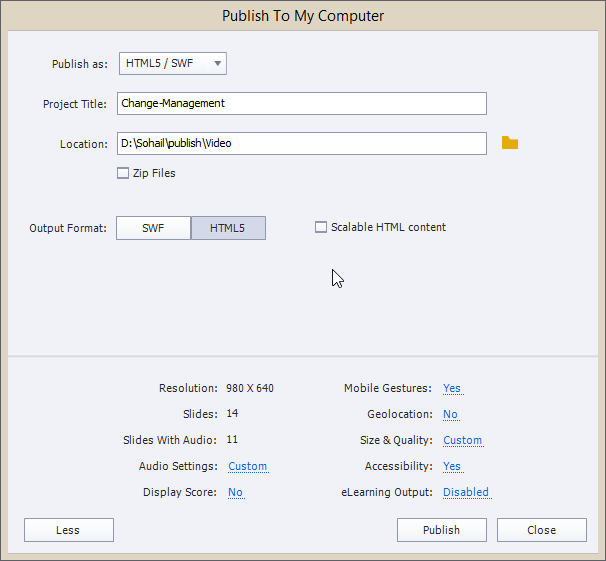
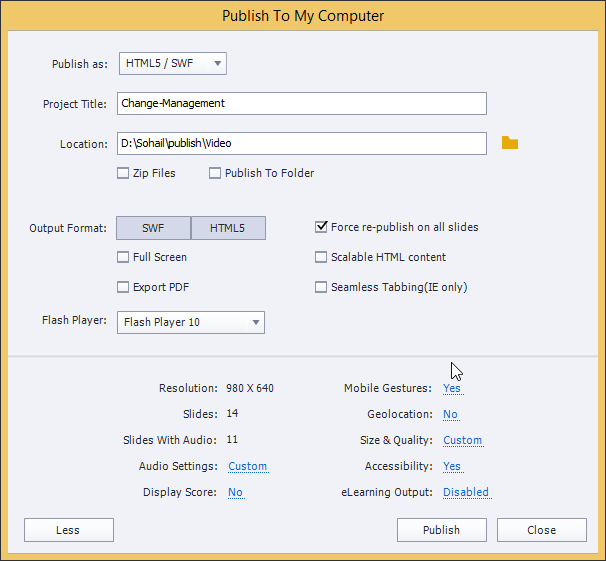
Let’s select the first option: Publish to Computer. The Publish to My Computer window will appear, from which we can publish the Adobe Captivate project to HTML5, SWF, Video and Executable formats using the ‘Publish as’ drop down.
You can publish independently to HTML5, SWF, Video and Executable or you can publish to both HTML5 and SWF.
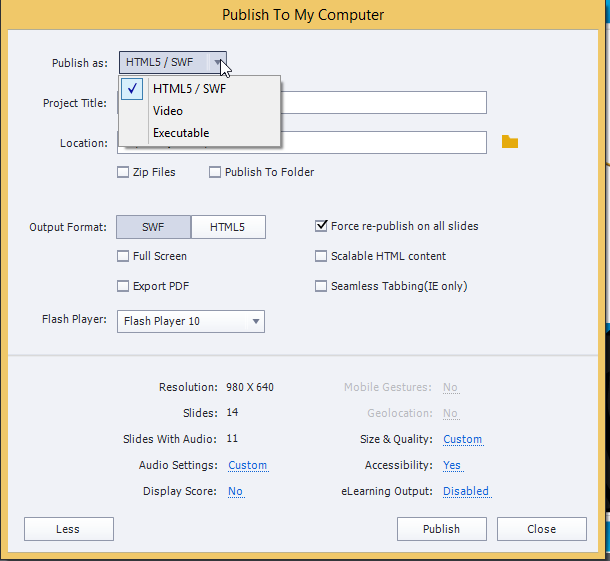
Let’s take a look at all the fields in the window.
In the Project Title field, enter the project name. In the Location option, click the folder icon and browse the desired folder where you want to publish the course.
Below this, you have the Zip Files option; check this to create a Zip file in the drive specified by you, so that all the files of the course will be published as a zip file. This option is useful when you want to create a single file for uploading to a Learning Management System.
We also have the option Publish to Folder to create a folder with the title of the project. This folder will have all the files needed to play the course. Captivate creates a new folder in the location specified by you.
Under the Output Format, if you select the Full screen option, the published output will be in full screen. Check the option Export PDF if you want to export the course to a PDF document. This option is useful to share content over an email or other means, where the learner doesn’t have access to the content through the Flash Player in a browser.
Adobe Captivate generates the SWF file in the Flash version that you choose.
If you select the Scalable HTML content option, the published SWF will always be resized according to the size of the browser.
With the Seamless Tabbing option, you can deliver your eLearning course seamlessly to your learners who use only Internet Explorer.
Resolution shows the course dimension.
Slides will show the total number of slides in a project.
Slide with Audio shows the number of slides with audio in the project.
Audio Settings allows you to edit the audio by clicking the Custom link. You can edit the audio quality before publishing.
Display Score allows you to set the quiz score; related settings are also displayed. Check the options and select only those options which are important.
If you select Mobile Gestures, the Mobile Palette window will appear on your screen. By selecting this, you can either play or pause the course or video on mobile devices. Navigation allows us to move the slide to the right or left.
Zoom allows learners to increase or decrease the screen size by pinching and enlarging the screen. Show / Hide Table of Content allows learners to view the menu with the table of content. Show / Hide Play Bar displays or hides the play bar by swiping it up and down.
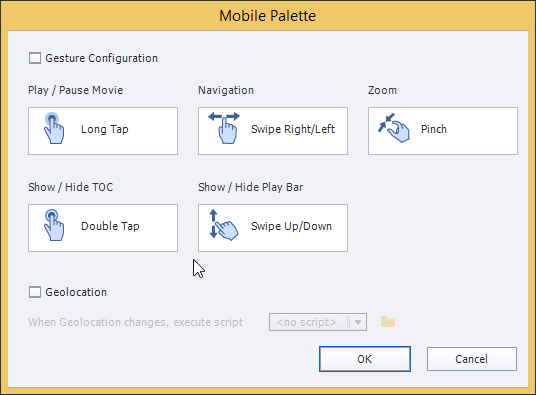
Finally, we have the Geolocation option; check the box if you want to track the learner’s location.
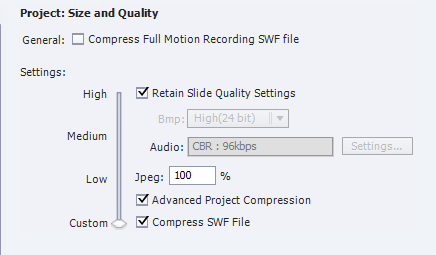
Next, we have the Size & Quality option; where we can set the image background, audio, JPEG image, and SWF file quality by dragging the slider to the ‘Custom’ option.
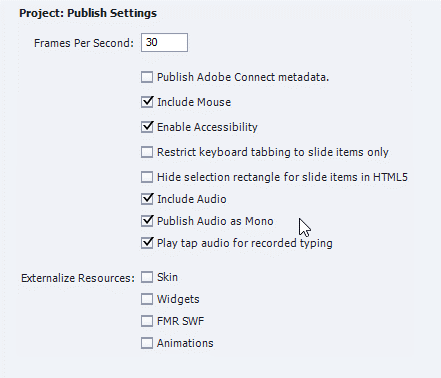
If you click Accessibility, you can find various options in a preference window. You can set the frame rate, mouse, keyboard tabbing, and audios.
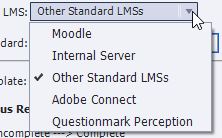
Select eLearning Output if you want to publish the course to an LMS. Check Enable reporting for this project, it will show a list of standard LMSs from which you can choose; here you can see various hosting platforms such as Moodle, Internal Server and many more.
Select any of these options to track the eLearning course.
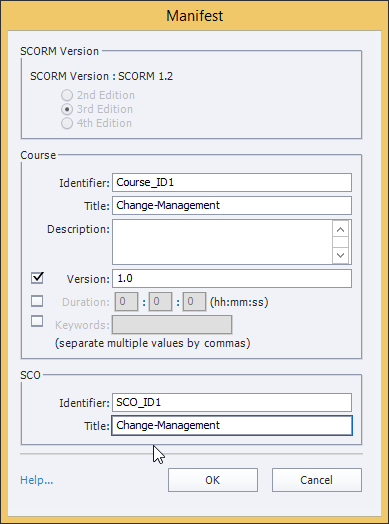
Select a standard LMS such as SCORM 1.2, SCORM 2004, AICC, and xAPI from the list. Then, click the Configure button to set the manifest file, here you need to provide information such as the Identifier, Title and Description.
Next we have the Status Representation Option to set the status of your course.
Incomplete — > Complete
When the learner launches the course, its status is shown as Incomplete in the LMS. After the course is completed by the learner, the status changes to Complete.
Incomplete — > Passed/Failed
If the learner leaves the course without completing it, the status will be shown as Incomplete. If the learner goes through all the slides and completes the final quiz, the status will be shown as Pass or Fail.
Then we have the Success/Completion criteria, here you can select either User Access or Slide views. In Slide view, you can set the completion criteria to 100% or you can enter the number of slides your learner should complete in a course. For a quiz, you can set the completion criteria, as shown here.
You can also report the score in terms of Percentage or Points.
Before using Advanced LMS settings, you need to have some knowledge about the LMS and its behavior.
We can now publish the course to various formats.
i) HTML / SWF
Here, we have two output options – SWF and HTML5. You can either select both or any one.
HTML5
HTML5 is the latest version of “Hypertext Markup Language” that is used to create content. By publishing your courses to HTML5, you can maintain the content in a single source and deliver to a wider range of audience.
When we publish to HTML course will open in I pad or mobile devices
SWF
SWF ShockWave Flash use for creating vector graphics, 2d animations and Action-script.
SWF work for PCs
Publish to only HTML5
After publishing to HTML5, you will be able to see the various published files such as the ‘assets’ folder in which we have all the images related to the course and ‘index.html’.
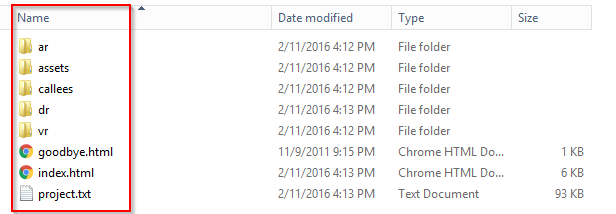
Publish to only SWF
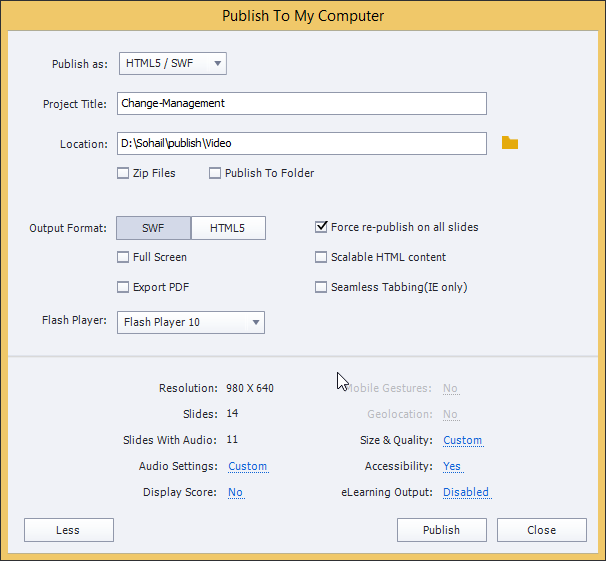
As you can see here, we have the .swf file.

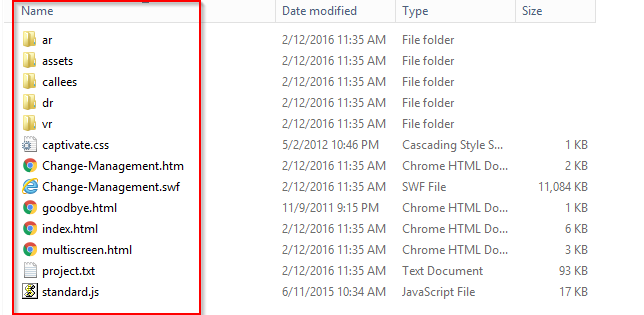
Publish to both HTML5 and SWF
We see the output files such the ones shown below:
ii) Video
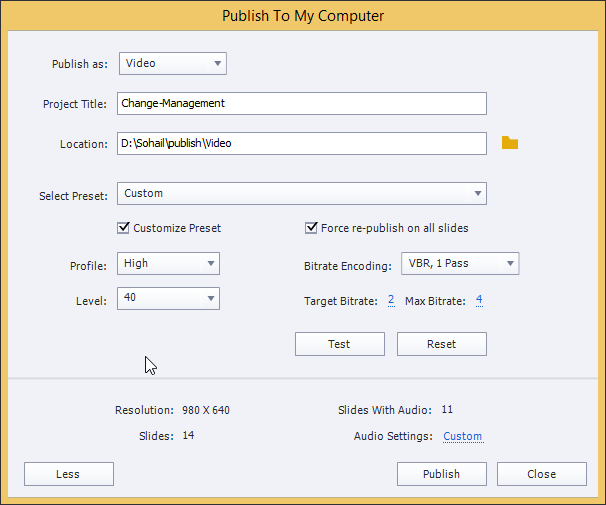
Adobe Captivate provides the option to publish the course in a video format. Here, you can set video related properties. We have Select Preset options such as iPad, iPhone and YouTube; select the video output of your choice.
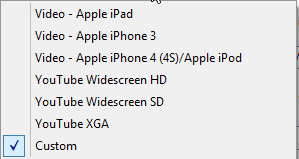
If you want, you can customize the video setting by checking the ‘Customize Preset’ option.
In the Profile dropdown, you will have the following options:
- Baseline: Select this option to play the video on mobile devices
- Main: Select this option to broadcast the video on digital TV
- High: Select this option to play the video on devices with high definition
We have more video setting options here, use them if required.
After specifying the settings for the video, click Test Settings to verify whether the custom settings are valid.
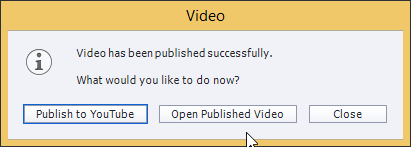
When you publish the slides to video, you can see two options, ‘Open Published Video’ and ‘Publish to YouTube’.
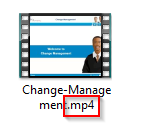
If you click the Open Published Video, you can view the video in MP4 format. You can publish the video to YouTube; click the Publish to YouTube option and enter your login details.
The video output will be MP4 format.
iii) Executable
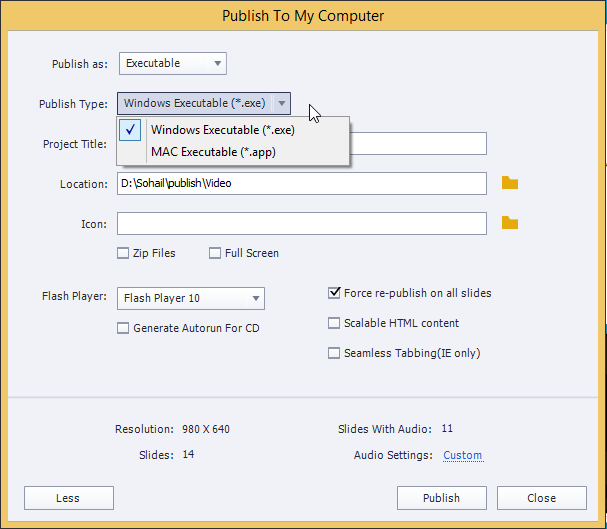
Adobe Captivate added a new option to publish the course in an Executable format. Here, you can publish to Windows Executable (.exe) or MAC Executable (.app).
Executable file format is similar to a video format, it’s a file extension that will run in Windows systems.
Here we have similar options as I discussed earlier in the HTML/SWF formats except icon option. Where you can add image to your .exe file extension.
Using the Generate Autorun For CD Autorun option, will enable the project or games to play automatically within Windows systems when a CD is inserted in the DVD-ROM.
These two options are not applicable for MAC Executable (.app). All the remaining options are the same.
2. Publish to Devices (App)
- iOS / Android
- Windows 8
i) iOS / Android
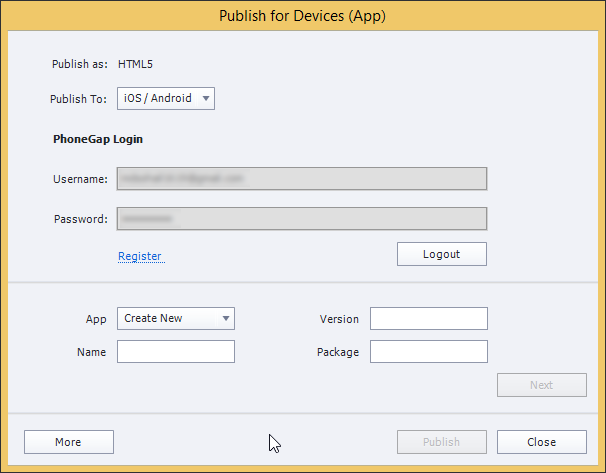
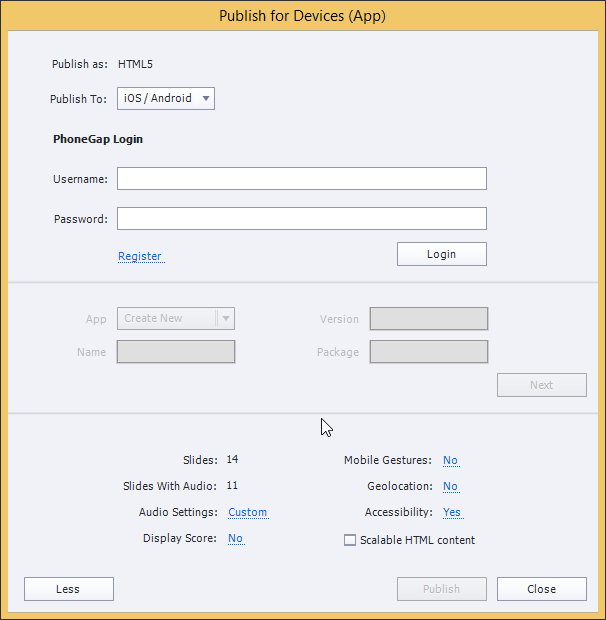
This is a new option included in Captivate 9 to publish to devices such as iOS, Android and Windows 8. We can publish with the help of PhoneGap Login.
- Enter your mail id in the ‘Username’ field
- Enter password in the Password field
If you don’t have a login ID, you can create a new id by clicking the blue Register link.
Enter the username and password and click the Login button.
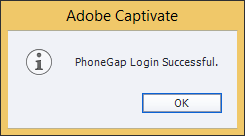
A popup window saying PhoneGap Login Successful will appear.
Click Ok. It Enables options like App, Name, Version, Package.
App
You can create a new app or update an existing app. Provide the related Name, Version, and Package.
Click the Next button to view iOS and Android related options.
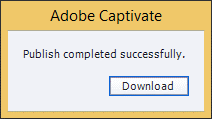
Click the Publish button to publish your file to PhoneGap.
ii) Windows 8
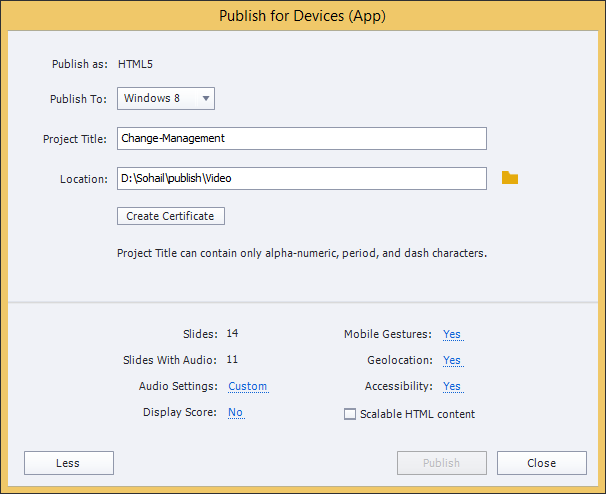
Click Create Certificate if you have a certificate in your course and publish the course.
3. Publish to Adobe Connect
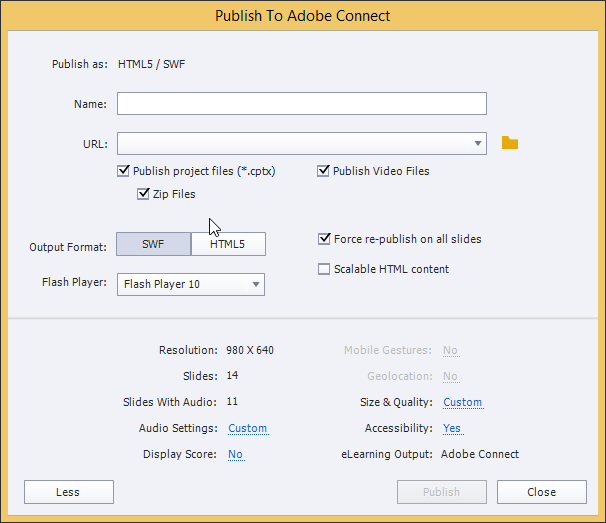
Adobe Captivate allows us to publish the course to the Adobe Connect server. Click folder, click the Add button and enter the name and URL to connect to the server. Select the format in which you want to publish the course – SWF or HTML5 – and click Publish.
4. Publish to Adobe Captivate Prime
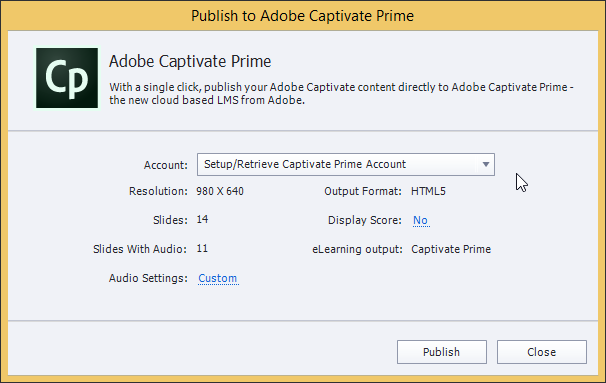
Adobe Captivate Prime is a Learning Management System environment where you need to create a new account and publish to Adobe Captivate Prime to check your course. In this, an Admin can add learners, Author can create training module and can add courses, Team managers can manage their teams and provide feedback after completion of the training and track them and Learners can access courses assigned to them.
After login, the ‘Publish to Adobe Captivate Prime’ window will appear where you need to fill all the columns related to publish such as the Module Name, Short Description, Module Type, Module Tags, Completion criteria and Success criteria.
Fill the details based on the requirements and publish the course.
Clicking the Publish button will successfully upload the course in the Captivate Prime account.
So this is all about the publishing features in Adobe Captivate 9. Please do share your feedback.


