Tips and Tricks of Lectora Inspire You May Not Know

Building online learning courses is a great experience for any developer with Lectora under his belt. It has an easy-to-master drag and drop functionality, and you can develop your e-learning rapidly using this tool that doesn’t require complex programming knowledge, thereby reducing your expenses and saving time It can now also incorporate HTML5 media support for mobile devices, allowing “multi-device” learners to access content.
→ Download eBook Now: Rapid eLearning Authoring Tools
Today, we’ll see some of Lectora’s “hidden” features, features that most developers don’t pay much attention to, but go a long way in helping you develop good online learning.
1. Title Explorer
The title explorer in Lectora can feel bulky, and sometimes a little daunting in the Design view (especially titles with complex interactions), but you can change how things look and take complete control.
a. Enable visibility check boxes
It’s well known that you can control the visibility of an object on the stage when a course is published, but here’s a Title explorer trick which lets you show or hide objects even while you’re designing, using the Title Explorer visibility icons.
Select Preferences from the File menu. Click the General tab and check the box which reads Show Visibility Check boxes in Title Explorer, and click OK:
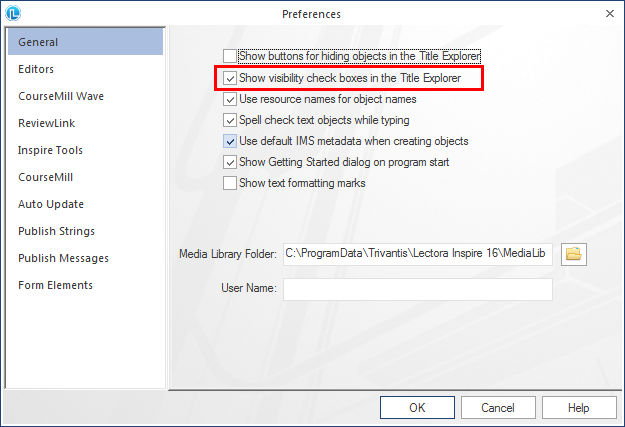
You will now be able to see a visibility icon next to your Title Explorer, allowing you to show or hide objects on your design stage.
b. Show or hide objects
Ever wished the top-level title, chapter, and section objects would somehow disappear and clear up some space in your Title Explorer? Here’s how you achieve that:
To turn on the Expand/Collapse icons in Title Explorer, check the Show buttons for hiding objects in the Title Explorer box in the Preferences tab.
![]()
Voila! You will now be able to see clickable (+) and (-) icons which Expand and Collapse those objects (title, chapter, and section), offering the Title Explorer some real estate.
Rapid eLearning Authoring Tools
Explore the What and the Why of Popular Rapid eLearning Development Tools, and GenAI Tools
- Categories of eLearning Authoring Tools
- Considerations to Choose Your Next Authoring Tool
- Features of Popular Rapid Authoring Tools
- GenAI Tools to Create Content, Graphics, Audio, and Video
2. Background Wizard
- If you want to make an update to the course background, access the Background Wizard on the Scope of the Background Screen. Check All pages in the title and click Next.
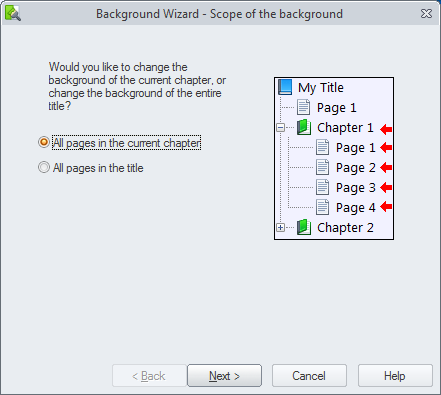 Select the appropriate option in the Type of background screen and select Next.
 - To change the color of a single page, access the Color drop-down and make your choice.
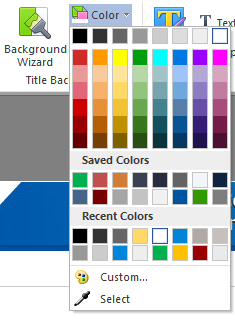
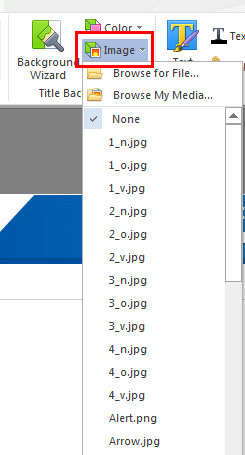
- Want to change the background from a solid color to an image, or insert a sound clip? Select the Image drop-down, and use the Browse for Files or Browse My Media options to add the appropriate image or sound.
3. Using Grids and Guides
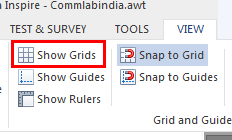
- Grids and Guides are priceless when you want to position multiple objects, and get the spacing and layout right. To turn them on, click the Show Grids button in the View menu.
- Want your objects to ‘snap’ to the grid lines? Make sure the Snap to Grid option is turned on.
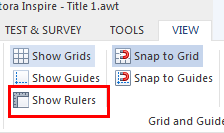
- Now, coming to Guides. Guides are a lot like chalk lines. To use Guides, turn on the Show Guides and Show Rulers
To create a horizontal guide, left-click on the top ruler, then drag the cursor to where you’d like the guide to be positioned.
For a vertical guide, left-click on the left ruler, then drag the cursor to the appropriate position.
4. Line Spacing and Hyperlinking
Dealing with text boxes and formatting text in Lectora is easy, but they are not visible in the Properties tab (like they used to in Lectora 10).
- To use these “missing” options, select the text ‘inside the text box’ you want to format. Then, right-clicking on this selected text will open a fly-out menu which includes submenus for formatting the text.
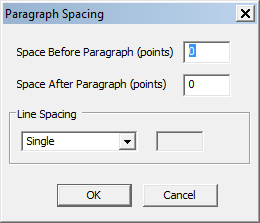
- Coming to line spacing: Paragraph and Insert are two extremely important options. You’ll be glad to know that Paragraph now brings back the good old’ line-spacing. This option allows you to fix line spacing problems in Lectora.
The other option is Insert which, as the name implies, lets you insert an image or any other element inside the text box.
Lectora is a great tool for elearning development. Some of its features do not get used frequently, but with a little knowledge, they can be used creatively in your e-learning courses. These small things do matter. Besides, what may seem like a small feature is a feature nevertheless.
Lectora Inspire isn’t the only rapid authoring tool out there. Do you know what the other rapid authoring tools are, and what they can do that Lectora can’t Check out this resource – Understanding Rapid Authoring Tools for E-learning Development – to understand more about rapid authoring tools.


