Customizing the Slide Next Button Using Articulate Storyline 2

Articulate Storyline 2 is an advanced version of Storyline 1. It has resolved many issues that occur in Storyline1. It has many features that help in developing effective e-learning courses based on different customized requirements.
In this blog, I explain how we can customize the GUIplayer’s button like the next button on our requirement using Articulate Storyline 2.
One of our clients asked us to develop a project using Storyline2 with customized GUI. The requirement of the client was to use only customized GUI buttons such as next, back, menu, transcript and many more, and his expectation on the use of the Next button on each slide was so innovative and challenging to us.
Some of his requirements included the following:
- The next button should not be clickable until the audio for the slide is completely played for the normal slides.
- After slide audio is fully played, the color of the next button should change and it should be clickable.
- When we revisit the previous slide, there should be no restrictions for the next button, that is, it should be restriction free.
Let us now see how to meet each of these requirements.
Before starting, Design the slide with the next button and insert the audio file.
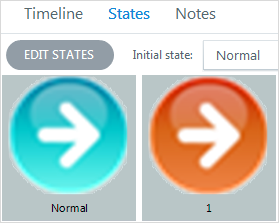
Let the normal state of the next button be a blue color icon; add one more state with name ‘1’ as an orange color icon as shown below.
Place one rectangle with 100% transparency just above the next button.

Note: Here the next button is a picture that was created in Photoshop.
Below are the some of the simple steps that help create customized next button with restrictions for a normal slide. They are:
Step 1:
Create a variable with initial value false and add the below trigger to it
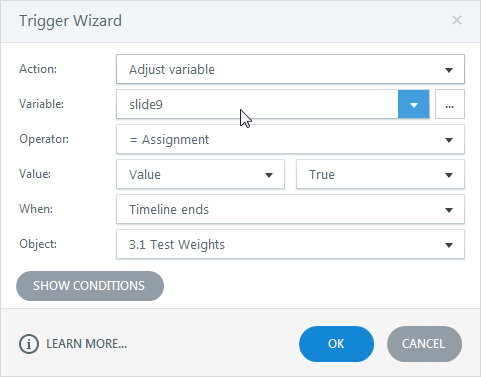
Note: Slide 9 is a variable name that was created with false value initially.
Step 2:
In a normal slide, place the rectangle path above the next button and adjust the timeline as shown, that is, give some space at the end of the timeline, and add the trigger shown below to the rectangle patch.

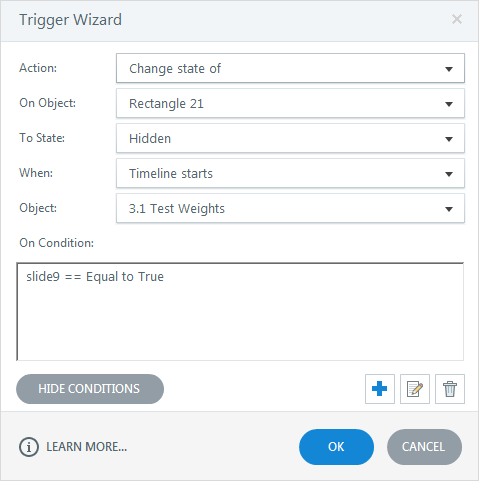
Note: Object rectangle21 is a rectangle patch with 100% transparency.
Step 3:
Add the following trigger to the next button
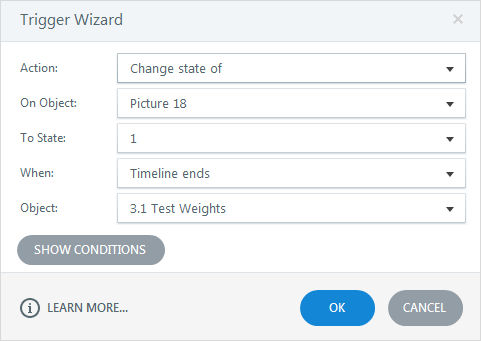
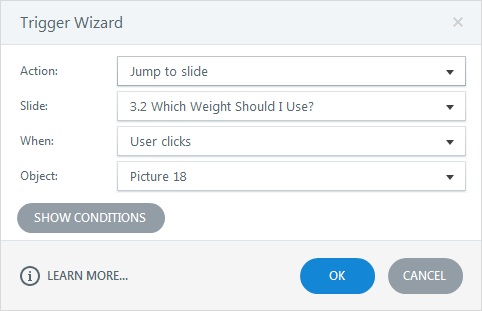
Note: Object Picture18 is the next button.
Following these simple steps, we can customize the next button. Until the slide audio completes, the next button is not clickable but after the audio plays fully, it turns into another color, which is an indication to click on it. And when the learner revisits the same slide, the next button will be in the restriction-free mode.
I hope these steps will help you in your course for better development of customizing the GUI next button with restrictions.
Please try this and give your valuable feedback.


