Articulate Storyline: Adding Custom Progress Bars in Online Courses

Progress bars in e-learning courses are used to show the learner how much of the course he has completed.. Articulate Storyline, by default, doesn’t have an option to add progress bars. However, we have progress bars for individual slides. We can add a progress bar for an entire course in Articulate Storyline either by placing objects within the GUI (which consumes more time) or developing a HTML progress bar and inserting it as a Web Object into the course.
Given below are the steps to add a customized progress bar in quick time to your online courses.
Step 1:
Develop a HTML page with <Progress> tag and format it as you want. Refer the screenshot below with 30% progress.
![]()
Note: Make sure to save the HTML file as index.html.
Remember that we can reuse the same file throughout the course by just modifying a number in the code.
Step 2:
Now, in the Insert tab of Storyline, select the Web Object option to insert a HTML page into Storyline.

Note: If you want to insert the progress bar for all slides, then you must create multiple folders and place each HTML file with different ‘progress’ values in a separate folder. This is important because a WebObject inserts index.html file directly into the course from the path given. We can’t place multiple files with name index.html in same folder. Hence save all HTML files with the same name but in different folders. The screenshot below gives you a good idea.

Step 3:
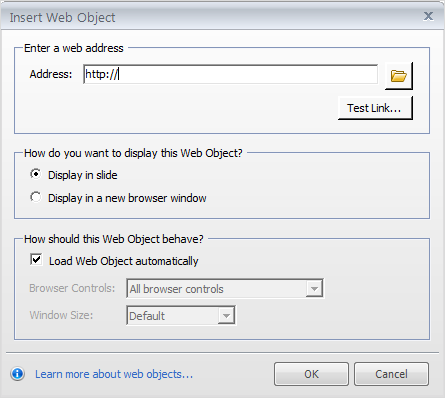
In the window opened, paste the location of the HTML file, or browse for its location by clicking the folder icon as shown below.

Step 4:
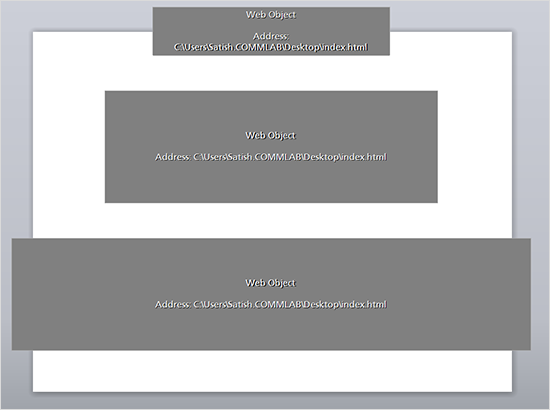
Adjust the size and position of the Web Object on the screen. You can even place a portion of the Web Object off the stage. However, the output remains the same. Shown below are the references.

Step 5:
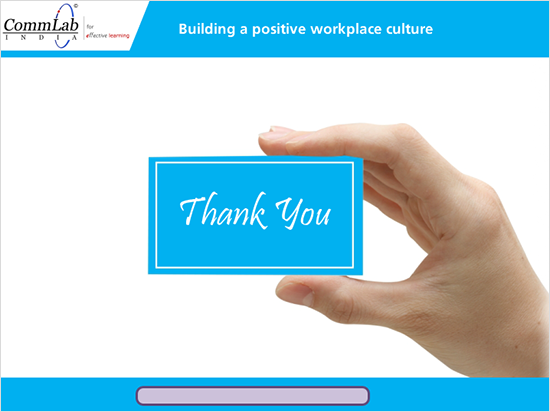
After inserting Web Objects throughout the course, publish the course and check the output.

In this way, we can add customized progress bars to online courses. The main advantage of using Web Objects is that we can customize the progress bar to a great extent with simple modifications to the code.
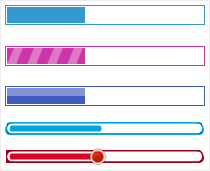
You can even use images to make the course visually appealing. Refer the screenshots below.

However, these progress bars are just Read-Only (learners cannot move or drag) and can be used to enhance the look and feel of online courses.
Hope this helps you. Please do share your views on this post.


![Creating Online Compliance Training: Tips & Best Practices [Infographics]](https://blog.commlabindia.com/hubfs/Imported_Blog_Media/tips-for-impactful-compliance-communication1.jpg)

