Adding Resources to Your Articulate Storyline Project
This blog delves with steps to add resources for eLearning course using articulate storyline.

Job aids in an eLearning course in the form of checklists, worksheets or flowcharts support your learners before, during, and after the training. In Articulate Storyline you have the Resource tab, which allows you attach files, links to websites, or a combination of both.
These resources can be accessed by learners from which ever point they are in the course. In this blog, I will share with you steps to add resources to your eLearning course.
Resource Feature in Storyline
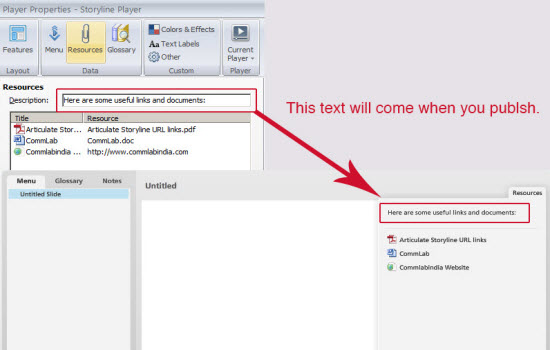
For the Resources tab to show up in courses, click on the Home tab and then click on the Player Tabs.

After clicking the player, a window appears where you can see the Resources button

After you click the resource button, you are asked to give the description for the description field, which your learners will see at the top of the list of resources.

Adding resources to the player
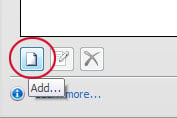
1. Click the Add button (you can see in the image below) located at the bottom of Resources window.

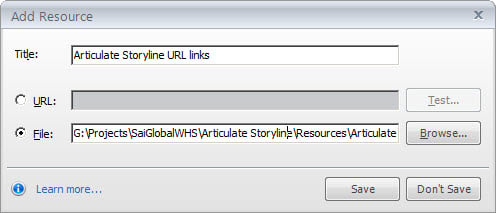
2. After the Add Resource window gets displayed on the screen, give a title for the added resources. This is the same title learners will see in the eLearning course when they browse the list of resources.

3. Next select either URL link address or File, depending on the kind of resource you’re adding. Then do the following steps:
- If we choose URL, we have to enter the web address link in the field provided in the Add Resource window. Then we can also check whether the link is working or not by clicking the option beside the URL text field area. After publishing, the url links will work online.
- If we choose any file, click Browse and selectthefile that you want to attach. And click Save. When published, the Storyline course will include all the files along with course content.These files will be included in the story content folder of the published output.
After adding all the resources, click Save.
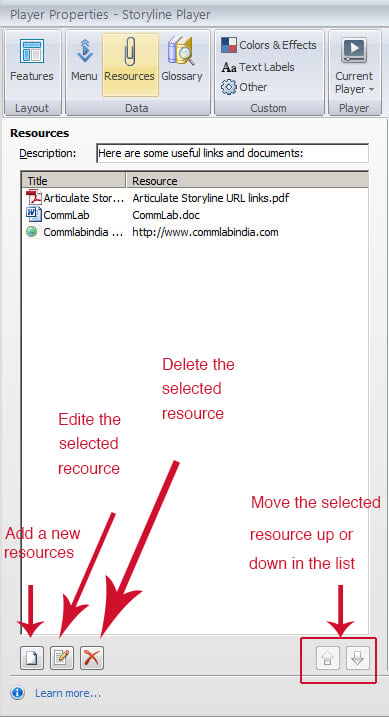
Till now we have seen how to add resources to the Storyline course; if you want to edit, delete or arrange the resources, the buttons at the bottom of the Resources window allow us to add new resources and to edit, rearrange files, or delete the ones you’ve already added.

This is how you can add resources to your Storyline project. In my next blog, I will be back with some tips that you can consider while working on a Storyline project.


