10 Plus Ways to Import Audio in Adobe Captivate 9

Adobe Captivate is one of the major authoring tools used by learning designers to develop interactive online learning courses. It has a wide variety of features that can be used to strengthen the instructional effectiveness of the course. Here, I would like to share 14 ways of inserting audio in an eLearning course using Captivate.
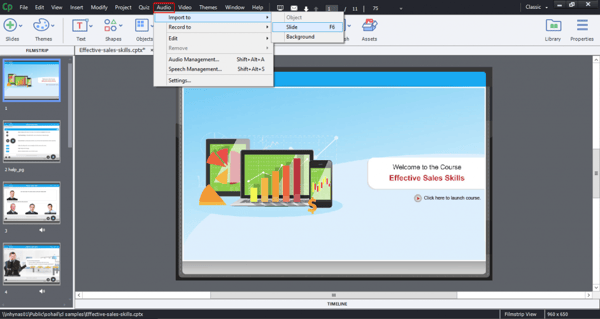
1. From the Menu:
Select the slide in which you want to embed the audio file.
Go to the Audio tab in the Menu and select Import to slide.
The Import audio window appears at the top of the screen.
Select the audio from your system and click the Open button.
2. From the Toolbar:
There are two ways to import audio to a slide from the Toolbar – one is through the Media button and the other is through the Record button.
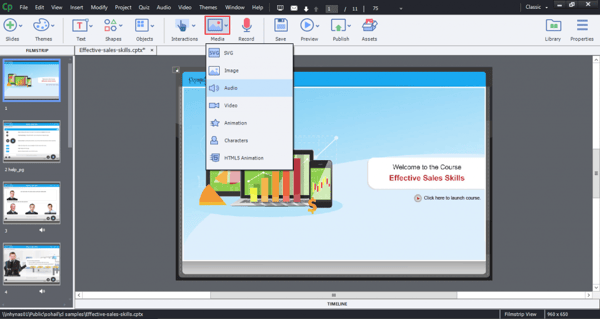
3. Using Media:
Click the Media tab in the toolbar.
Select Audio from the list.
The Import audio window appears where you can select the audio file from your drive.
4. Record:
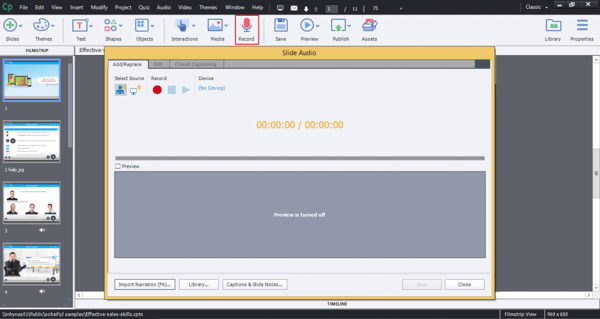
Click the Record button.
On clicking on the Record button, the audio window of the slide appears and you can also see the Import Narration button.
Click the Import Narration button and add audio of your choice to the slide.
5. From the Library:
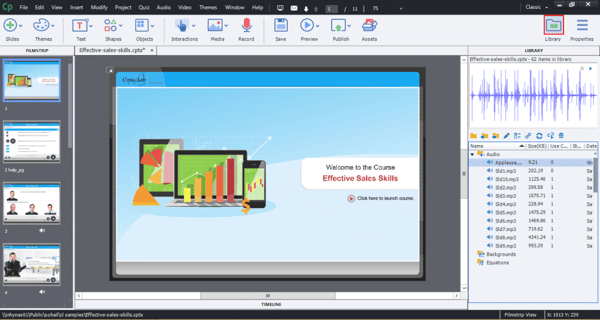
Click the Library panel where you can see the list of audios which were added to the course earlier.
Select any audio and drag onto the workspace area of the slide.
Alternately, you can insert audios through the Library by clicking the Import folder icon. You can then drag the audio onto the screen.
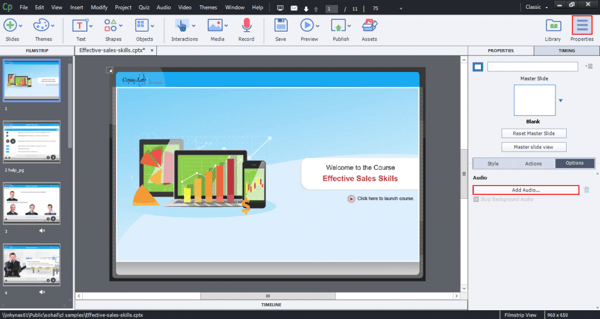
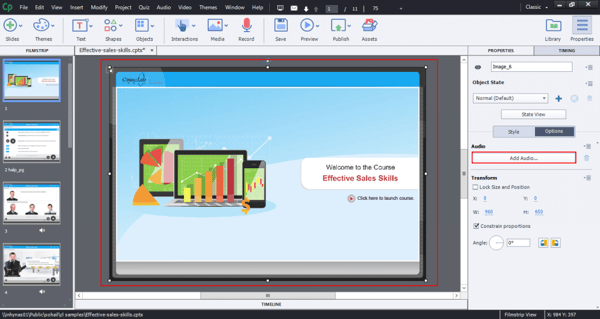
6. From the Properties Panel:
Click the Properties panel.
You can see the Add Audios button in the Option tab.
Click the Add Audios button to add the audio.
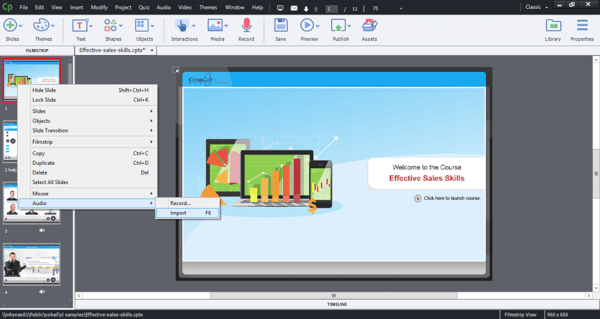
7. From Filmstrip:
Right-click on Filmstrip thumbnails area where you can see Audio at the bottom of the list; when you hover the mouse on Audio, you can see the Import option, from there you can add audio to the slide.
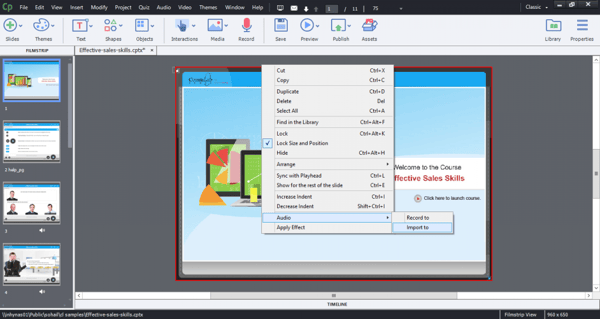
8. From the Workspace Area:
When you right-click on the workspace area, you can see the same options as the Filmstrip. For specific details, refer the screenshot given below.
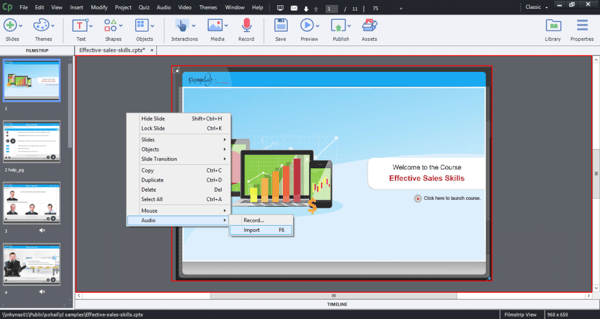
9. From Out of the Workspace Area:
Right-click outside the workspace area where you will see the same options to add audio. See the screenshot given below.
10. From Objects:
If you want to add audio to an object, select the object (text, smart shape or image), go to the Properties panel, and click the Options tab. Click the Add Audio button. The Object Audio window appears on the screen, where you can see the Import button.
11. From the Action Panel:
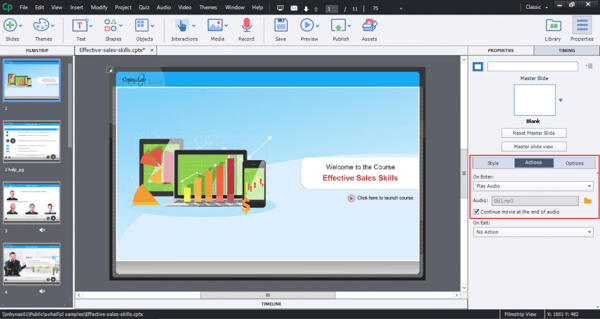
Go to Action tab in the Properties panel.
In the On Enter field, select Play Audio action from the drop down list.
Click the folder icon to browse for the audio.
On clicking the folder icon, the Select Audio From Library window will appear.
Here, you can import or select the audio from the existing library.
12. From the Timeline:
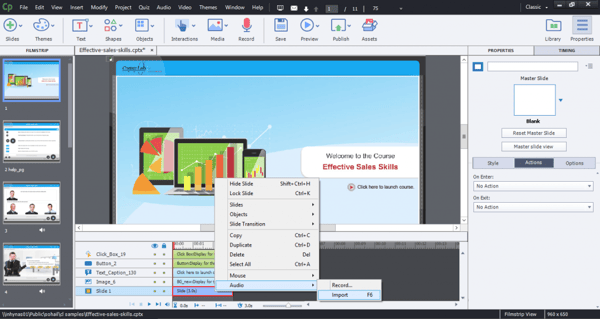
Right-click on the timeline of the slide and you can see the same options like Record and Import.
13. From Layers:
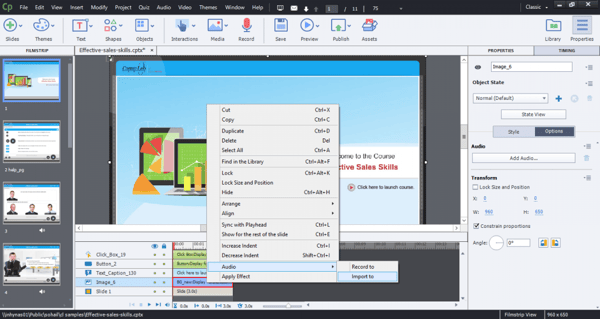
Right-click on any object layer where you can see the Import to option under the Audio option.
14. Using the Shortcut key:
Finally, you can also insert audio using the shortcut key F6.
![]()
These are the various ways to import audio into your online courses using Adobe Captivate. There is no other rapid authoring tool that facilitates adding audio in so many ways as Captivate.
I hope this blog helps you get started with importing audio in easy ways based on your convenience.


![Top 4 Steps to Gain Stakeholder Buy-in for Online Learning [Infographic]](https://blog.commlabindia.com/hubfs/Imported_Blog_Media/Instructional-Designers-Efficiently-Leverage-the-Skills-Of-SMEs.jpg)