How to Integrate JavaScript with Lectora Inspire

As developers, we always look to improve our technical skills and integrate these skills with authoring tools such as Lectora and Articulate Storyline to enhance the design or change the behavior of objects the tool can’t do on its own.
Recently, one of our clients asked us to display the bullet points in sequence. To fulfill this requirement, we inserted a simple JavaScript code in Lectora Inspire. Here are the steps.
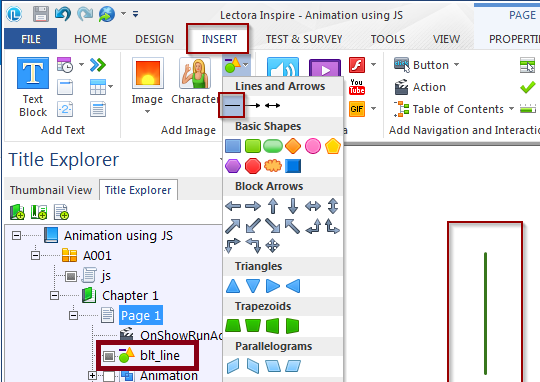
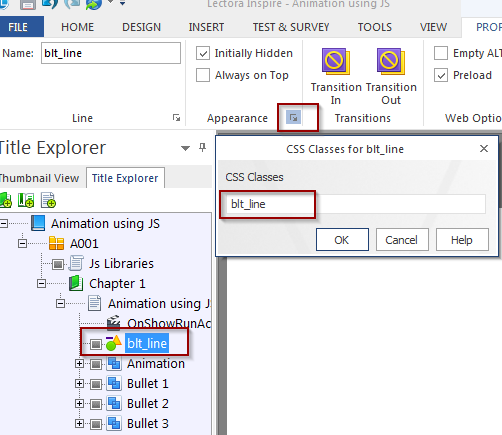
Step 1: First off, draw a line using the “Shape” option under the “INSERT” tab in the toolbar. Name the line “blt_line” under “Appearance”.
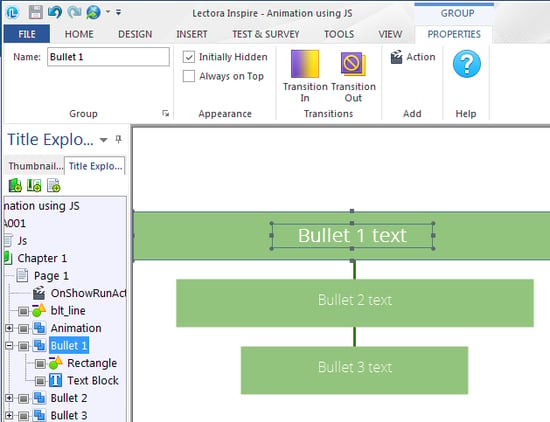
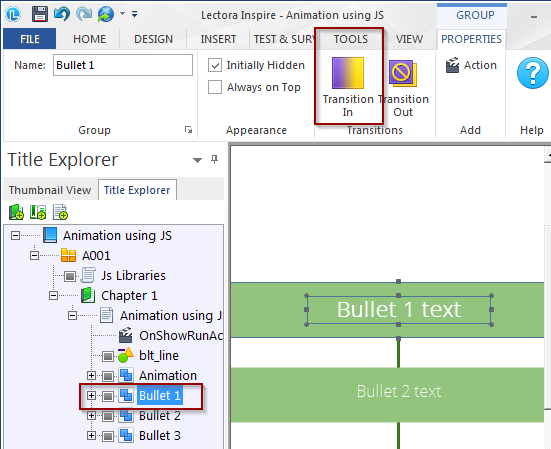
Step 2: Arrange the bullet points in sequence and give the “Fade” effect to all points. You will find this effect in the “Transition In” drop down list under the “TOOLS” tab. Please refer the images below.
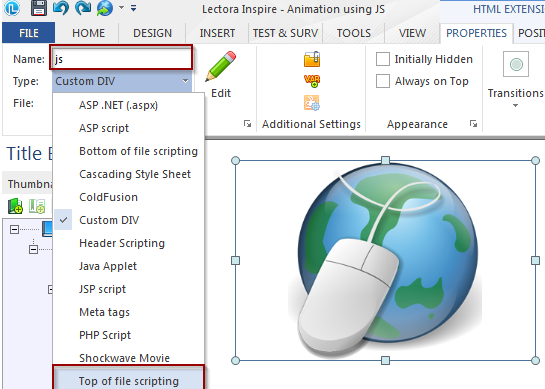
Step 3: Now you need to create an HTML Extension which is in the “Add Web Object” group under the “INSERT” tab. Once it is created, change its properties such as Name and Type (select Top of file scripting) as shown in the image below.

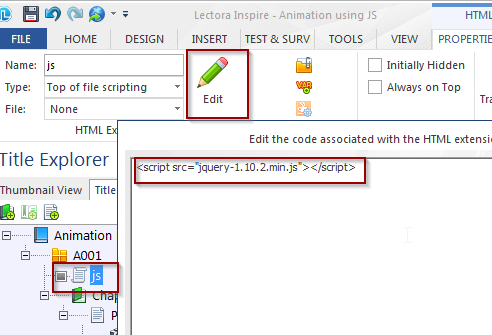
Step 4: Add the following line of JS code “<script src=”jquery-1.10.2.min.js”></script>” in the HTML Extension by clicking “Edit”.
Step 5: Here you need to create a series of actions as explained below.
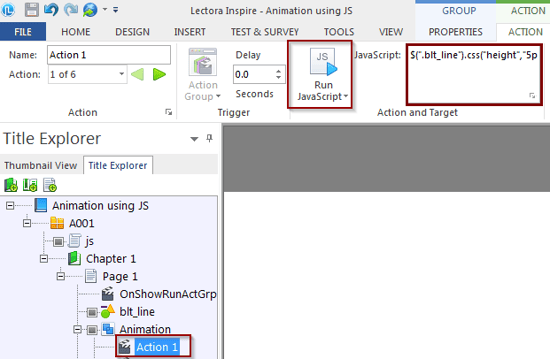
- Create an action called “Run JavaScript” and write a single line of JS code “$(“.blt_line”).css(“height”,”5px”);” under “Target”. In this code, you are specifying the line name (blt_line). See the image below for reference.
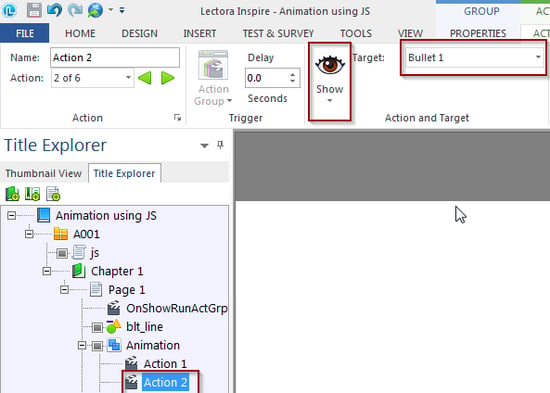
- Now show “Bullet 1” by creating an action.
- Create an action to “Show” the line with “1.0 Seconds” delay.
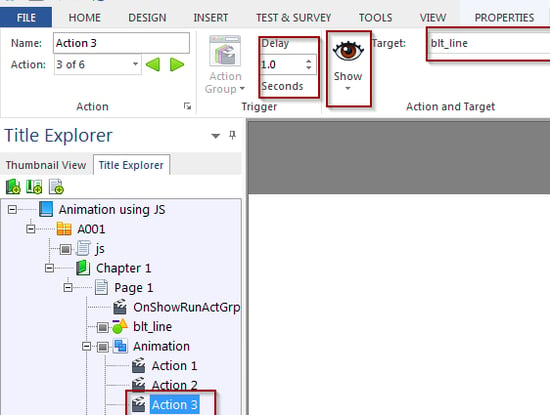
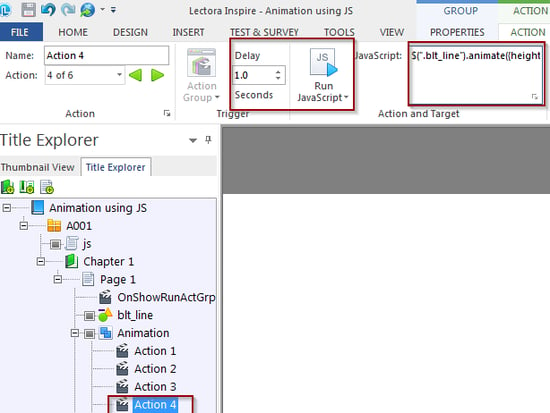
- Create another “Run JavaScript” action and write a single line of JS code “$(“.blt_line”).animate({height: “120px”}, 3000, “linear”);” under “Target”.
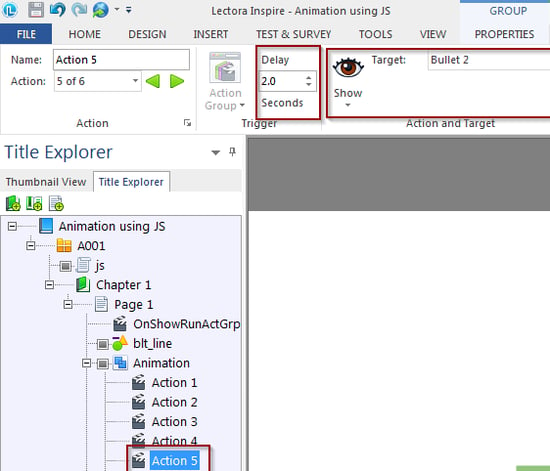
- Create an action to “Show” bullet point 2 with “2.0 Seconds” delay.
- Finally, create an action to “Show” bullet point 3 with “3.0 Seconds” delay.
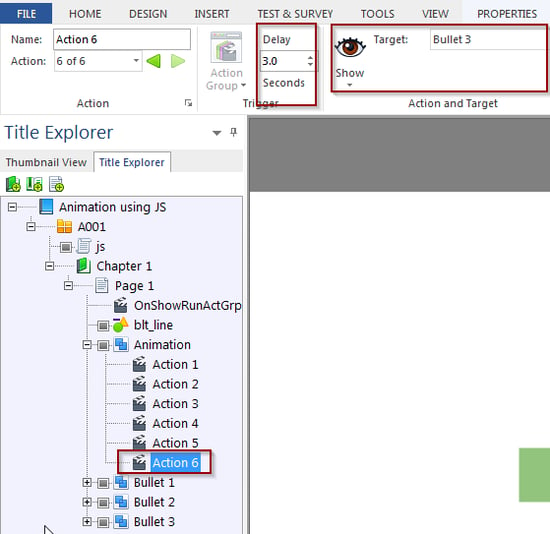
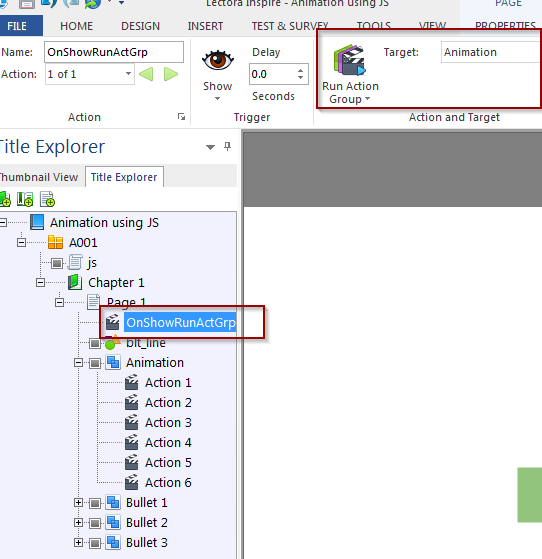
Step 6: Once all the actions have been created, group them as a single object and name it “Animation”. Finally, set an action on top of the page as shown below.
That’s it. This is a small example of how to integrate JavaScript with Lectora. You can customize objects/page behavior using JS in Lectora. Hope you have learned something new out of my blog. Do share your views.


![Why Consider Lectora Inspire 17 for Responsive Learning [Infographic]](https://blog.commlabindia.com/hubfs/Imported_Blog_Media/articulate-storyline-boon-for-stakeholders-1.jpg)
![5 Benefits of Using Lectora Online Tool [Infographic]](https://blog.commlabindia.com/hubfs/Imported_Blog_Media/5-benefits-of-lectora-online-tool-infographic1.jpg)