Articulate Storyline 2: Adding Custom Bullets

How many of you are comfortable with the following default bullet types in Articulate Storyline?
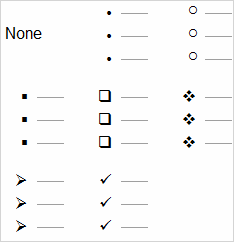
Do you know that we can easily use custom symbols as bullets in our e-learning courses using Articulate Storyline?
Well, you need to understand a new feature of Articulate Storyline 2, using which we can add the required symbol as a bullet. It’s a pretty easy process, and I would like to list the steps of the process in this post. Here they are.
Step 1:
Select the list of points to which you want to add bullets.

Step 2:
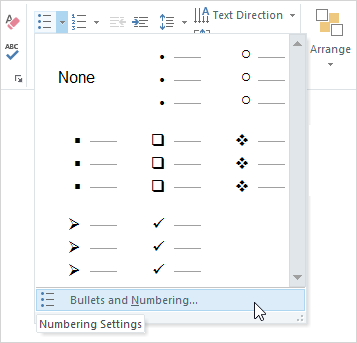
In the Home tab, click the Bullets drop down menu.

Step 3:
A list of the default bullet types is displayed. Select a type if it matches your requirement. Otherwise, click the Bullets and Numbering option at the bottom.
Step 4:
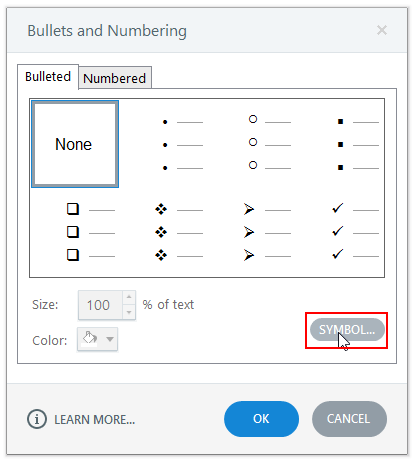
Click the Symbol button to view all available symbols.
Step 5:
A window with all the available symbols will be opened. Select one of these symbols.
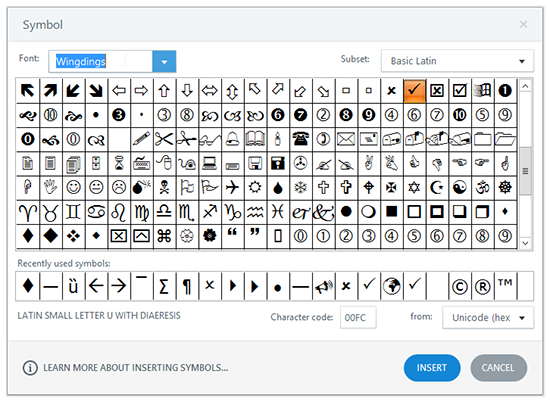
Note: Change the Font and Subset on the top of the window to view more symbols.
Step 6:
Click Insert after selecting a symbol.
Step 7:
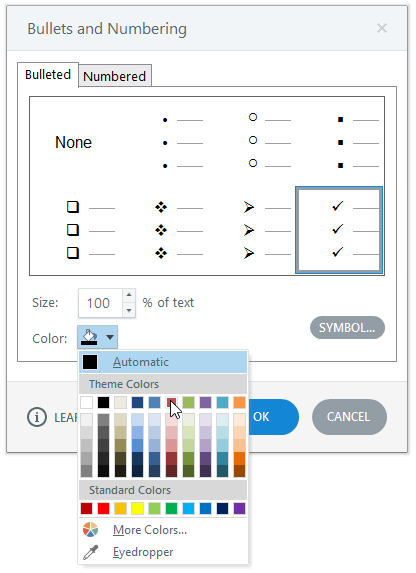
This brings you back to Bullets and Numbering window and now you can change the Color and Size of the symbol in order to match it with the GUI.
Now, check the output.

These are the steps to add custom symbols as bullets to your text.
Hope this post is useful. Do share your views.


![4 Challenges of End-To-End E-learning Development [Infographic]](https://blog.commlabindia.com/hubfs/Imported_Blog_Media/end-to-end-elearning-development-challenges-infographic1.jpg)
![Popular Ways to Develop Multi-device Compatible E-learning [Infographic]](https://blog.commlabindia.com/hubfs/Imported_Blog_Media/cloud-based-authoring-tools-infographic.jpg)
