7 Simple Steps to Display Question Feedback in Lectora Using “Variables”
This blog describes the procedure to display question feedback using variables in Lectora.

Do you want to create an engaging eLearning course with lots of interactivities? Of course you do this with Lectora. As an eLearning developer, I think it is very important to know how important it is to test the learner’s knowledge as they go through the course. Well this can be possible with “Variables”.
I found “Variables” are a hot topic/feature in Lectora. Even for beginners, it is very easy to learn how to use them and you don’t need to be a programmer to create an engaging e-Learning course.
Before we begin, here is a little more information about “Variables”.
Variables are a way to remember information and they work as a storage device. Variables can only hold one piece of data at a time. In Lectora, we have an option of creating a variable and use it as “Text and Numeric” type by assigning its “initial value” either as text or numeric. You can also retain a variable value wherever you want in the course.
In this post, I would like to share “How to display a question feedback using variables” in Lectora.
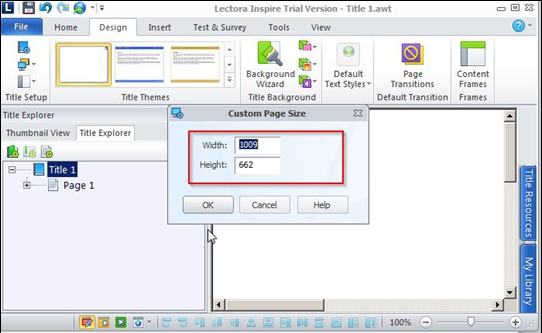
1. Start a new title in Lectora with your own dimensions.
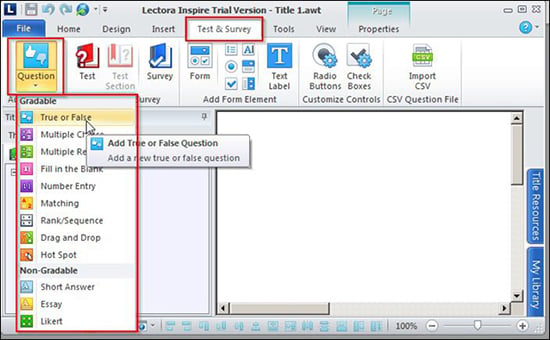
2. To add a question, go to “Test & Survey” tab and select any question type from the “Add a new question” option as shown in image below.
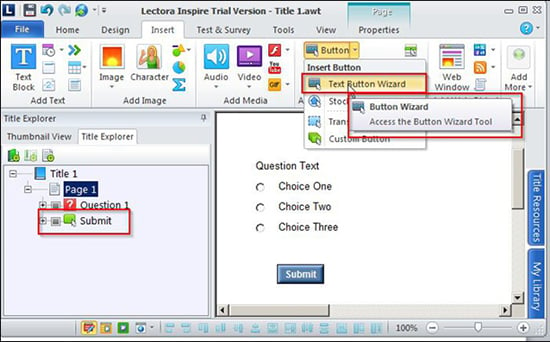
3. Now add a button to display the feedback. See the image below.
4. To add an “Action” to a button, go to “Properties” tab and then click on “Add Action” option. See the image below.
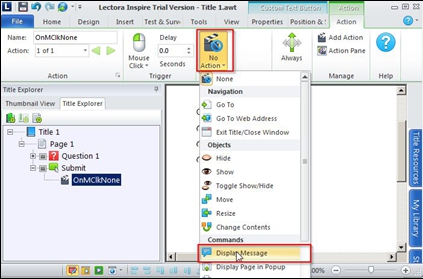
5. Double click on the action to display an “Alert” message when the learner clicks on a button. Here are the fields that you need to set to display a message.
Action: Display Message
Message: Display your own message in this field
Always (Click to edit action conditions): Select “question” variable (this will get
generate automatically whenever you create a question) under Variable field, select “Is Empty” under Relationship field.
See the images below for your reference.
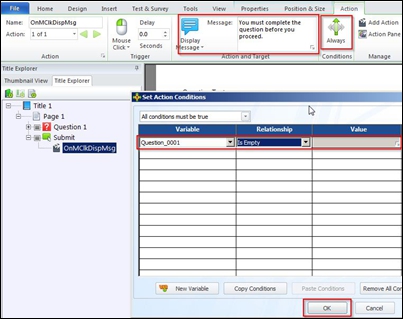
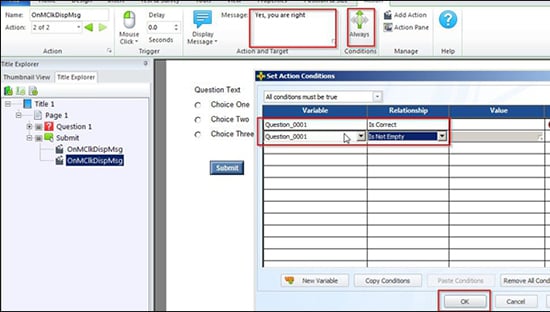
6. Take a “new action” to display correct feedback when the learner selects a correct option. Set the properties as shown below.
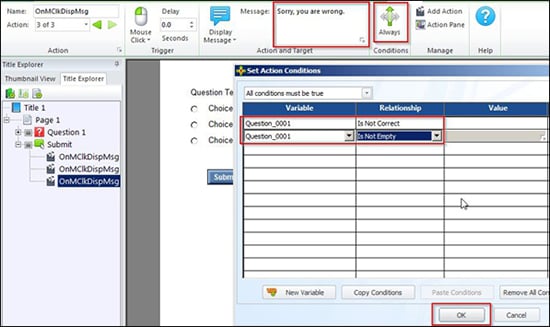
7. Now take a “new action” to display incorrect feedback when the learner selects an incorrect option. Set the properties as shown below.
These 7 simple steps help you to display your own message for any question type in Lectora using a powerful feature called “Variables”.
I hope you have learnt something new out of my blog, please do share your comments.


