Customizing Progress Bar In Articulate Storyline
This blog post shares how to customize progress bar in articulate storyline.
Progress bar in an eLearning course is a component of GUI that lets the learners knows about their progress in the course visually. Do you think such progress bar in Articulate Storyline can be customized? Can it be modified according our requirement? Yes, we can.
We have created a custom progress bar in Articulate Storyline for one of our clients.
Here I would like to share how we have done in the following steps.
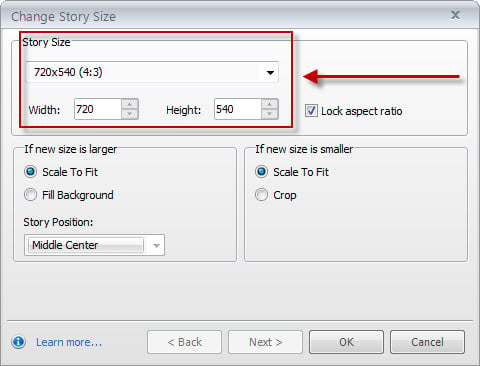
1. Start a new project in Storyline, set story size as per your requirement.
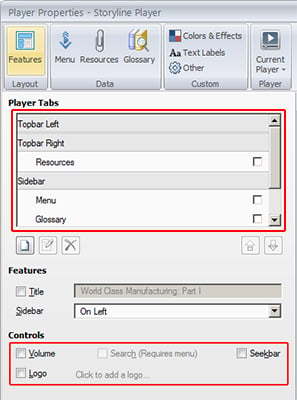
2. Go to “Player properties” and deselect the highlighted options as shown in image below.
3. Using the shapes tool, draw a rectangle at the bottom of your slide and also draw another rectangle (white colored) as background to your progress bar.

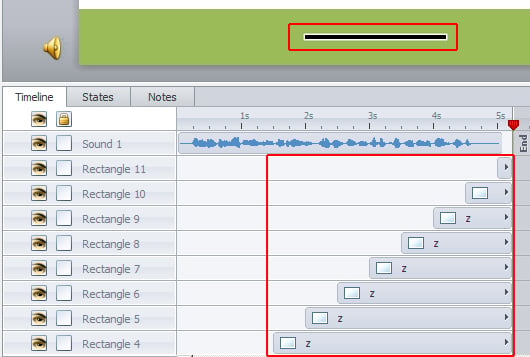
4. Now draw a smaller rectangle on the timeline to display the status of the slide as shown below.

5. Now copy the “smaller rectangle” and paste it on timeline and adjust its position as shown below. You can give 2-3 frame gap between each “smaller rectangle”
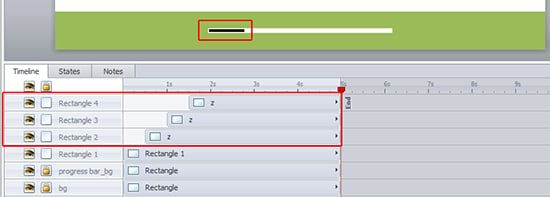
6. You need to copy and paste the “smaller rectangles” based on your audio length. For example if your audio length would be 30 seconds then you need to take the objects until end of the audio.
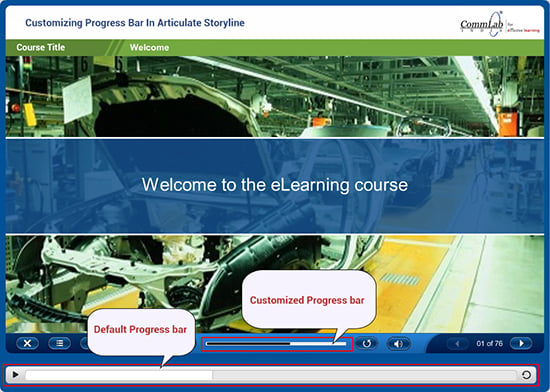
That’s it. It‘s an easy way to customize the progress bar of Articulate storyline. Here is the screenshot which shows the difference between a default and customized progress bar in Storyline.
I hope you have learnt something new out of my blog, please do share your comments.


