7 Easy Steps to Create Watch and Try Simulations in Articulate Storyline
This blog post shares some easy steps to create watch and try simulations in articulate storyline.

We use simulations to teach software applications or operation of a machine or a device in virtual life. It creates a risk-free environment for the user to practice a Software application or to operate a device. In Storyline simulations, we provide an option to the user to Watch, Try and Do, where he or she can practice Software application or operate a device without real-world risk.
When we hear the word Simulation many people think, they are very complex and take a lot of time to develop. In Storyline, Simulations are made very easy, they take less time to develop when compared to other authoring tools. Storyline is a very flexible tool to develop simulations.
But how do you create, watch and try simulations in storyline tool?
Let me take you through the 7 easy steps on creating watch-and-try simulations in storyline.
Step 1:
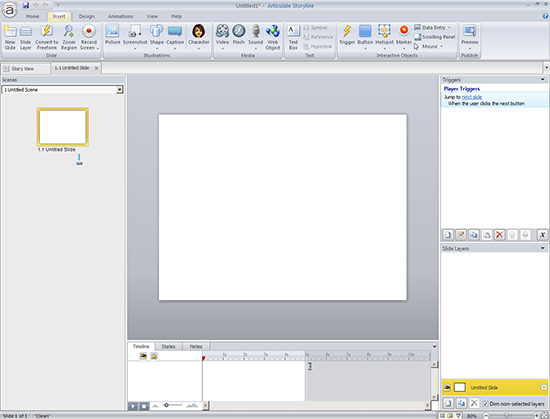
The first step is to click on the Insert tab on the ribbon where you can see the option record screen in the ribbon as highlighted below.
Step 2:
Next, you need to click on the Record Screen icon; when you do so, the recording pane will open. As shown below, you can adjust the pane according to the desired software interface window size.
![]()
Step 3:
Once you have adjusted the pane, click on the record button and start recording the simulation that you want to teach or explain about. After recording click on done or escape and save.
Step 4:
Saving options is easy as Step-by-step slides are selected,
Go to View mode steps then to view mode options, select the Language for captions in English, and select the check boxes. This is done in two steps.
1. Show mouse cursor, 2. Indicate clicks with highlight then click on ok.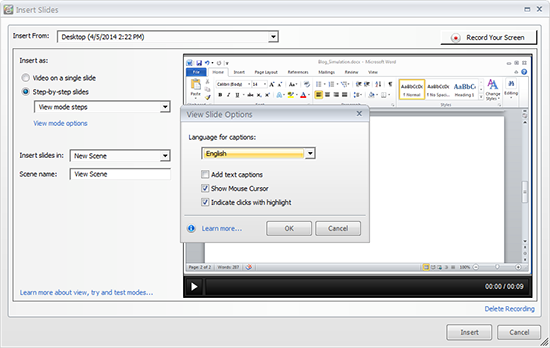
Step 5:
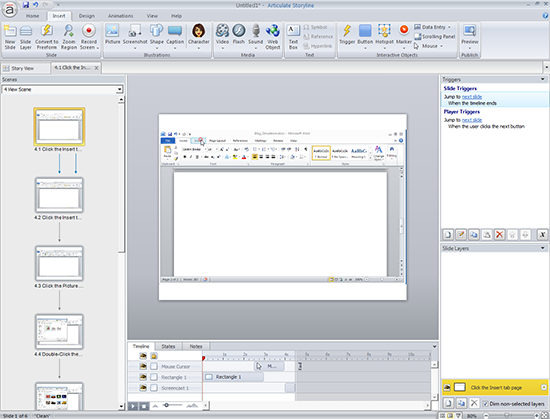
After clicking on ok then click on the insert; when you click on the insert the recorded video is saved step by step in a new scene as shown in the Storyline project and we can call this scene as a watch video as the image given below.
Step 6:
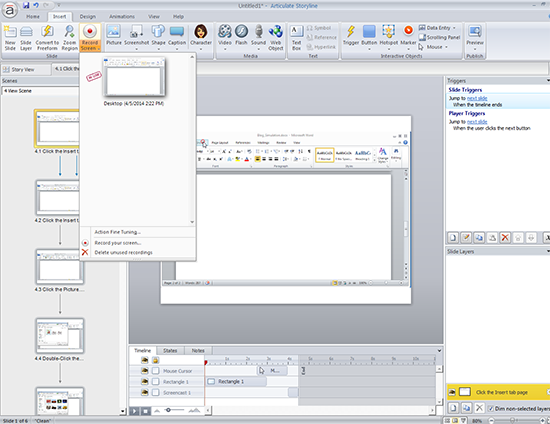
To create the try scene, click on the dropdown menu. In the Record Screen, you can see the video in use as the image shown below. Select that video. Saving options should be as Step-by-step slides should be selected, keep in Try mode steps then go to Try mode options select the Language for captions in English and select the check boxes.
1. Show correct feedback,
2. Show hand cursor when hovering hotspots,
3. Show hint captions Always. Then click on ok.
Step 7:
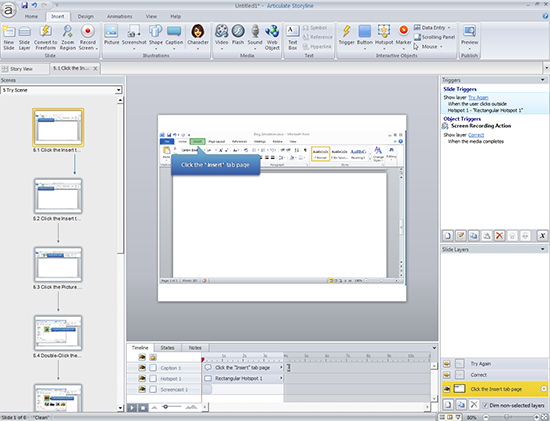
After clicking on ok, then click on the insert; when you click on the insert, the Try scene is saved in a new scene in a step-by-step format as shown in the Storyline project Image given below.
These are the steps required to create Watch, Try, Do simulations in Articulate Storyline. This is quite an easy process; give it a try and do share your experience in creating a simulation.


