How Create Interactive Sliders in Articulate Storyline 2
This blog post shares how to create an engaging interactivity using slider control in Articulate Storyline 2.

Articulate Storyline 2 is an advanced version of Storyline 1. It has resolved many issues of Storyline 1. It has many features that help in developing effective e-learning courses based on different customization requirements. Slider is one of the new interactions added in this latest version of the tool. In this blog I would like to share how create Slider interactivity in Storyline.
Step 1:
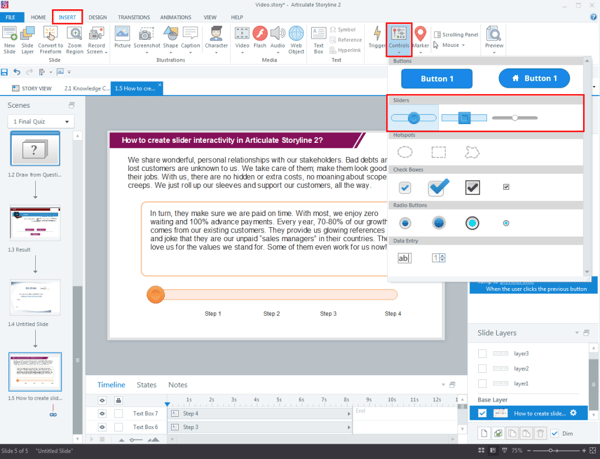
First, we have to insert the Slider in the slide. Click the Insert tab from the Menu bar and then click on the Controls dropdown arrow. The different types of controls will be displayed. We can select the type of Slider we need as shown in the screenshot below.
Step 2:
Select the slider and then click the Design tab from the Menu bar.

As shown in the above screen shot, we have to specify a number in the End dropdown box. Here I have assigned 4, because I have 4 slide layers. Next, select the While slider is dragged option in the Update box.
Note: In the End field, specify the same number as the number of slide layers.
Step 3:
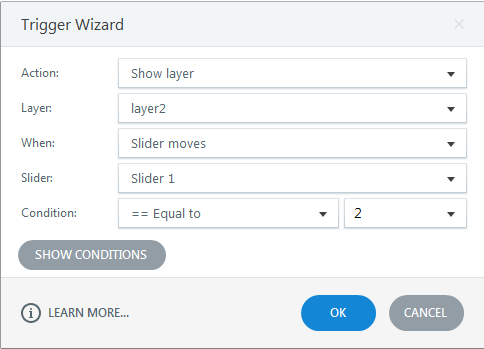
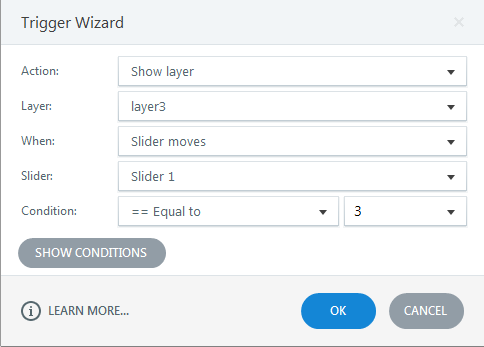
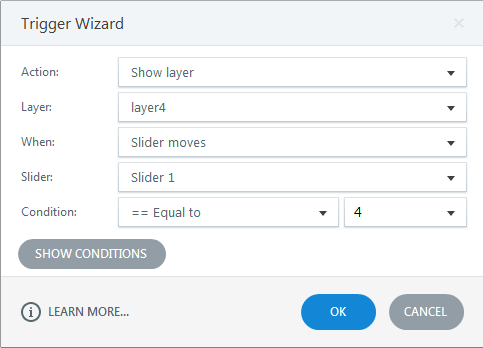
Create slide layers and provide Triggers to the slider, as shown in the screenshots below.
Trigger1:
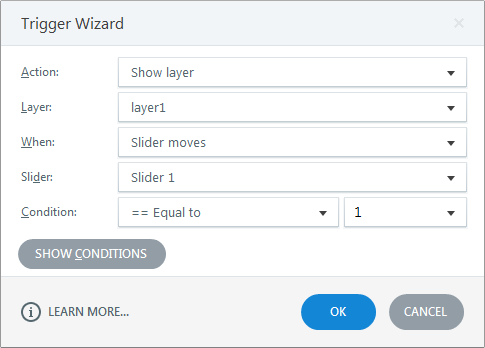
Apply the same trigger to the other slide layers also.
Trigger 2:
Trigger 3:
Trigger 4:
Step 4:
Preview the course check the output.
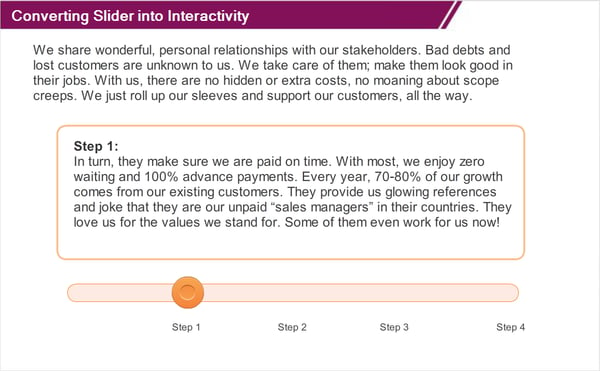
In this way we can create Slide Interactivity in Articulate Storyline 2.
Hope this blog helps you. Please do share your thoughts.


