Videos make the eLearning courses more appealing. Let us learn how to add youtube videos in eLearning courses using adobe captivate.

Adobe Captivate 7 helps you develop interesting and engaging eLearning courses by adding YouTube videos. Videos enhance the message and make the eLearning course more appealing. Developers can create engaging eLearning courses by inserting Videos in the course.
In this blog, I’m going to show how to add videos in eLearning Courses using Captivate.
Here are three easy steps to add a YouTube Video file.
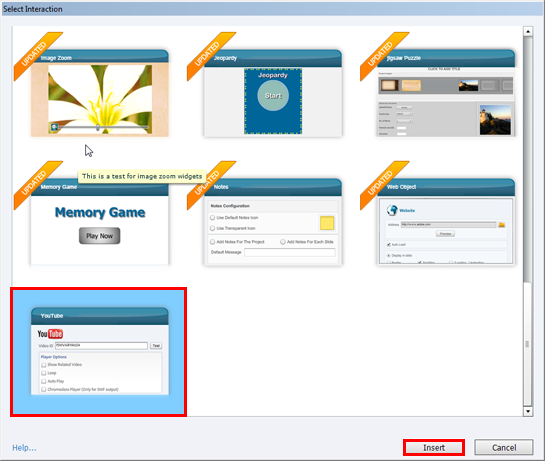
1. Insert Interaction:
Go to the Insert menu and select Interactions from the drop down list.

Select YouTube Interactivity and click on the Insert button to insert the widget in the slide. Shown below is a screenshot for your reference.
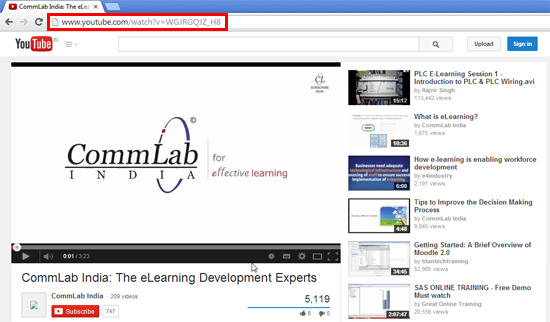
Copy the URL of the YouTube video that you want to embed in your ELearning course by browsing for it.
2. Assign URL:
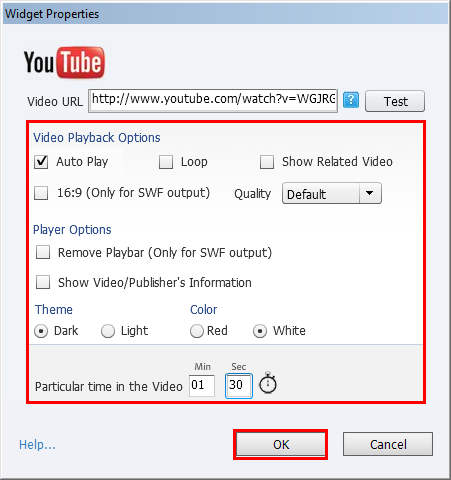
Paste the selected URL path in the Video URL area or field which is highlighted in the following screenshot.
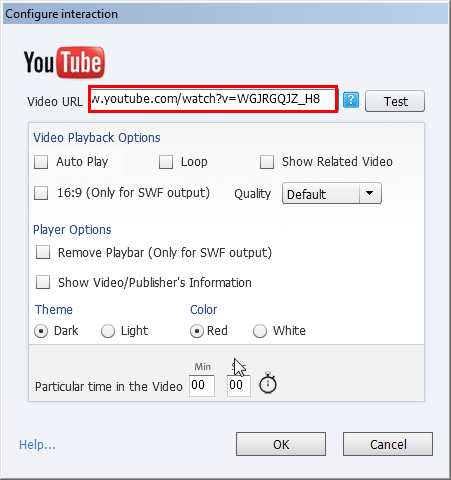
Note: Here you can see the Test button which help test whether the assigned path is correct or not.
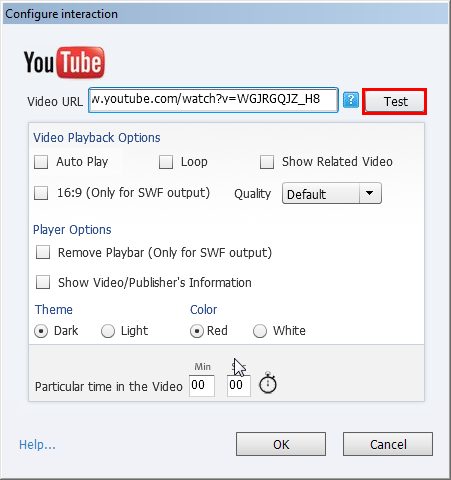
3. Configure the YouTube interaction:
Select the best option which matches your course
- Auto play: This option video will play the video automatically when we enter the slide.
- Loop: This option will replay the video from the starting frame once it reaches the end frame.
- Show related videos: This option will show interconnected or linked videos.
- 16:9: It is the aspect ratio with a width of 16 and height of 9.
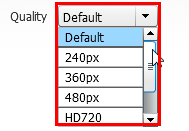
- Quality: We can select the desired resolution for the selected video.
- Remove Play bar navigation of the current video which allows you to play and stop the video.
- Theme: You can change the Theme to Dark or Light.
- Color: You can change the color to Red or white.
- Particular time in the Video: This is an amazing option which will help select the timing from where the video should play such as the particular minute or second. If you are not interested in selecting the time, you can ignore this option.
Just mention the minuteand second from where the video should start:

This will allow you to start the video from 1 min 30sec
Click ok
See the Output by clicking F12.
Shown below is the example which I inserted in our course.
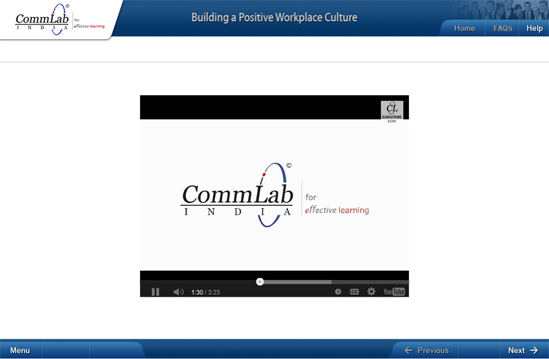
By inserting YouTube Video, video will stream live within the course and play easily in the output without any interruptions in the course.
Hope this blog helped you in understanding how to insert YouTube videos with the help of the interactivity option in Captivate 7. If you have any other ideas please do share.