Adding videos to your course is easy with Articulate Storyline. Let us learn some ways to add videos in storyline.

Adding videos to your course is easy with Articulate Storyline. We can add video files to the course in three different ways.
- Add videos that are saved on your hard disc,
- Add videos from different websites, and
- Add videos from your own webcam.
Let’s see how to do it.

Articulate Storyline supports many video file formats. It originally supports MP4, SWF, and FLV. All the other video formats are converted to MP4 after publishing the course. Always remember to import a good quality video so that while publishing the course, when it is compressed to a smaller file size, it does not lose its quality much.
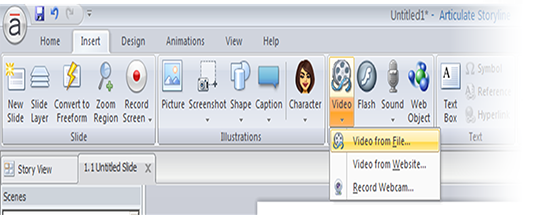
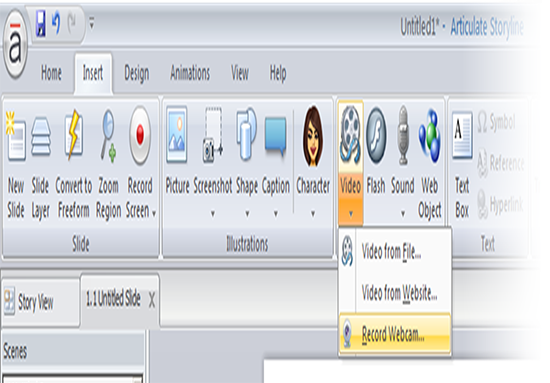
Steps to insert a video from file:
- Click on Insert tab.
- Click on the drop-down arrow of Video.
- Select Video from File.
- Browse through the files to, select a video.
- Click Open.
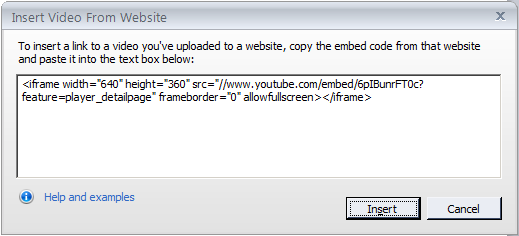
Steps to insert a video from website:
- Click on Insert tab.
- Click on the drop-down arrow of Video.
- Select Video from Website.
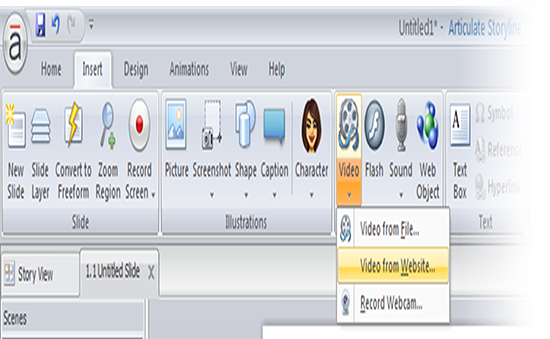
- Insert Video from Website wizard appears.
- Paste the embedded code of the video from the website in the wizard.
- Click Insert.
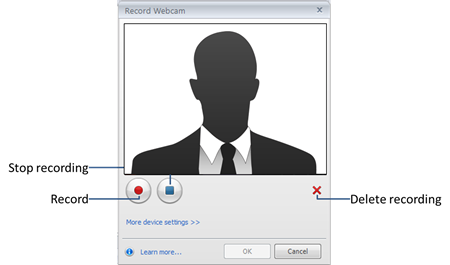
Steps to insert a video from webcam:
- Click on Insert tab.
- Click on the drop-down arrow of Video.
- Select Record Webcam.
- Record Webcam wizard appears.
- Select the Red record button to start recording.
- Select the Blue stop button to stop recording.
- If you want to check the video before inserting it into the course, you can play it. And if you are unhappy with the recording, just click on the Red Cross button to delete the recording.
As simple as that. Now just start importing the videos you want, to make your course more interesting and engaging.